> ## Documentation Index
> Fetch the complete documentation index at: https://docs.alex.com/llms.txt
> Use this file to discover all available pages before exploring further.
# Domains
> How to Connect your own Domain with Alex
This guide will walk you through the process of setting up a custom domain for your Alex account.
### Uses
The main reason to connect your own domain with Alex is to help us send emails to your candidates on your behalf. This way, the emails will appear to come from your domain, rather than from Alex. This helps to maintain your brand identity and build trust with your candidates.
The emails that we send on your behalf include:
- Interview invitations
- Interview reminders
- Interview completion notifications
- Handoff invitations
### Setting Up a Custom Domain
To set up a custom domain for your Alex account, follow these steps:
1. Log into your Alex dashboard.
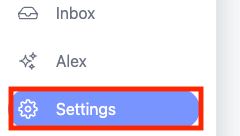
2. Go to the Settings page.
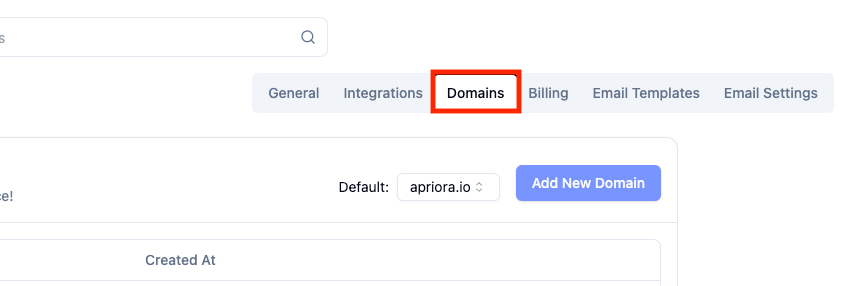
 3. Click on the `Domains` tab.
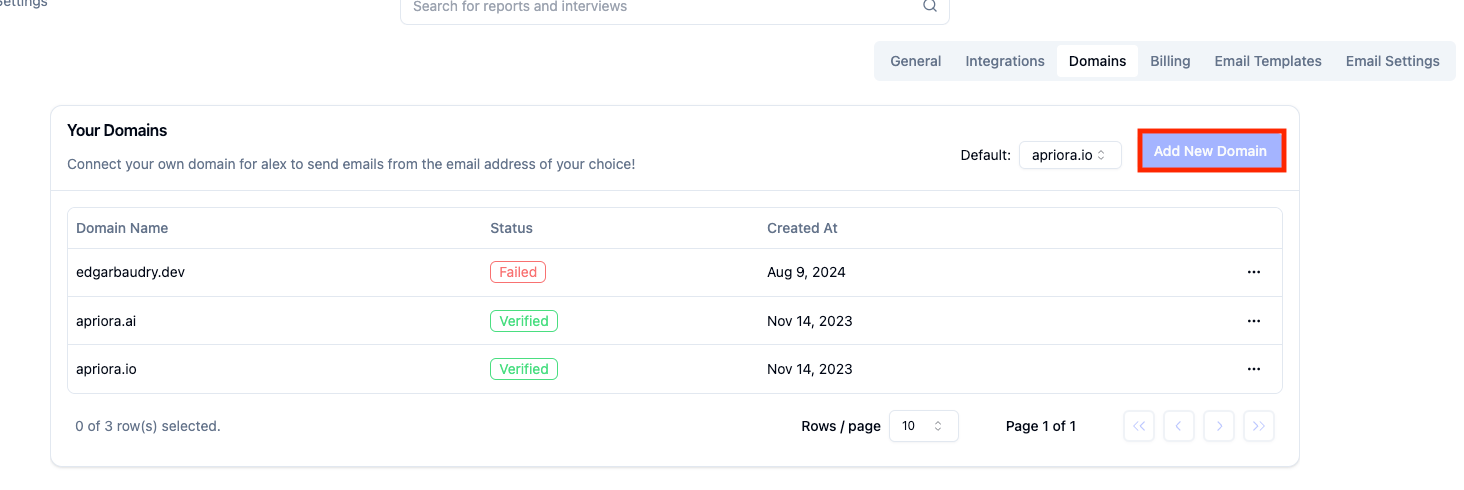
 4. Click `Add New Domain`.
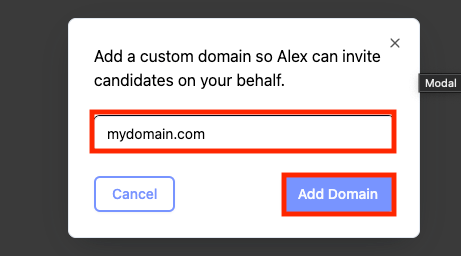
 5. Enter your domain name in the `Domain Name` field, and click `Save`.
 6. You will be taken to that domain's page.
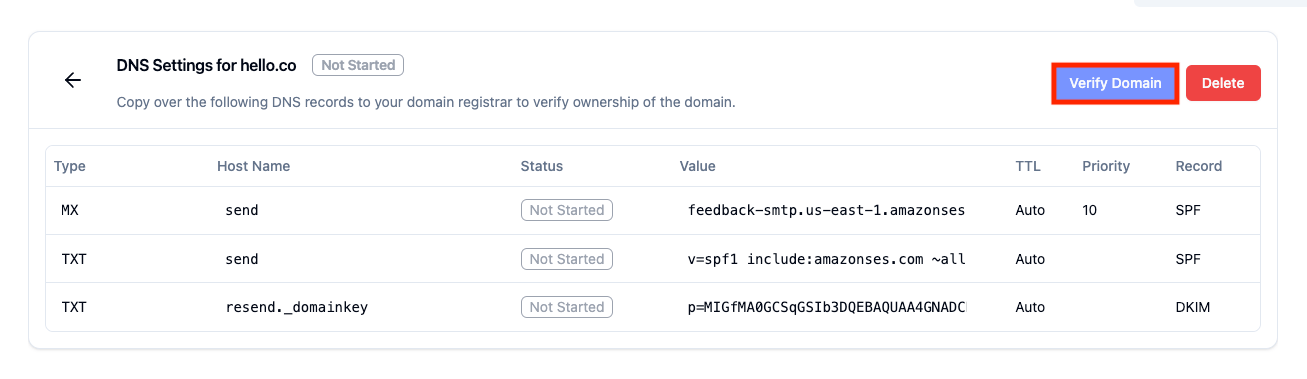
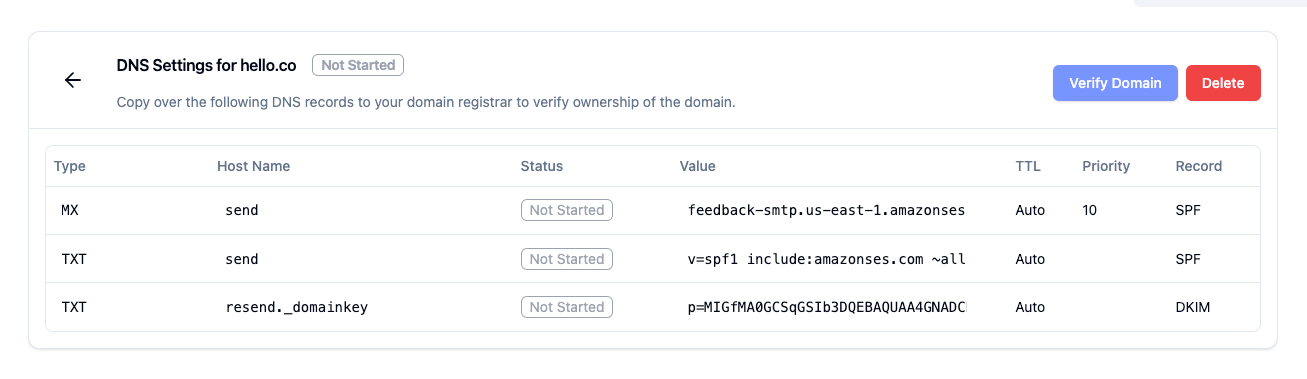 7. Copy over the `TXT` and `MX` records to your domain's DNS settings page.
{" "}
This step requires you to have access to your domain's DNS settings. If you
are not sure how to access these settings, contact your company's IT
department for assistance.
Here is an example of a DNS settings page, with which fields to fill in:
7. Copy over the `TXT` and `MX` records to your domain's DNS settings page.
{" "}
This step requires you to have access to your domain's DNS settings. If you
are not sure how to access these settings, contact your company's IT
department for assistance.
Here is an example of a DNS settings page, with which fields to fill in:
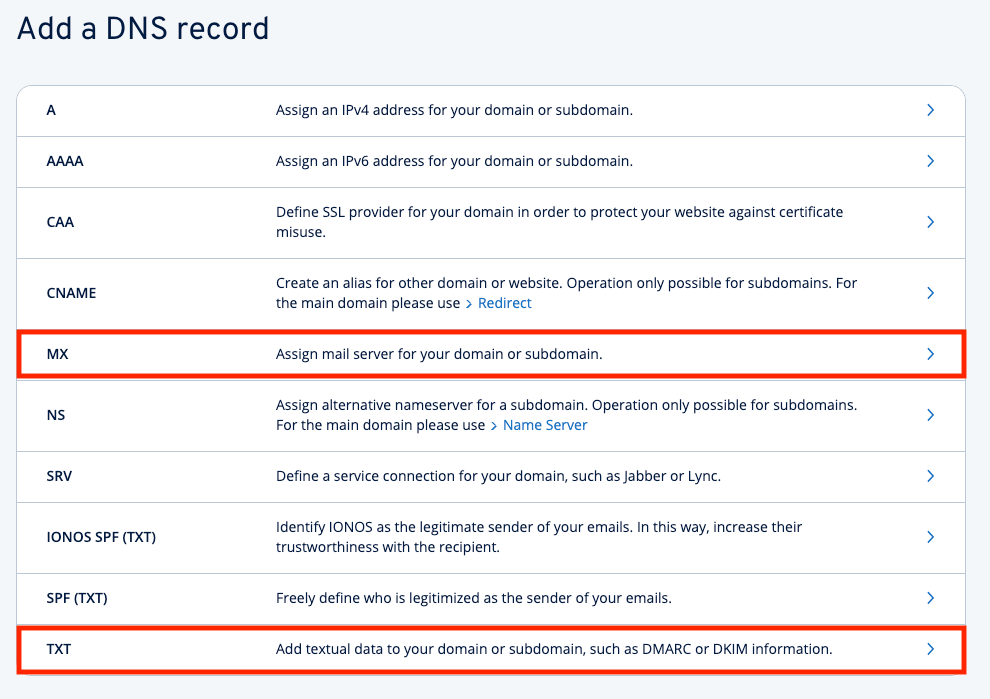
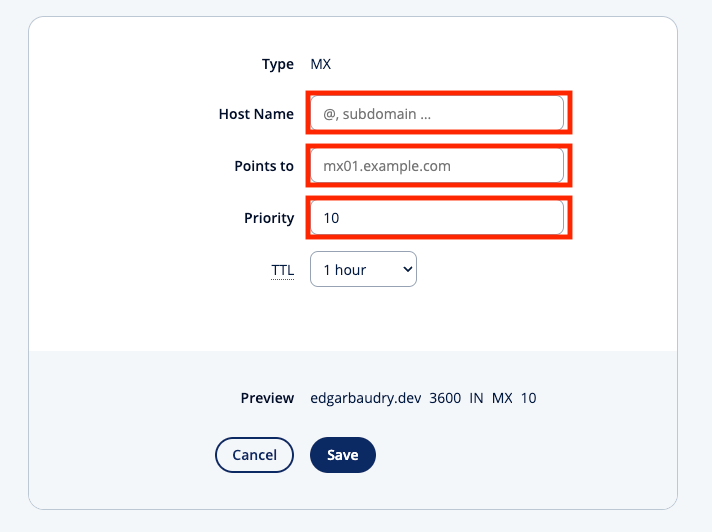
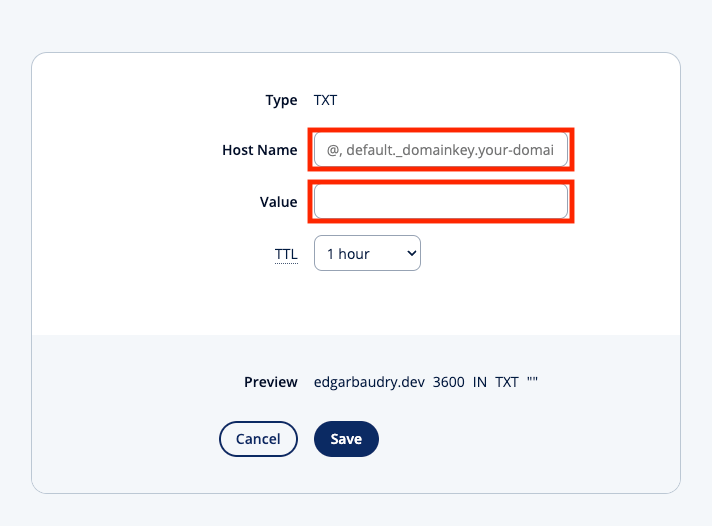 8. Once you have added the records, click `Verify`.
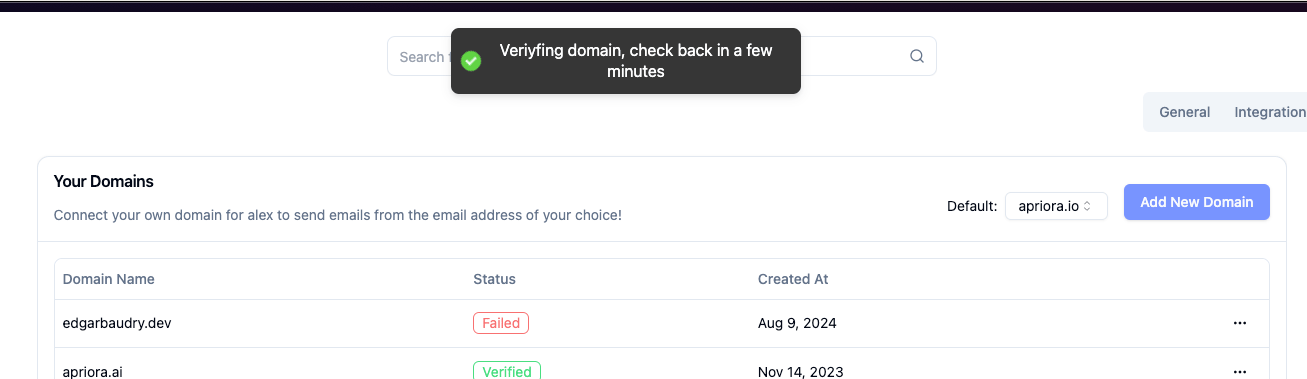
 9. You should see a success message. Your domain is now being verified.
The verification process may a few minutes to complete. You should see your
domain being marked 'verified' or 'failed'. If it takes longer, please contact
our support team for assistance.
If you see a 'failed' message, double-check the records you added to your DNS settings.
If the issue persists, contact our support team for assistance.
9. You should see a success message. Your domain is now being verified.
The verification process may a few minutes to complete. You should see your
domain being marked 'verified' or 'failed'. If it takes longer, please contact
our support team for assistance.
If you see a 'failed' message, double-check the records you added to your DNS settings.
If the issue persists, contact our support team for assistance.
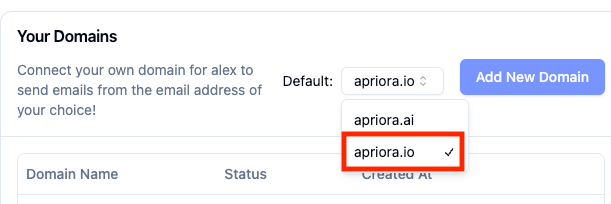
 10. Select the domain you just added from the dropdown list to set it as your default domain (you can add multiple domains and set one as default).
 Congratulations! 🎉 You have successfully set up a custom domain for your Alex account. You can now send emails to your candidates from your own domain.
If you have any questions or need assistance with setting up a custom domain,
please contact our support team at
[support@alex.com](mailto:support@alex.com).
Congratulations! 🎉 You have successfully set up a custom domain for your Alex account. You can now send emails to your candidates from your own domain.
If you have any questions or need assistance with setting up a custom domain,
please contact our support team at
[support@alex.com](mailto:support@alex.com).