> ## Documentation Index
> Fetch the complete documentation index at: https://docs.alex.com/llms.txt
> Use this file to discover all available pages before exploring further.
# Bullhorn
> Integrate Alex with Bullhorn
## Overview
Our Bullhorn integration allows you to see your interviews and reports directly in your Bullhorn dashboard. Candidate and Job entities will have 'Alex' Custom Tabs where you can see data per record. Upon integration, candidates that complete an interview, will have a note added to their Candidate Record with the report summary. Reach out to support if you're interested in populating candidate fields with report results.
## Steps to Integrate:
### 1. **Retrieve credentials**
The first thing you need to do is send an email to your Bullhorn Support for them to create an API account for Alex. You can use the following template:
```
I'm working with a Developer partner, Alex, and would like to turn their integration on in my Bullhorn instance.
Could you please create an API user (with Terms of Service disabled) for Alex and share the following information with me?
- Corporation ID
- Client ID
- Client Secret
- API Username
- API Password
Please note that Alex is a developer partner and will need ToS is disabled.
```
If you aren't given the API Password you can create it with an Admin account. To do this:
* Log into Bullhorn and navigate to menu > admin > users
* Locate the username listed above in your userlist and open the user record.
* Generate a new password for the user and save it as the API Password for the next step.
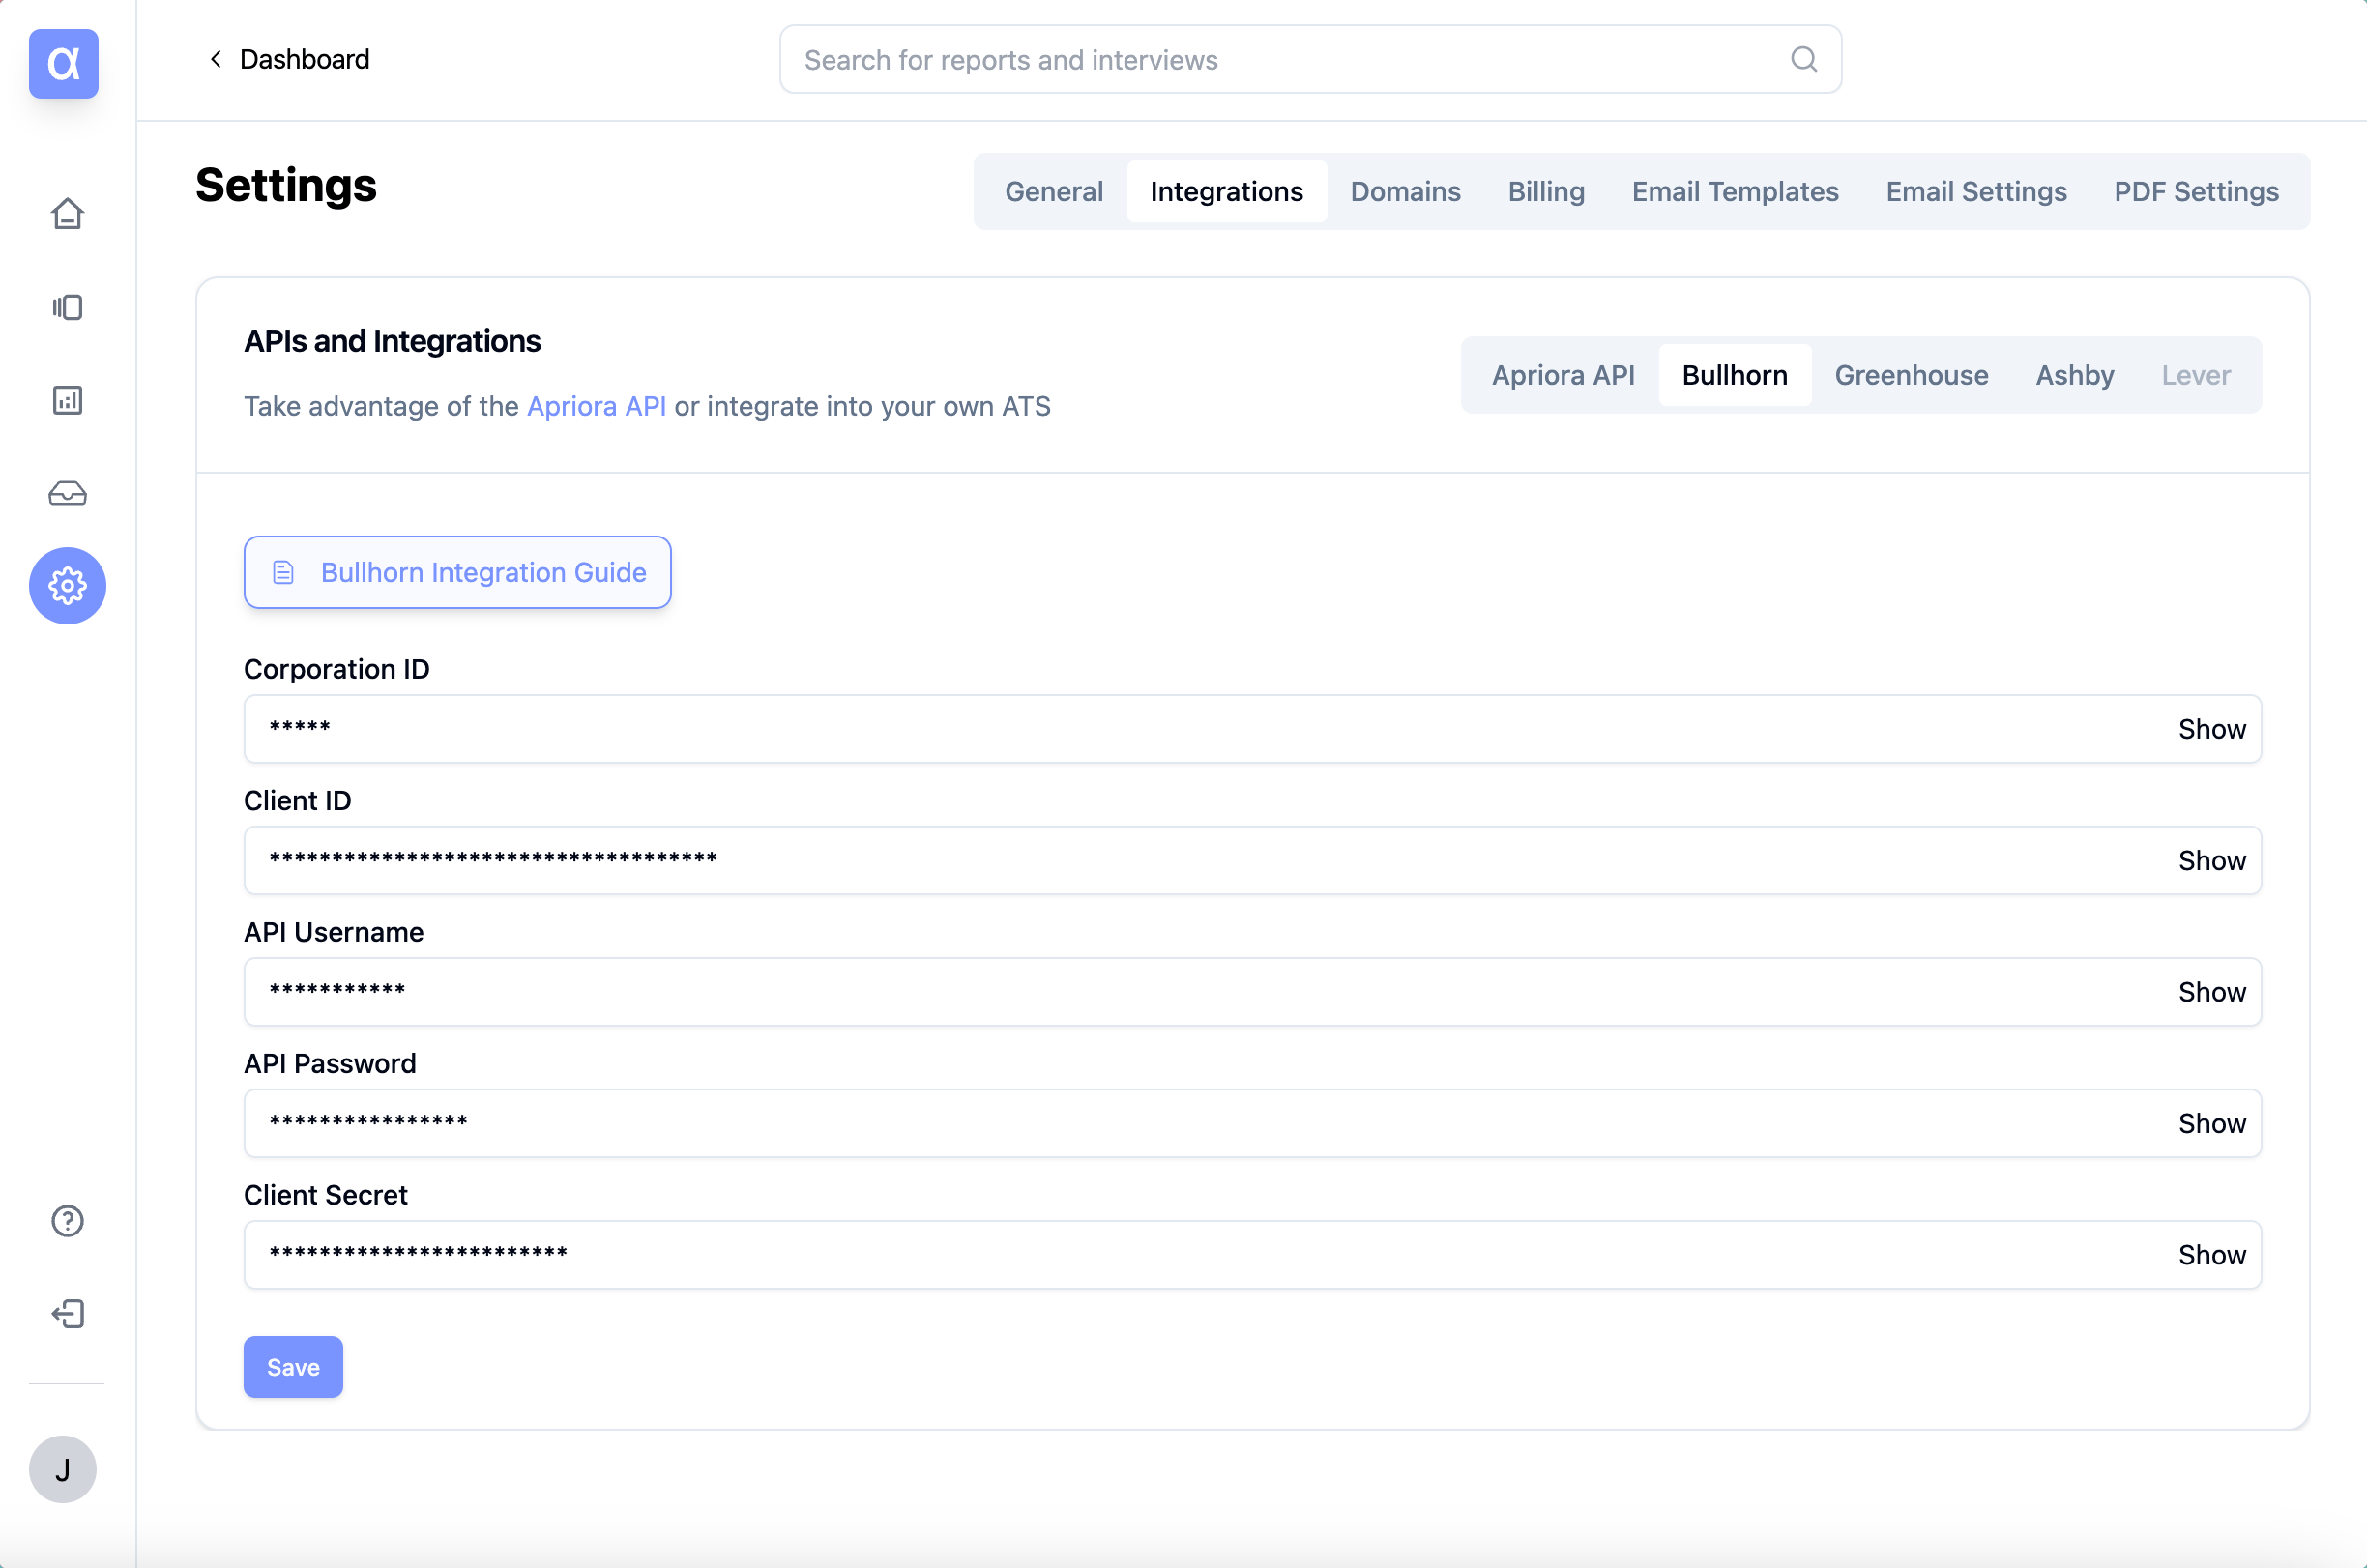
Once you have these credentials, you can enter them in the Settings > Integrations > Bullhorn page in the Alex dashboard.
 ### 2. **Setup Custom Tabs**
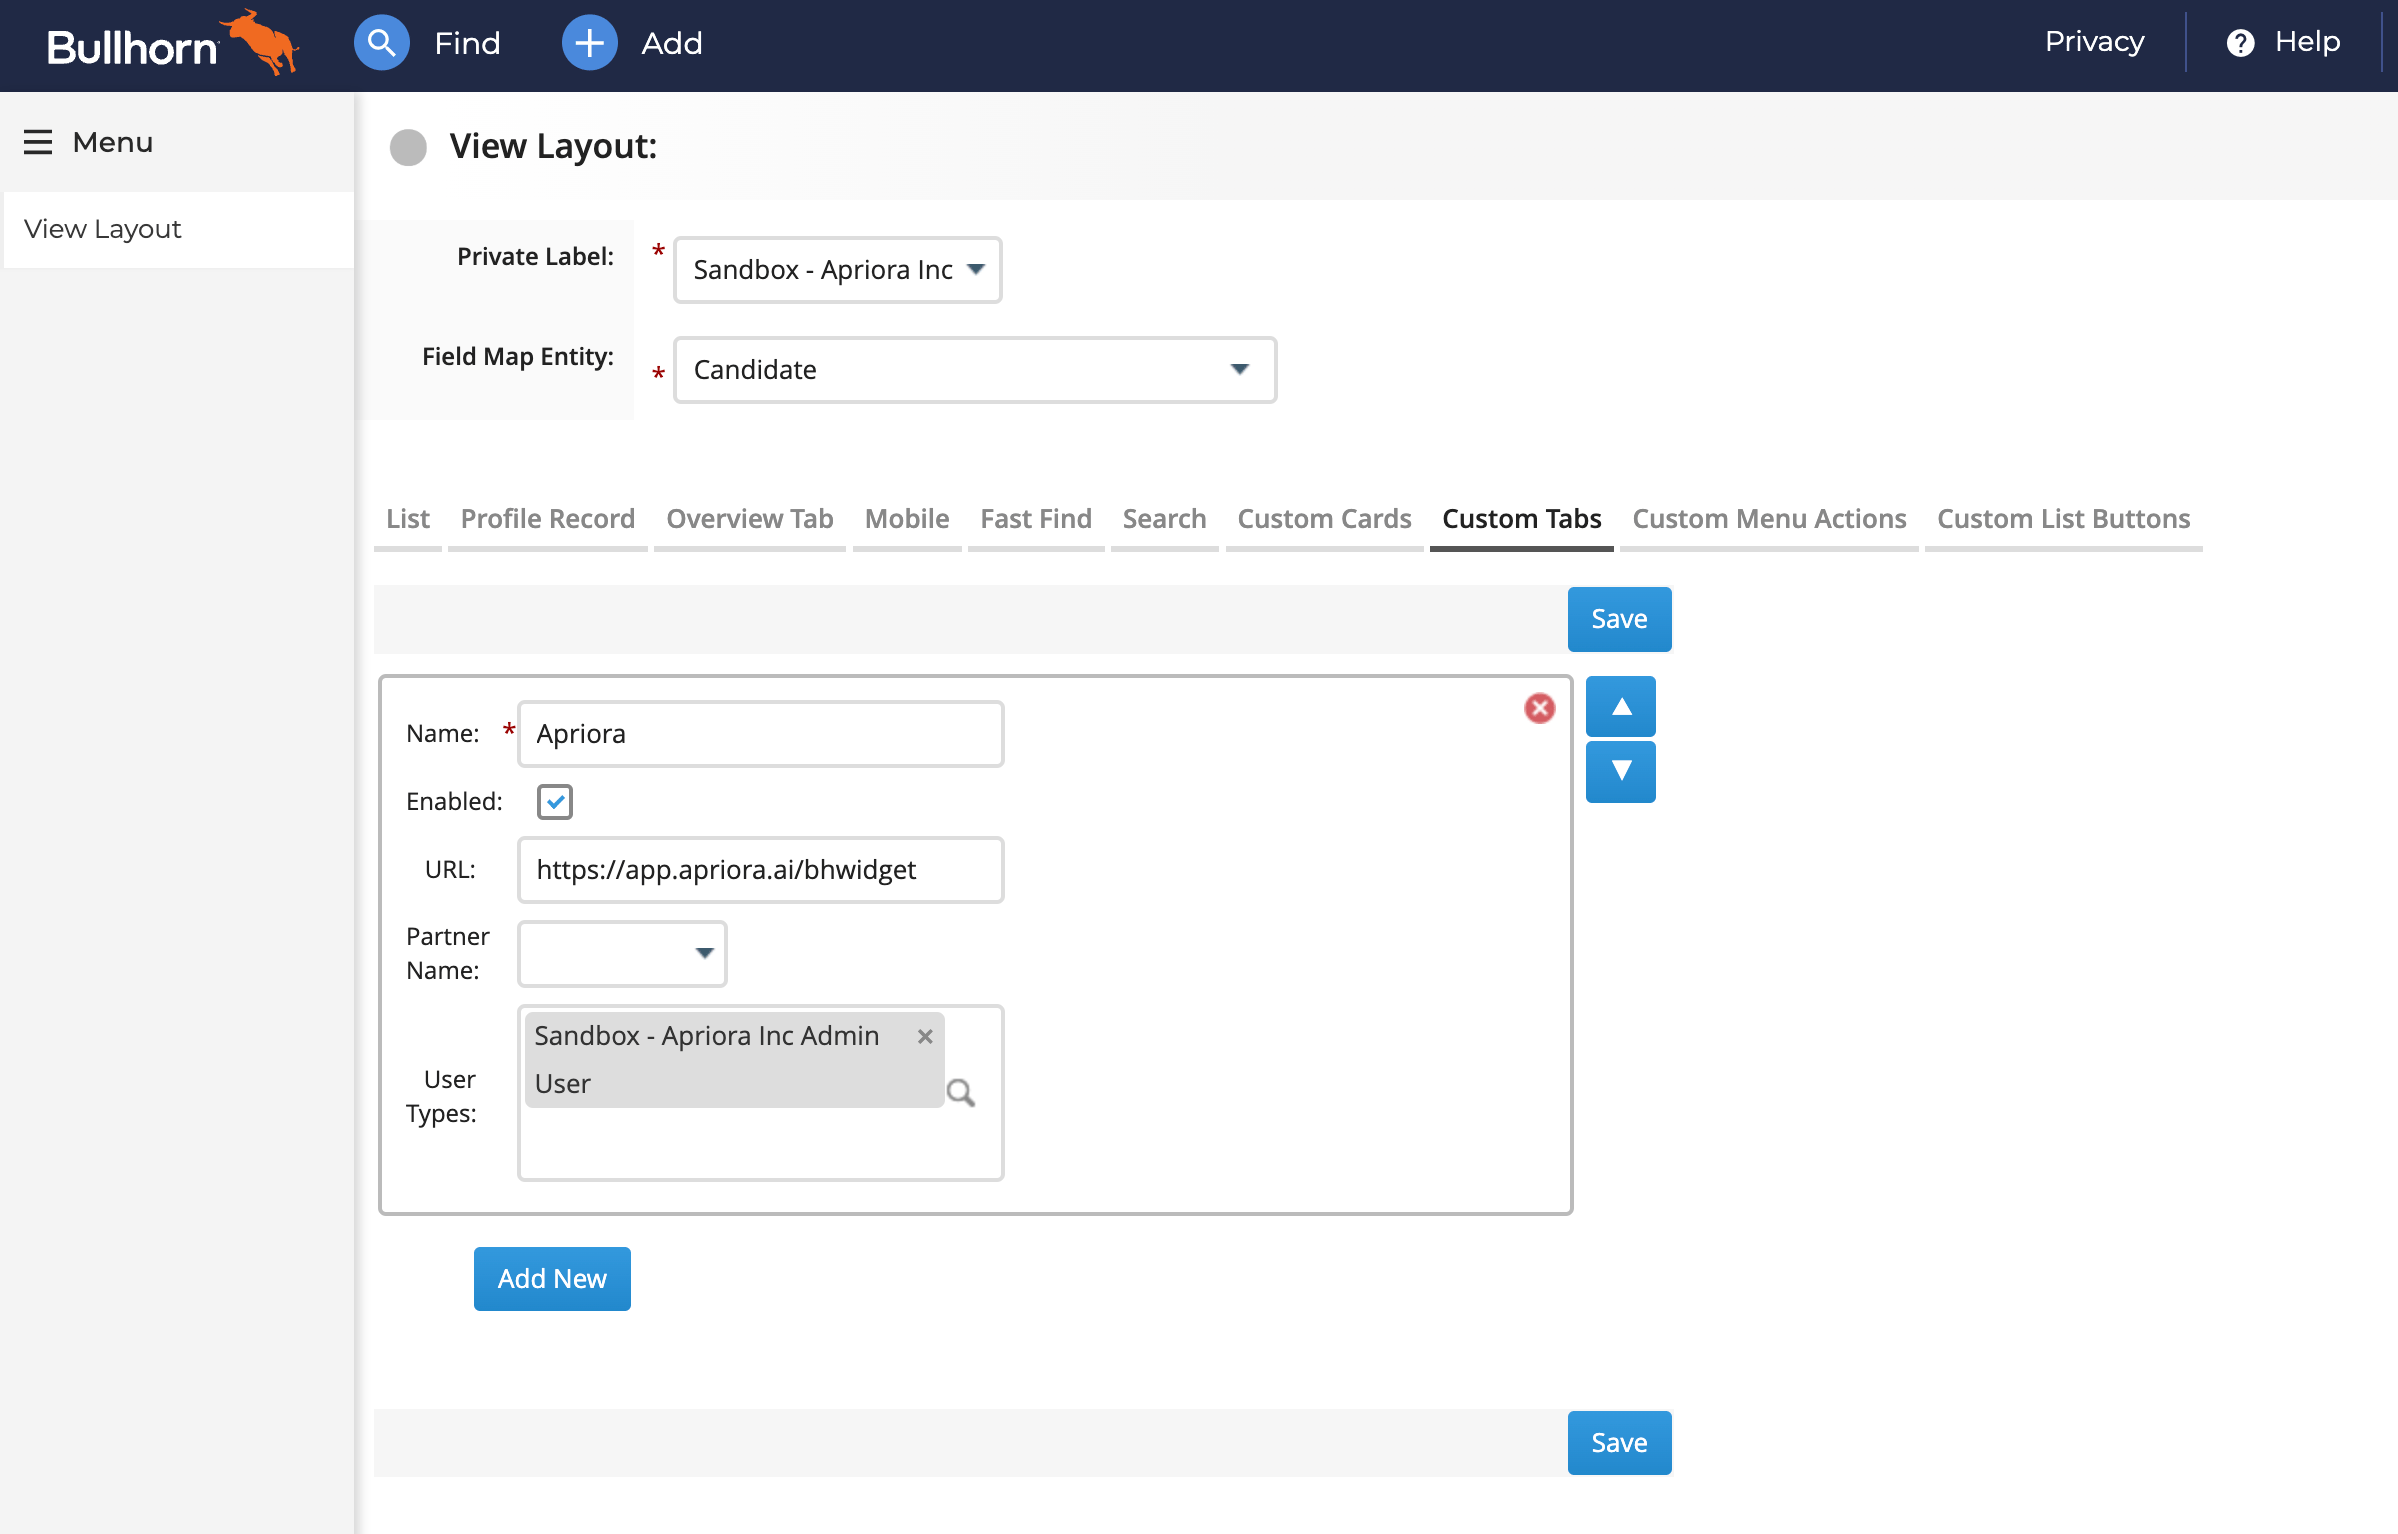
You need to add Alex as custom tabs in the Admin settings of Bullhorn to make them visible. In Bullhorn, go into Admin > View Layout.
* Select the `Candidate` Field Map Entity and go into the `Custom Tabs` tab.
* Click Add New. The name for the tab should be `Alex` and the URL should be `https://app.alex.com/bhwidget`. Make sure it is enabled.
* Add all the User Types you want to be able to see these Custom Tabs. Note that if you don't select any User Types, the tabs won't be visible for anyone.
* Click Save. You just added Custom Tabs for Candidate entities!
### 2. **Setup Custom Tabs**
You need to add Alex as custom tabs in the Admin settings of Bullhorn to make them visible. In Bullhorn, go into Admin > View Layout.
* Select the `Candidate` Field Map Entity and go into the `Custom Tabs` tab.
* Click Add New. The name for the tab should be `Alex` and the URL should be `https://app.alex.com/bhwidget`. Make sure it is enabled.
* Add all the User Types you want to be able to see these Custom Tabs. Note that if you don't select any User Types, the tabs won't be visible for anyone.
* Click Save. You just added Custom Tabs for Candidate entities!
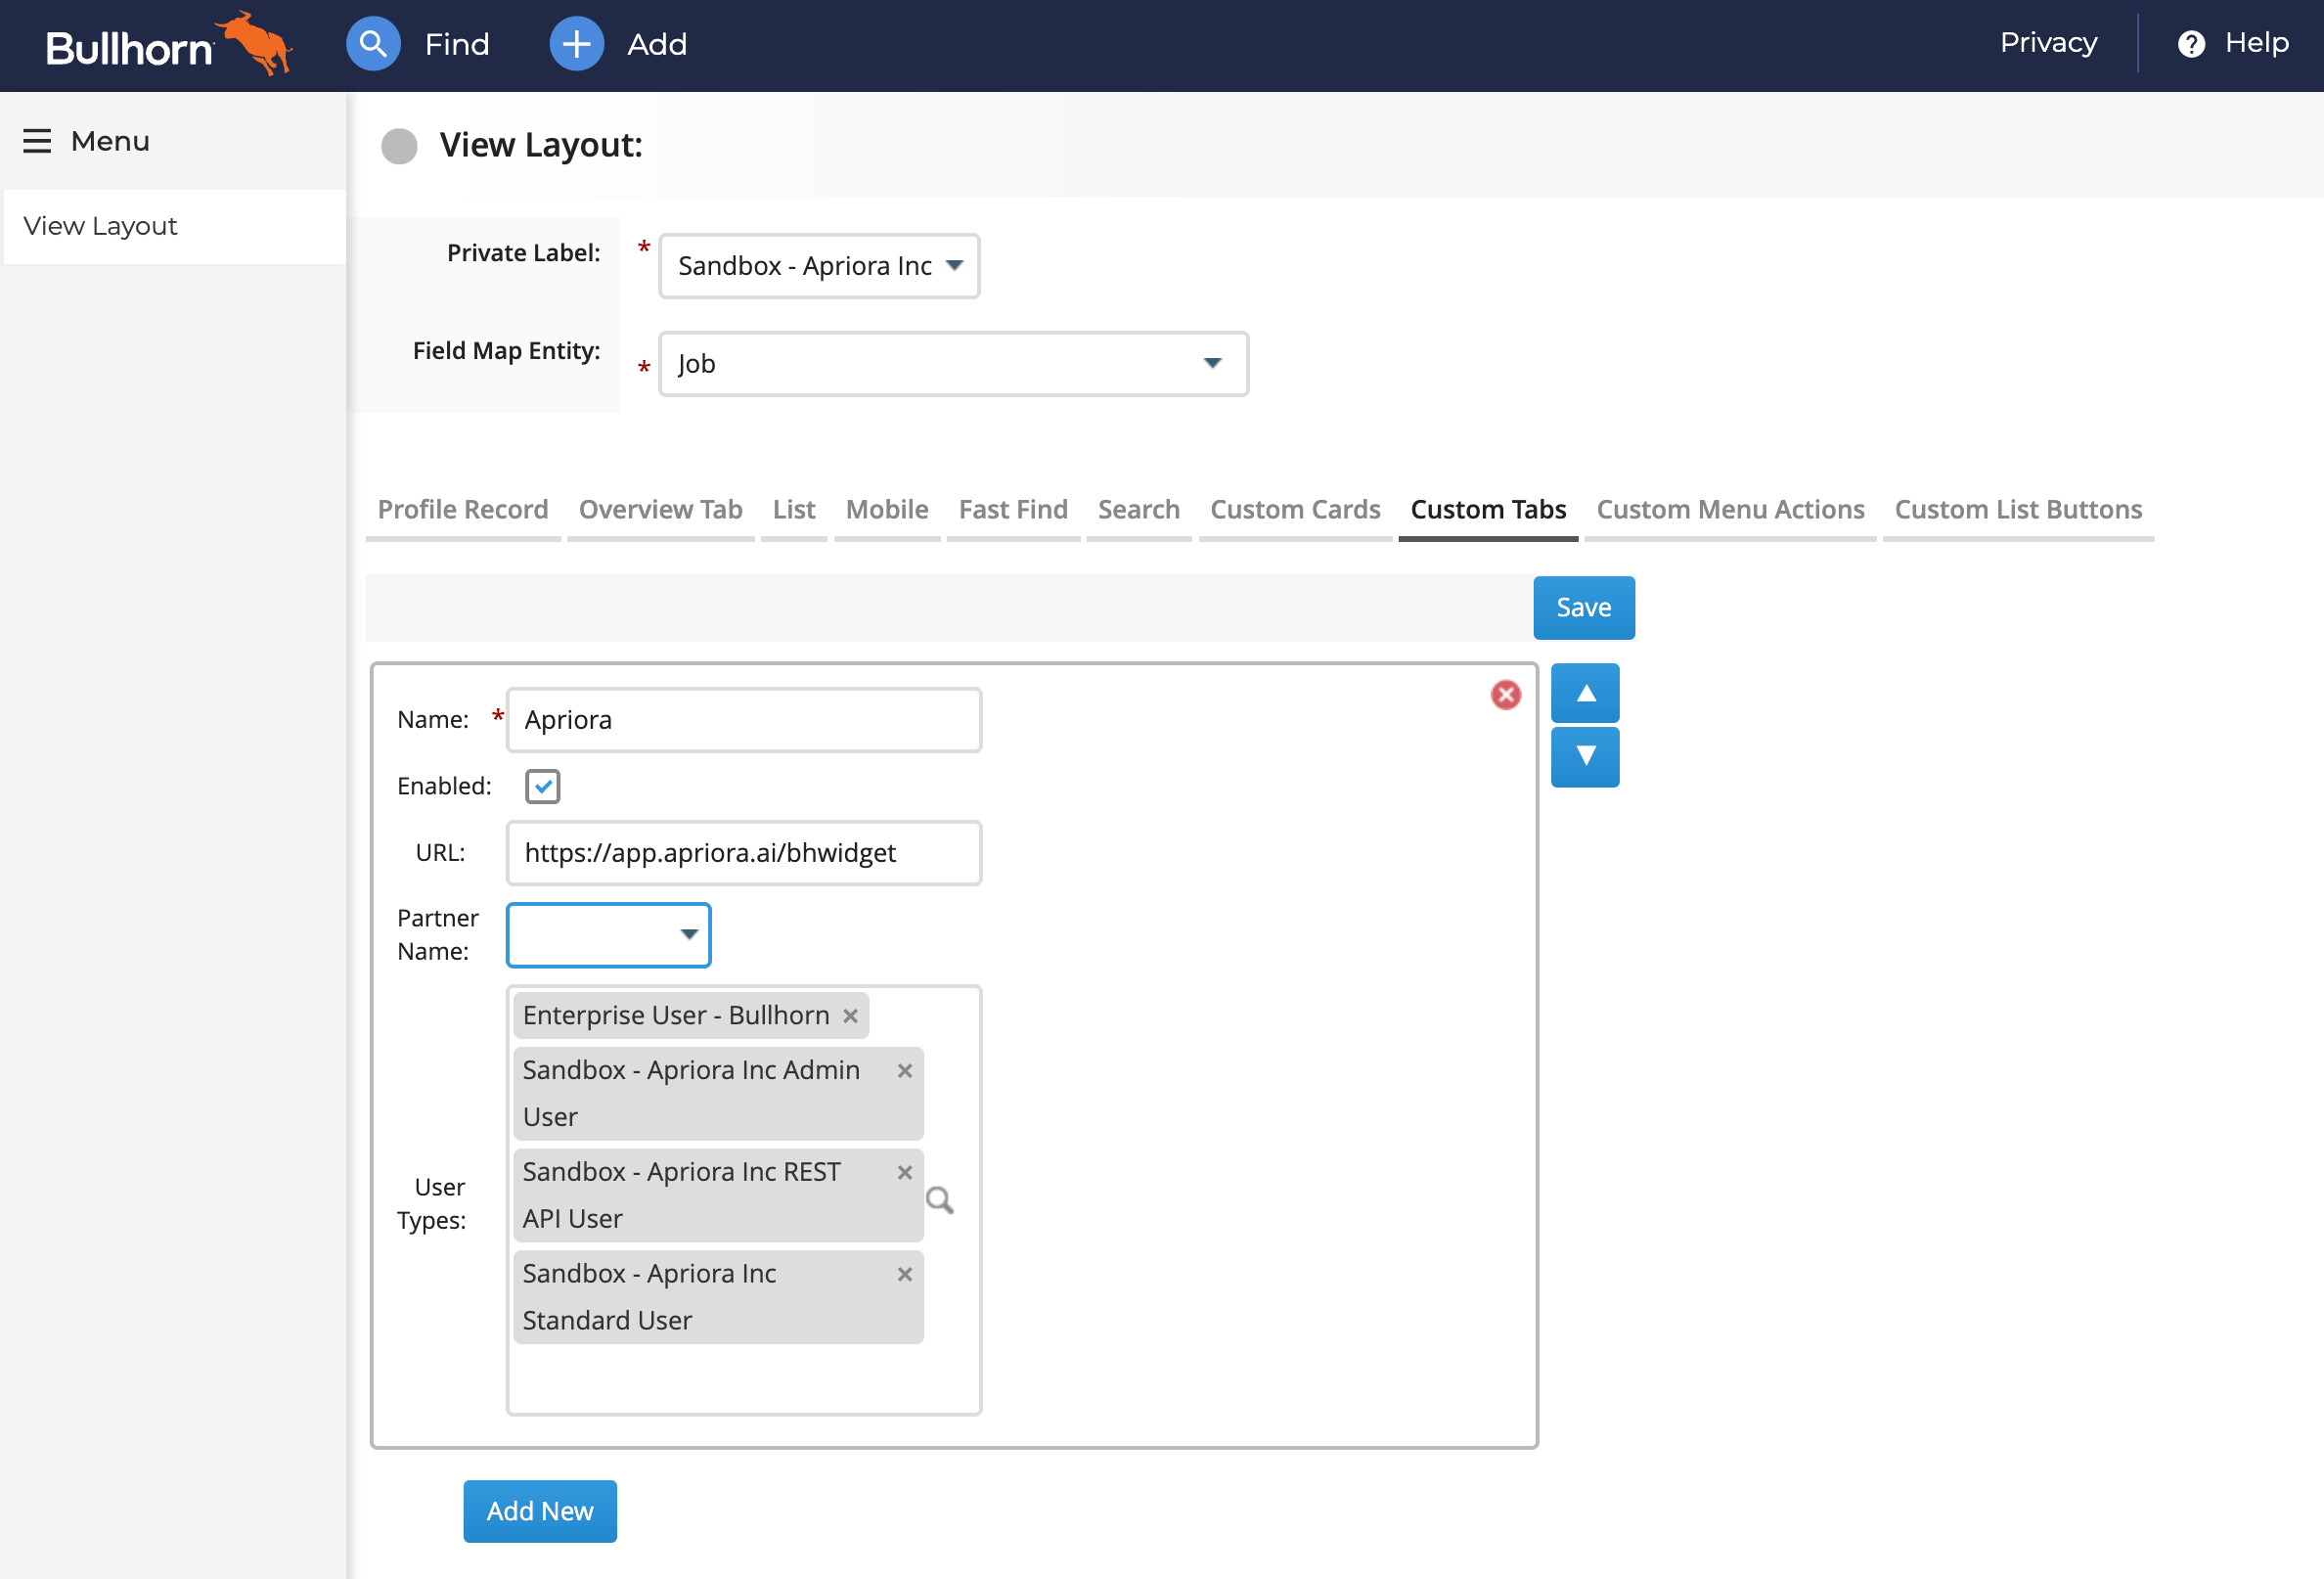
 For Job entities you need to do the same. Note that if you use Job I, Job II, ..., you will need to add a custom tab for each of those entities as well.
Follow these steps:
* Select the `Job` Field Map Entity and go into the `Custom Tabs` tab.
* Click Add New. The name for the tab should be `Alex` and the URL should be `https://app.alex.com/bhwidget`. Make sure it is enabled.
* Add all the User Types you want to be able to see these Custom Tabs. Note that if you don't select any User Types, the tabs won't be visible for anyone.
* Click Save. You just added Custom Tabs for Job entities!
For Job entities you need to do the same. Note that if you use Job I, Job II, ..., you will need to add a custom tab for each of those entities as well.
Follow these steps:
* Select the `Job` Field Map Entity and go into the `Custom Tabs` tab.
* Click Add New. The name for the tab should be `Alex` and the URL should be `https://app.alex.com/bhwidget`. Make sure it is enabled.
* Add all the User Types you want to be able to see these Custom Tabs. Note that if you don't select any User Types, the tabs won't be visible for anyone.
* Click Save. You just added Custom Tabs for Job entities!
 Your integration is now ready!