> ## Documentation Index
> Fetch the complete documentation index at: https://docs.alex.com/llms.txt
> Use this file to discover all available pages before exploring further.
# Greenhouse
> Integrate Alex with Greenhouse
## Overview
Our Greenhouse integration allows you to connect Greenhouse jobs to Alex jobs. Candidates can move into an Alex stage within Greenhouse, which allows you to invite them to an AI interview. Once completed, their score and a detailed report will upload to Greenhouse.
## What we need from you
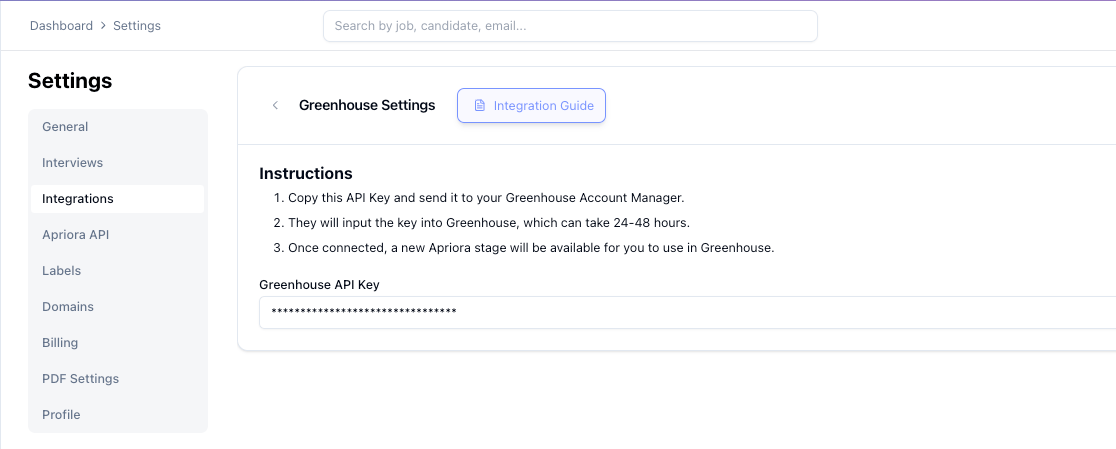
Navigate to the Settings tab in the Alex app. Click **Integrations** on from the left-hand side menu. On the next screen, select Greenhouse. From there:
1. Copy the API Key and send it to your Greenhouse Account Manager.
2. They will input the key into Greenhouse, which can take up to 24-48 hours.
3. Once connected, a new Alex stage will be available for you to use in Greenhouse.
 ## Add AI Interviews to a Greenhouse Job
Once your integration is connected, you will be able to add Alex as a stage within your Greenhouse job.
1. Create an Job Interview within Alex that you want to use to interview candidates for the Job within Greenhouse. See our docs on [Creating an AI Job Interview](https://docs.alex.com/interviews/create) for details.
2. Make sure you have [Connected your Domain](https://docs.alex.com/advanced/domains) and reviewed your default [Messaging](https://docs.alex.com/interviews/messaging). This will allow candidate invitations to function properly.
3. Now head to the specific Job page within Greenhouse.
4. Go to **Job Setup** > **Interview Plan** > **Add stage.**
5. In the modal that pops up, select Alex from the list of stages. The Alex stage will be visible once the Alex API key has been connected by Greenhouse.
## Add AI Interviews to a Greenhouse Job
Once your integration is connected, you will be able to add Alex as a stage within your Greenhouse job.
1. Create an Job Interview within Alex that you want to use to interview candidates for the Job within Greenhouse. See our docs on [Creating an AI Job Interview](https://docs.alex.com/interviews/create) for details.
2. Make sure you have [Connected your Domain](https://docs.alex.com/advanced/domains) and reviewed your default [Messaging](https://docs.alex.com/interviews/messaging). This will allow candidate invitations to function properly.
3. Now head to the specific Job page within Greenhouse.
4. Go to **Job Setup** > **Interview Plan** > **Add stage.**
5. In the modal that pops up, select Alex from the list of stages. The Alex stage will be visible once the Alex API key has been connected by Greenhouse.
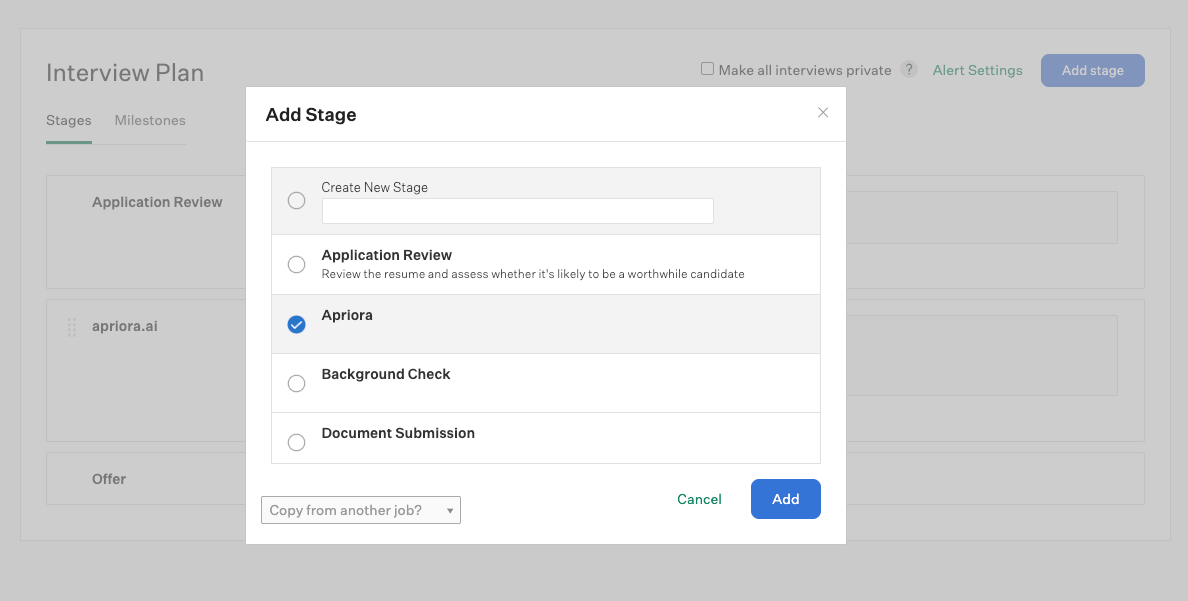 1. Once added, you can drag the Alex stage to any position within the Interview plan.
2. This will automatically update the Job Pipeline, such that the Alex stage is visible within the Pipeline.
1. Once added, you can drag the Alex stage to any position within the Interview plan.
2. This will automatically update the Job Pipeline, such that the Alex stage is visible within the Pipeline.
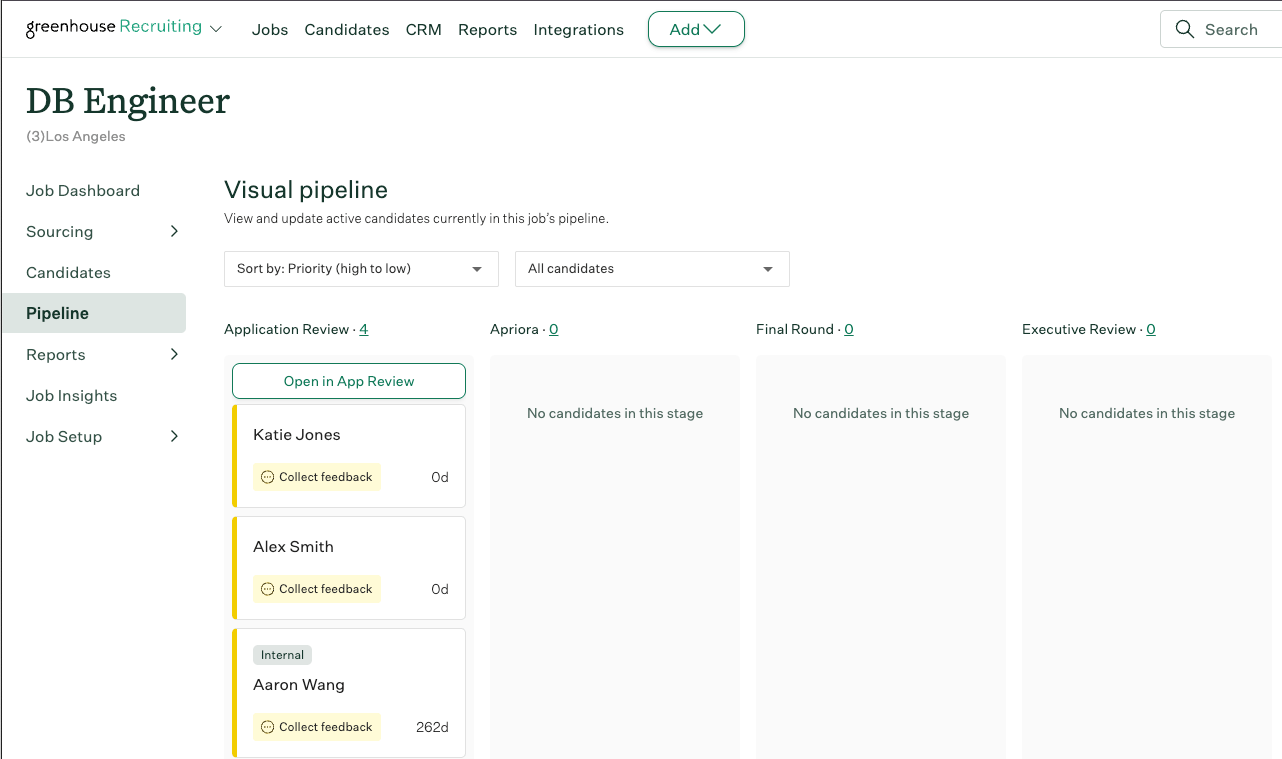 Next, you must a) **move candidates to the Alex stage** AND b) **send them the Alex invite.**
1. To invite candidates Individually:
* Drag a candidate's card into the Alex stage.
* Click their candidate card. From their candidate profile, click **Send test to candidate,** which is hyperlinked on the right hand side\*\*.\*\* This will pop up a Send test modal. Select the appropriate Alex Job (Test) from the dropdown box and assign the grader. Click Send test.
2.
Next, you must a) **move candidates to the Alex stage** AND b) **send them the Alex invite.**
1. To invite candidates Individually:
* Drag a candidate's card into the Alex stage.
* Click their candidate card. From their candidate profile, click **Send test to candidate,** which is hyperlinked on the right hand side\*\*.\*\* This will pop up a Send test modal. Select the appropriate Alex Job (Test) from the dropdown box and assign the grader. Click Send test.
2. 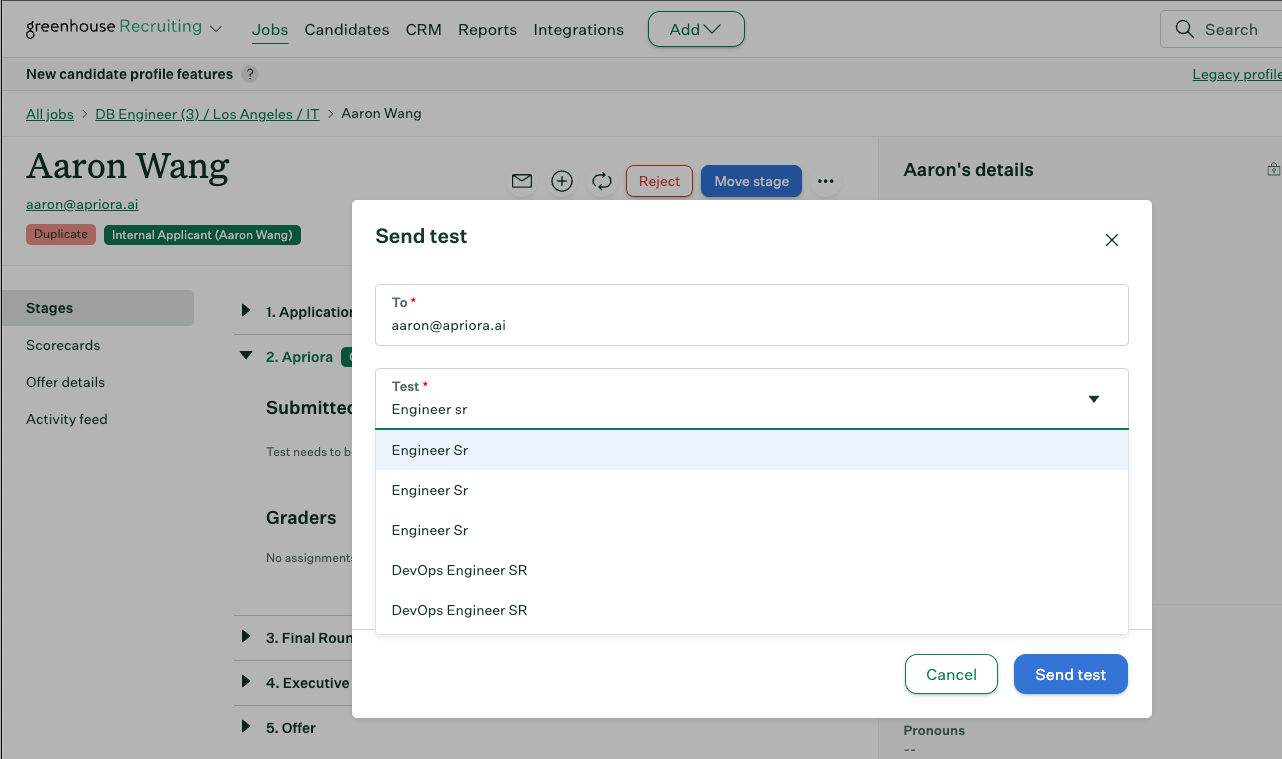 To invite candidates in bulk:
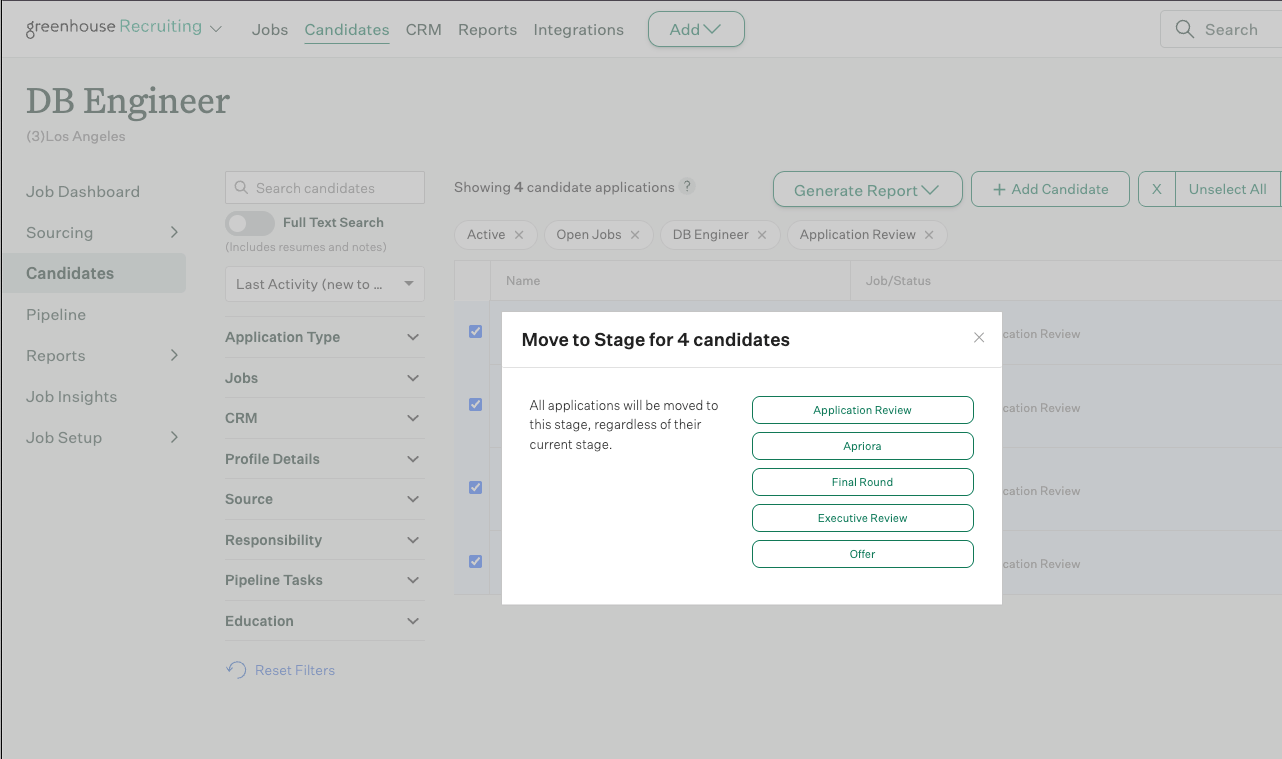
* Click the Pipeline stage before the Alex stage, typically Application Review. In the top right, click **Bulk Actions** > **Select All** > **Edit Selected** > **Move to Another Stage** (under Candidates). This will pop up a Modal where you will select Alex.
To invite candidates in bulk:
* Click the Pipeline stage before the Alex stage, typically Application Review. In the top right, click **Bulk Actions** > **Select All** > **Edit Selected** > **Move to Another Stage** (under Candidates). This will pop up a Modal where you will select Alex.
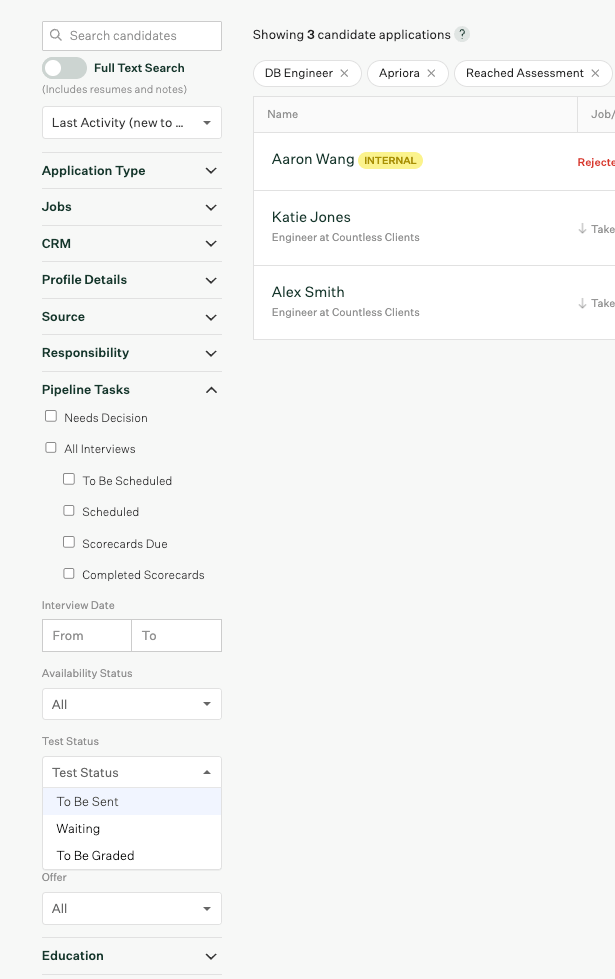
 * Now, go to the **Pipeline Tasks** filter on the left under **Responsibility.** Select **To Be Sent**. After that, click **Bulk Actions** > **Select All** > **Edit Selected** > **Send Tests** (under Action). Next, select the Alex Job (Test) and the grader. Click Send Test.
 3. By clicking **Send Test**, the candidate will get an email from Alex, based on the **Messaging** assigned to that Alex Job. The candidate's status will also update to **Pending**.
4. Once the candidate has completed their AI interview, their status will update to **Completed** and their test score and report will be uploaded to Greenhouse.
3. By clicking **Send Test**, the candidate will get an email from Alex, based on the **Messaging** assigned to that Alex Job. The candidate's status will also update to **Pending**.
4. Once the candidate has completed their AI interview, their status will update to **Completed** and their test score and report will be uploaded to Greenhouse.
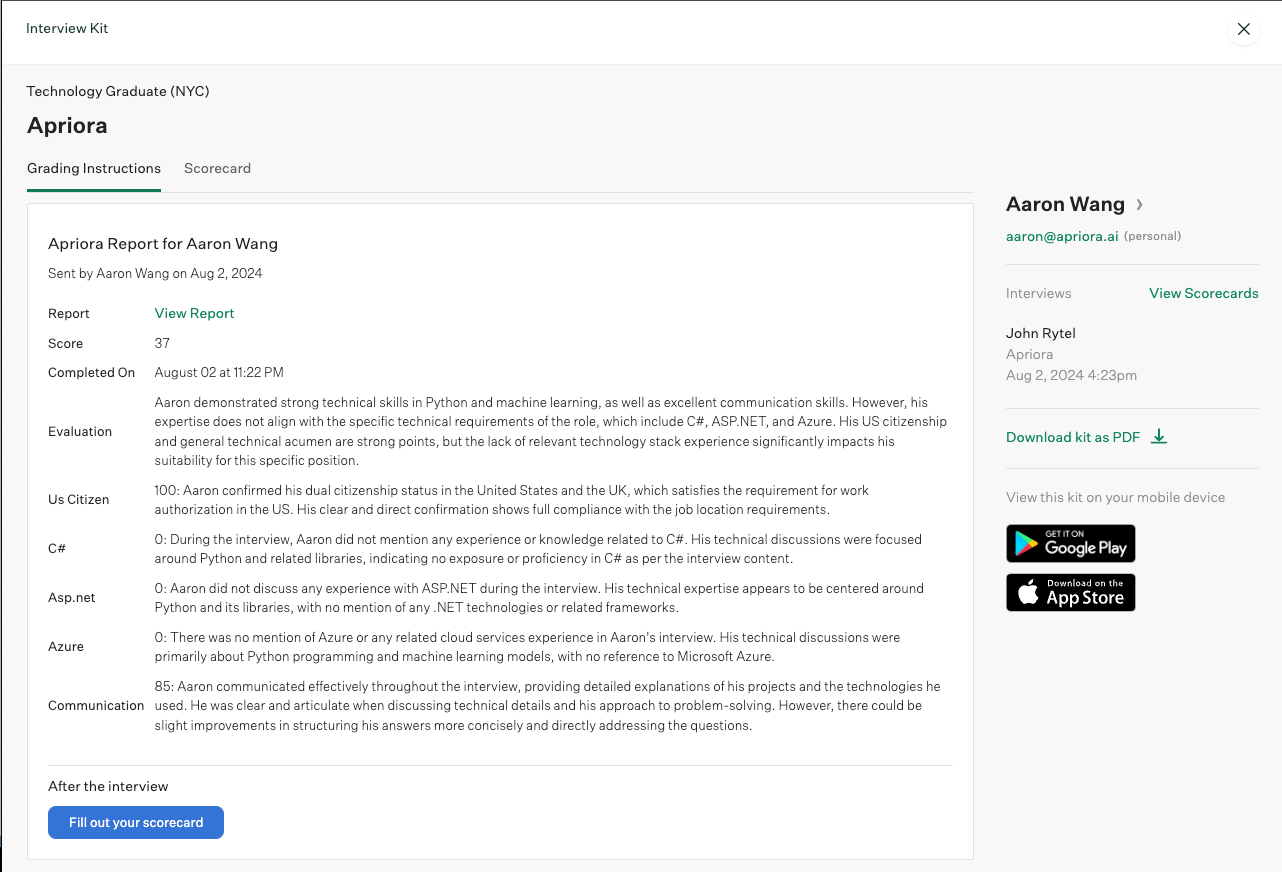
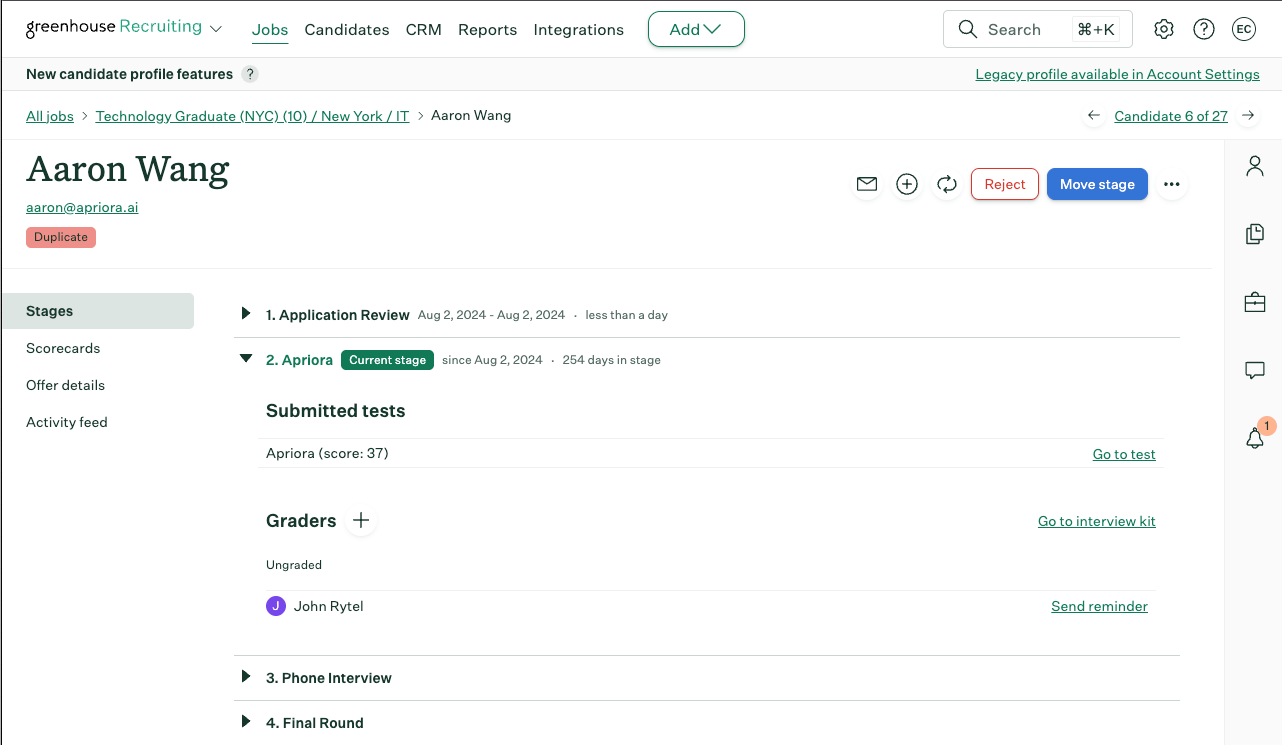 1. Navigate to the Interview kit to see the Alex report, which contains:
* Overall Score
* Evaluation Summary
* Skill Scores
* Skill Summaries
* Link to the Report within Alex
1. Navigate to the Interview kit to see the Alex report, which contains:
* Overall Score
* Evaluation Summary
* Skill Scores
* Skill Summaries
* Link to the Report within Alex
 ## Greenhouse Configuration for Syncing Rejections
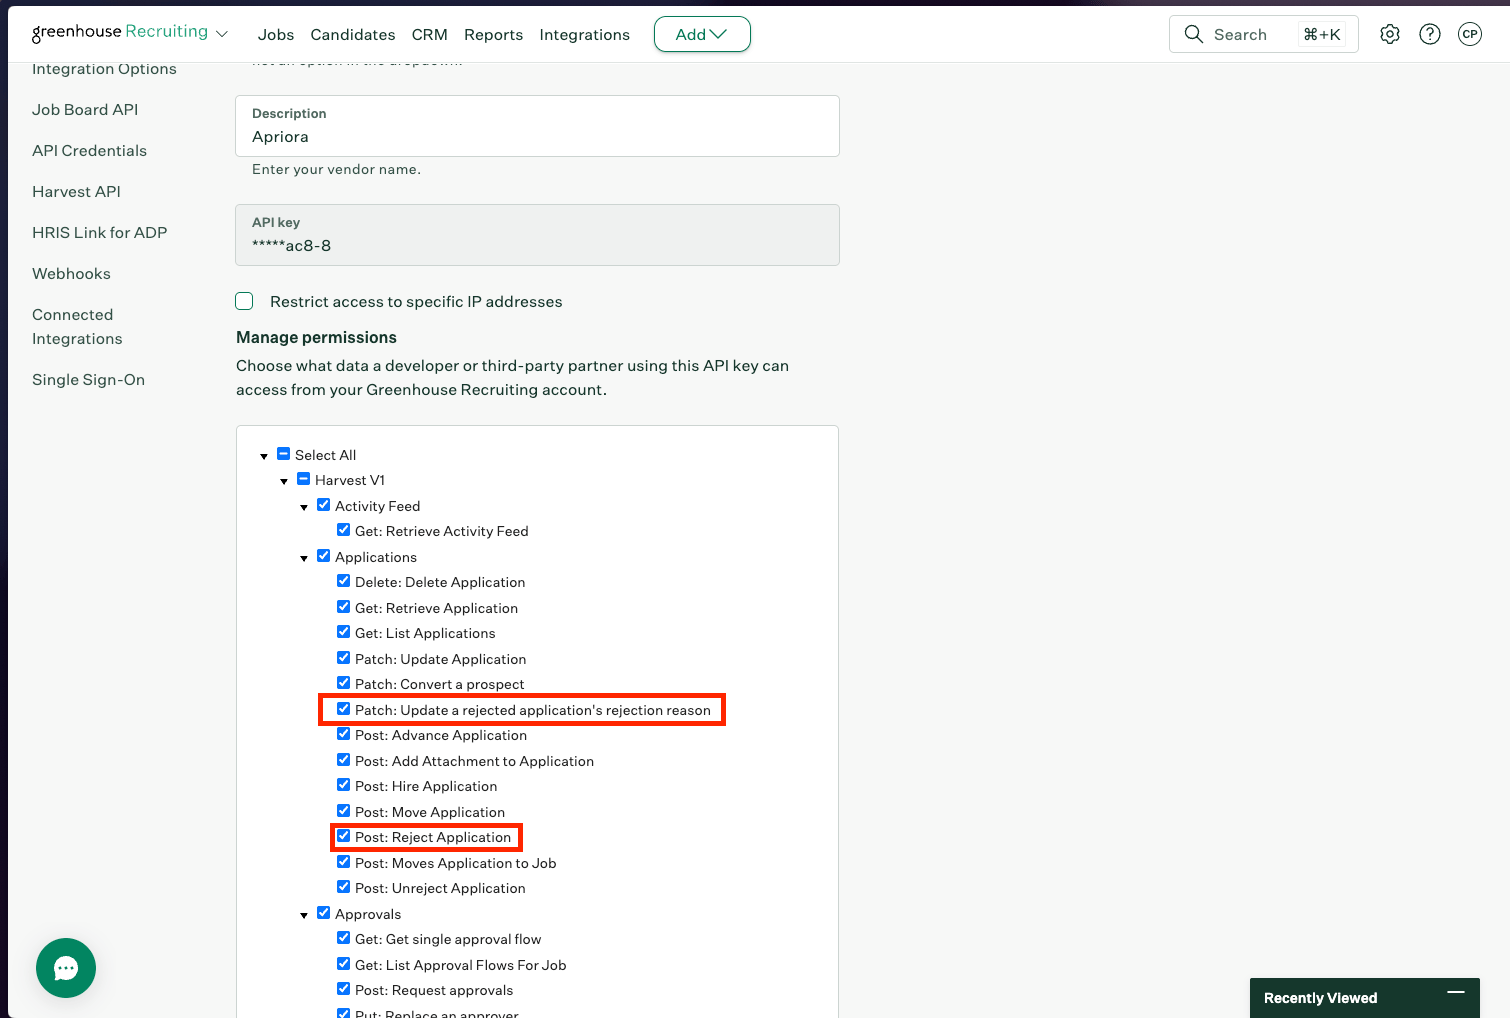
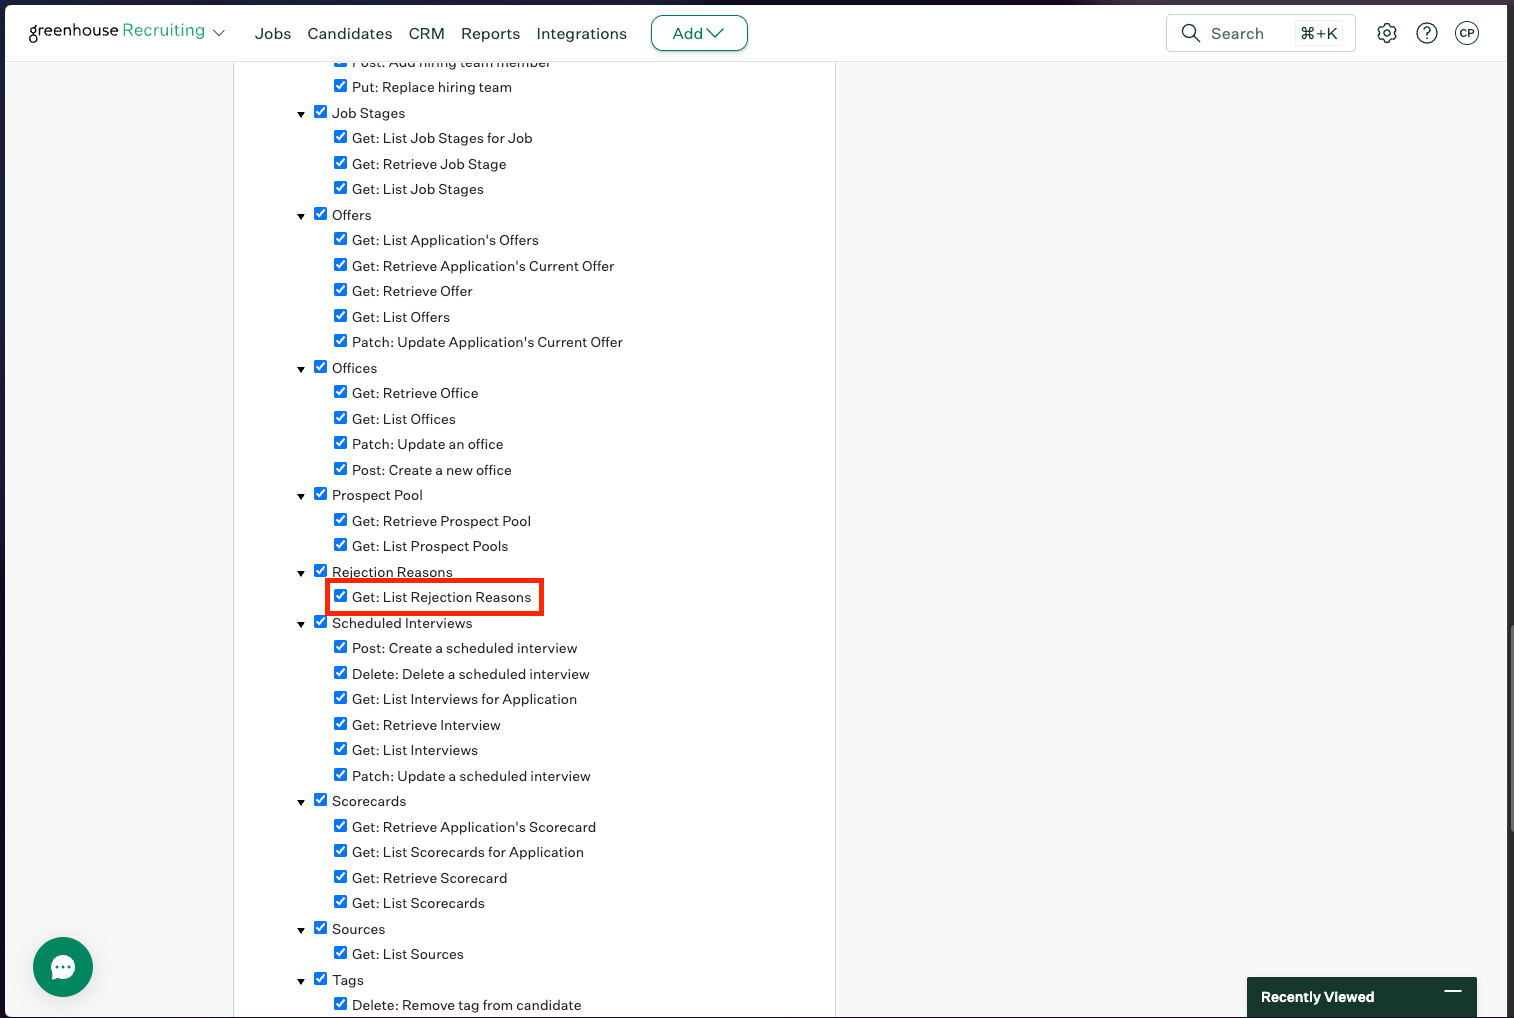
Alex supports syncing rejections from Alex to Greenhouse. You will need to ensure that our Alex API user has the necessary permissions to sync rejections from Alex to Greenhouse. Below is a step by step guide on how you can configure the necessary permissions.
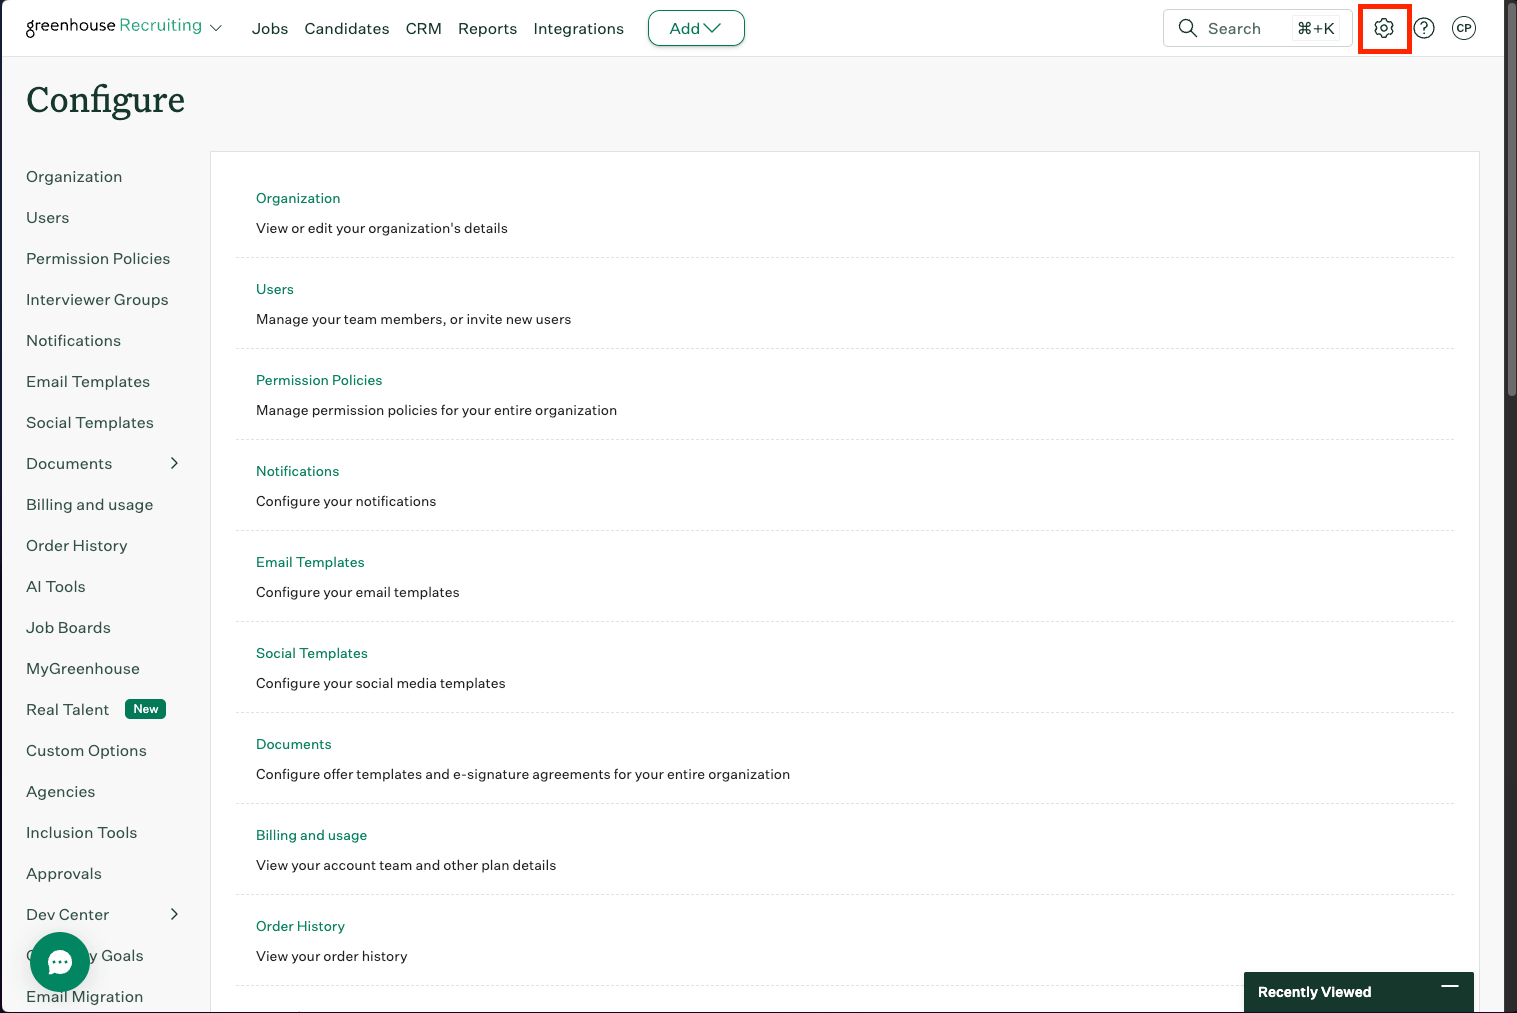
1. In Greenhouse, go to the configuration settings by clicking the settings icon in the top right.
## Greenhouse Configuration for Syncing Rejections
Alex supports syncing rejections from Alex to Greenhouse. You will need to ensure that our Alex API user has the necessary permissions to sync rejections from Alex to Greenhouse. Below is a step by step guide on how you can configure the necessary permissions.
1. In Greenhouse, go to the configuration settings by clicking the settings icon in the top right.
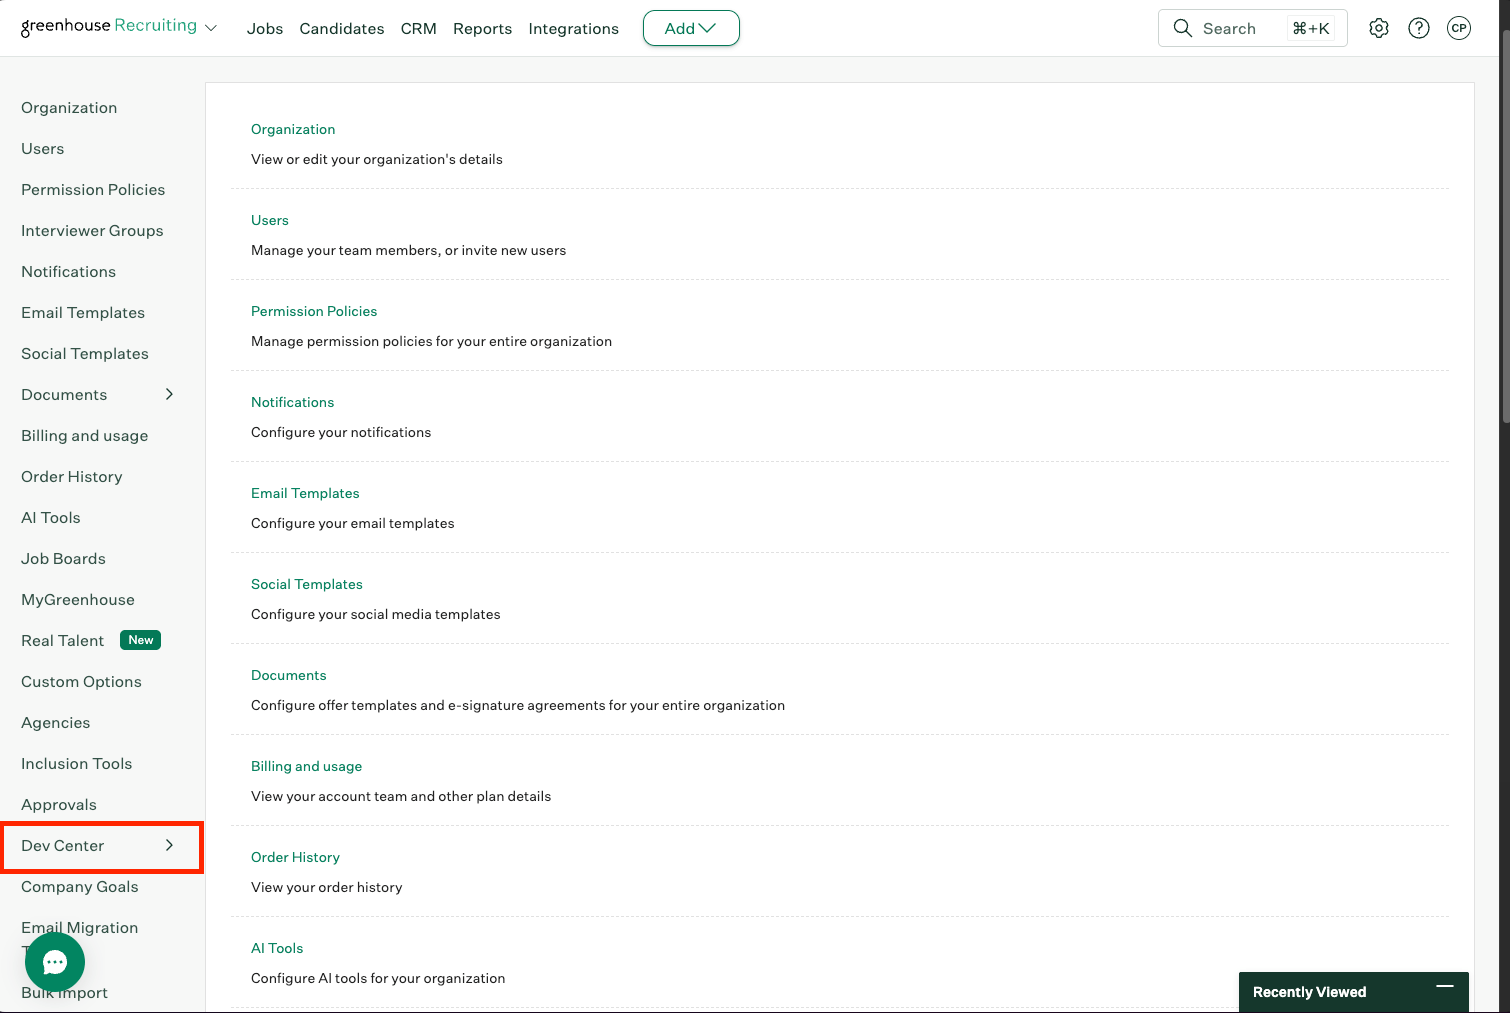
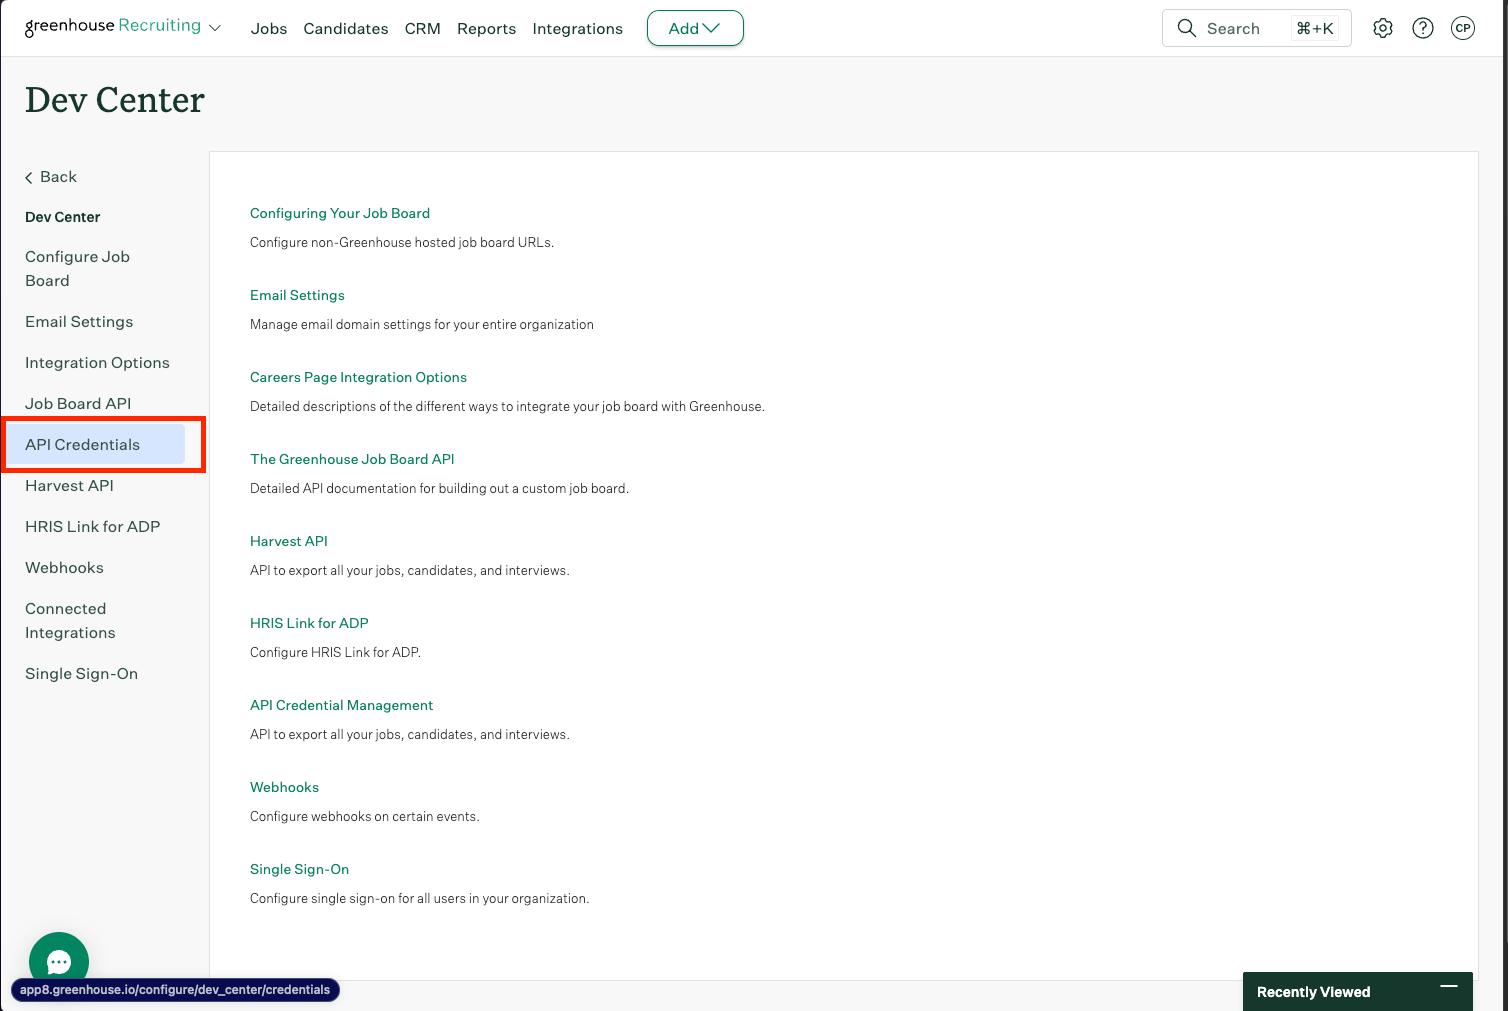
 2. In the left sidebar, click on "Dev Center".
 3. In the left sidebar, click on "API Credentials".
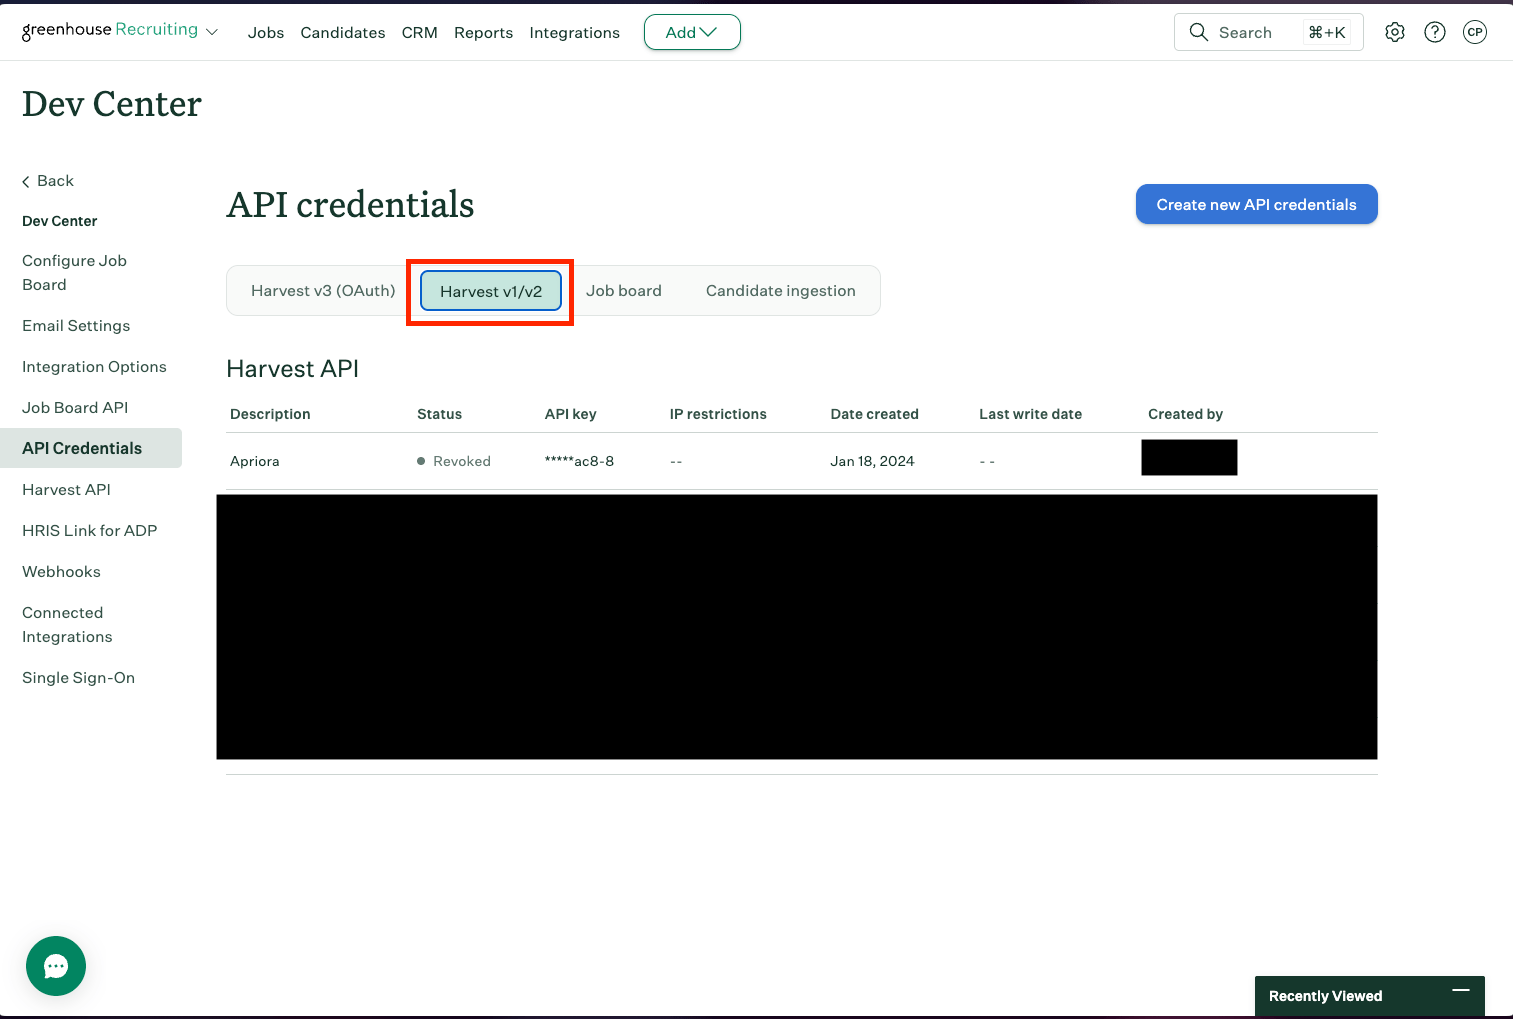
 4. In the tab bar, click on "Harvest v1/v2".
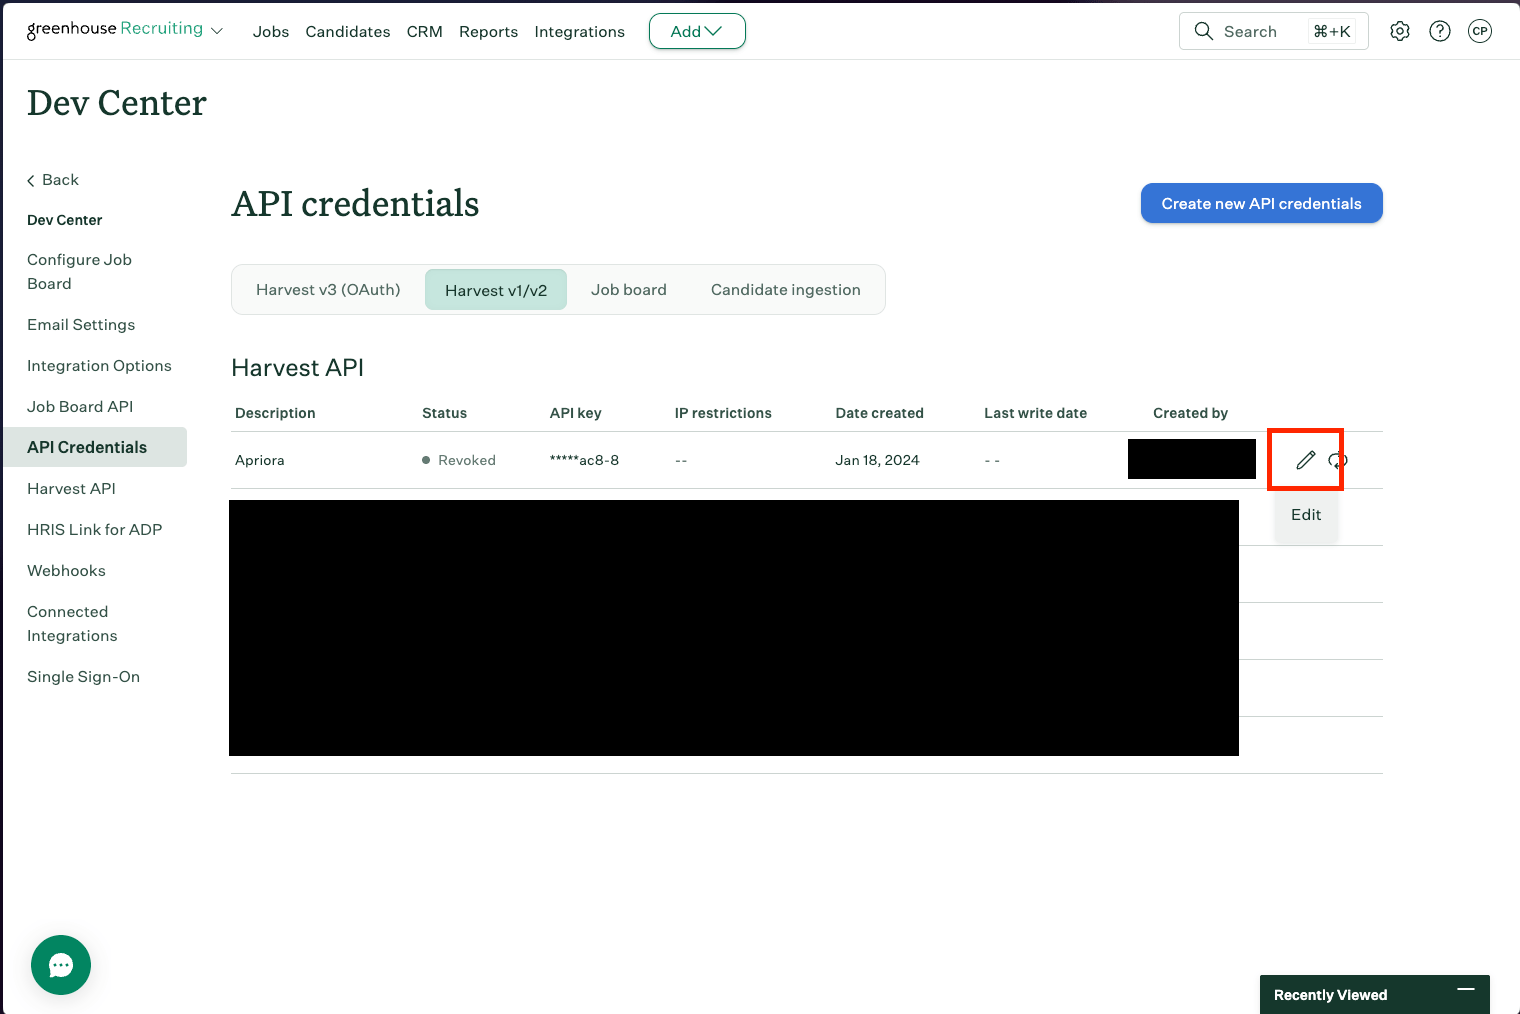
 5. Find the API user for Alex and click the edit icon.
 6. Ensure that these permissions are enabled and save.