

How the Integration Works
- Automatic Interview Generation: For each new job you create in Loxo, an interview is automatically created in Alex using the information from your job description.
- Automatic Interview Invites: When candidates apply for a job in Loxo, Alex automatically sends them an email invitation and handles all the interview scheduling.
Set up the Loxo Integration
Follow these steps to connect your Loxo account.1. Get Your Loxo Credentials
You will need three pieces of information from your Loxo account: anAPI Agency Slug, API Domain, and an API Key.
To get the Agency Slug and Domain, you will need to email Loxo Support to have them create an API account for the integration. You can use the template below:
I’m working with a Developer partner, Alex, and would like to turn their integration on in my Loxo account. Could you please create an API user for Alex and share the following information with me?Once you receive the
- API agency_slug
- API domain
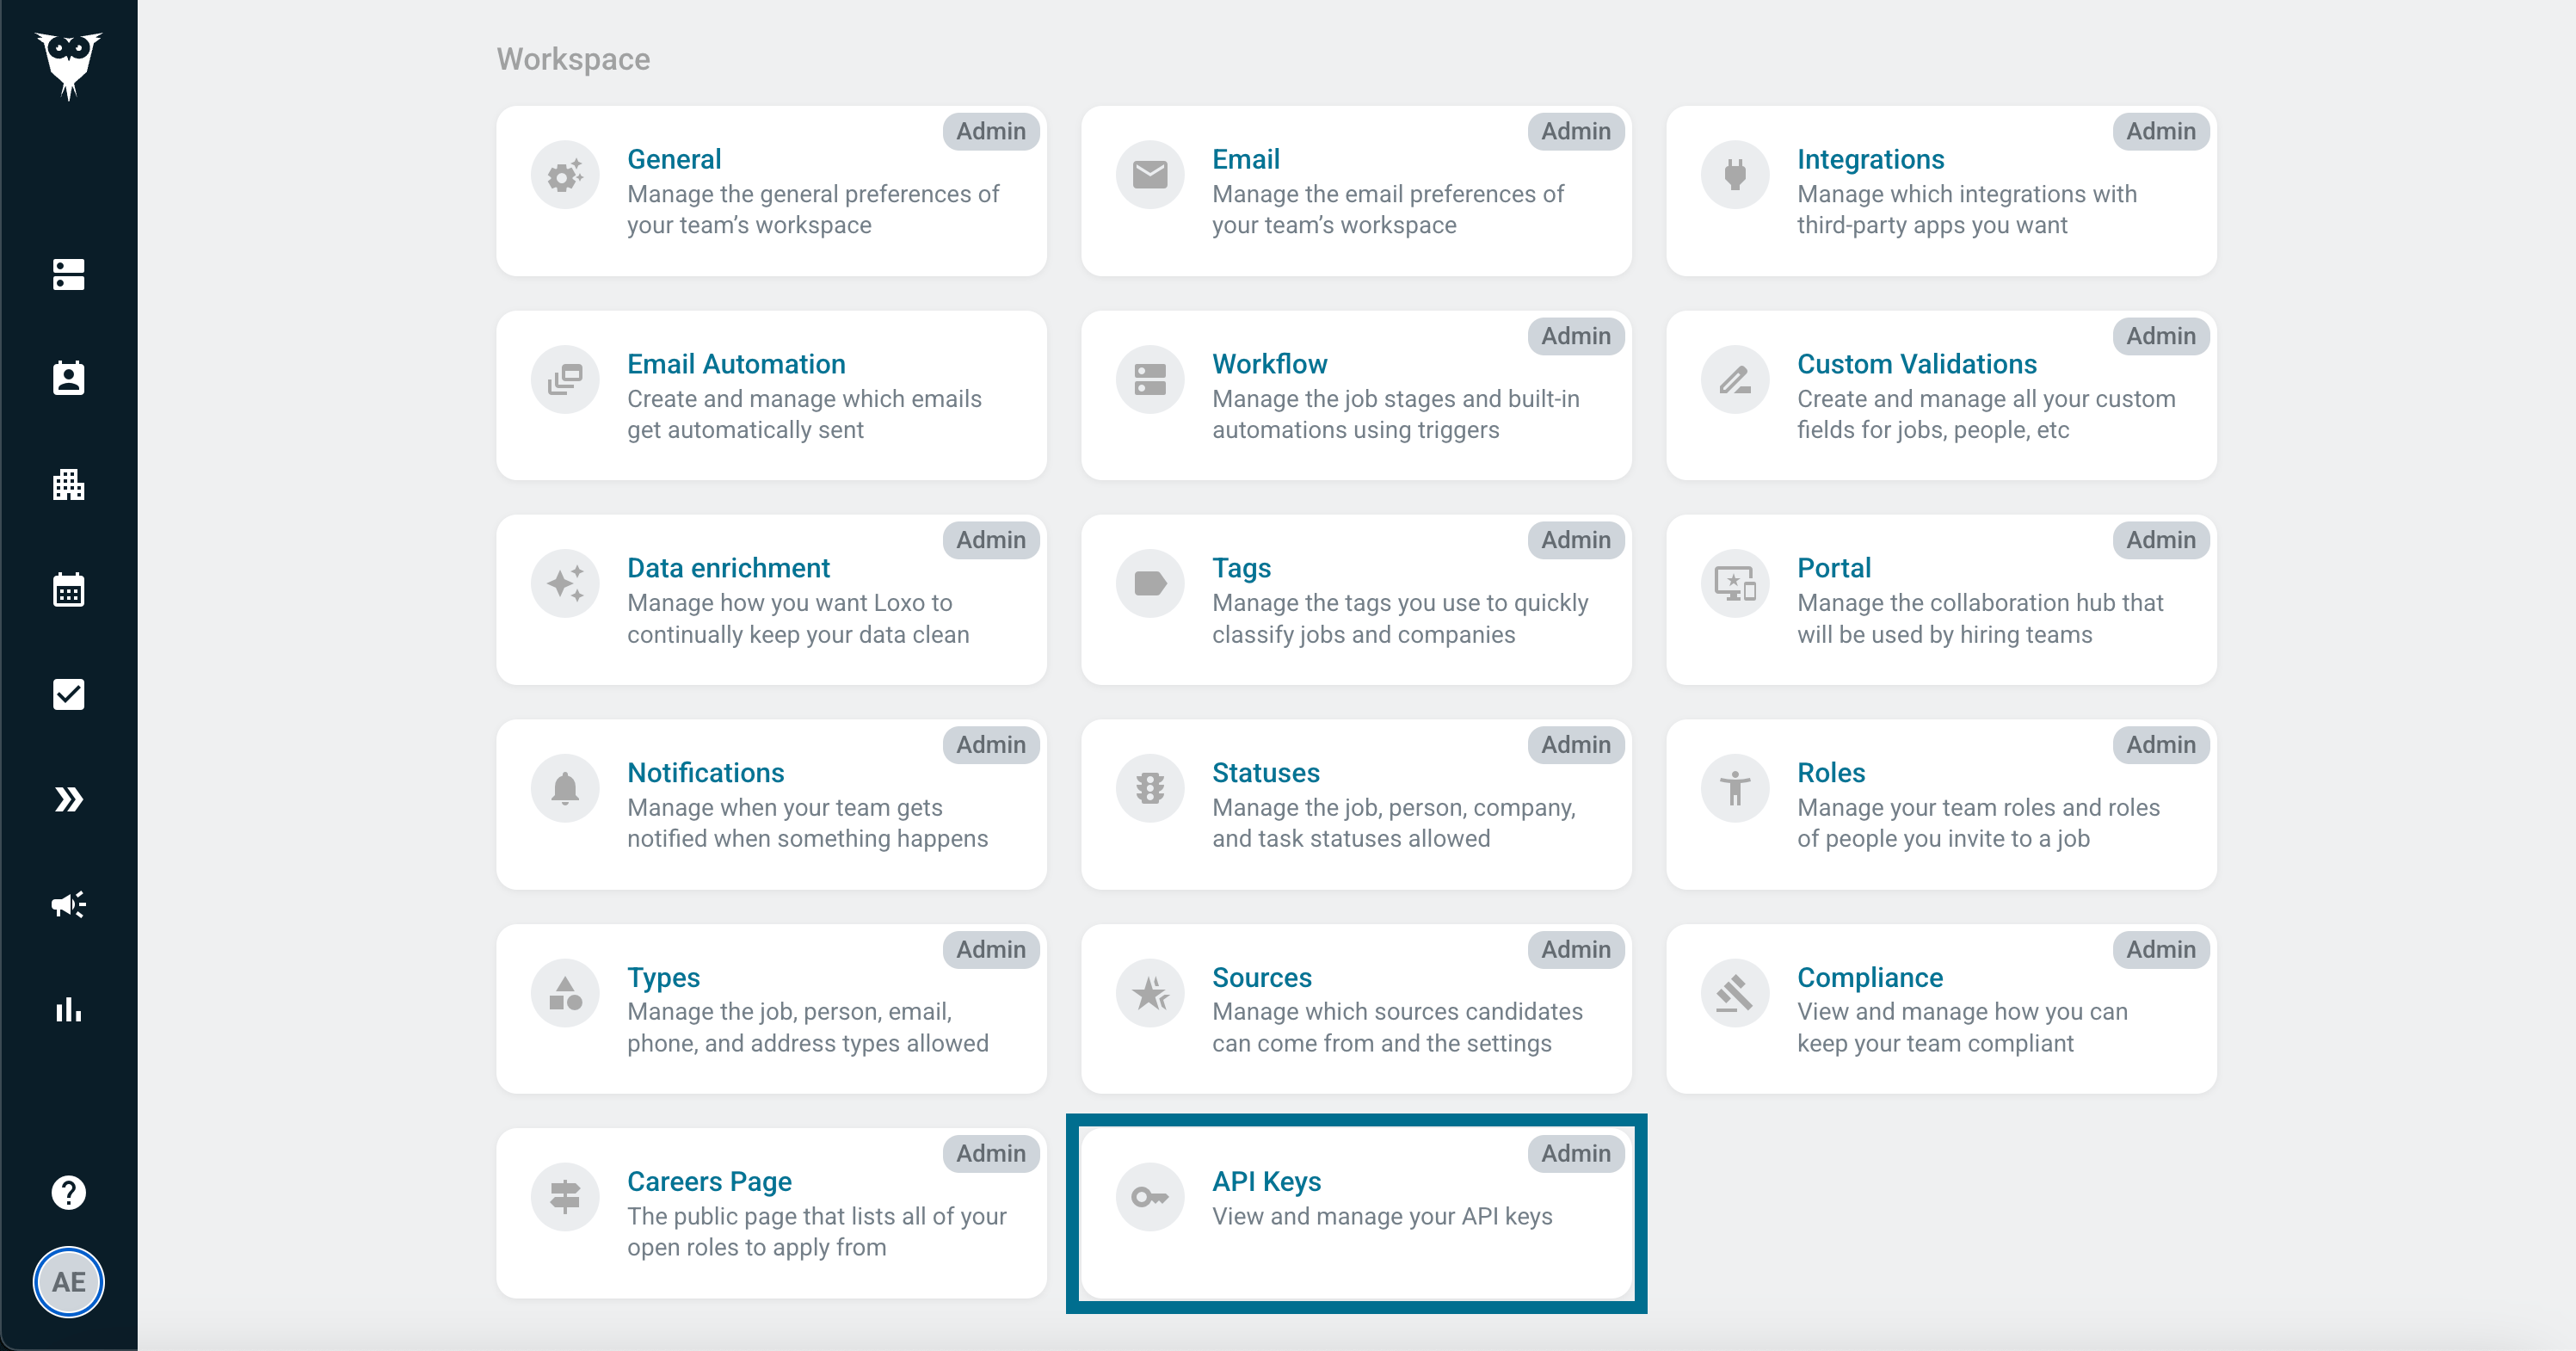
API domain from Loxo, sign in to that domain and create an API Key from the Settings > API Keys page.
2. Enter Your Credentials in Alex
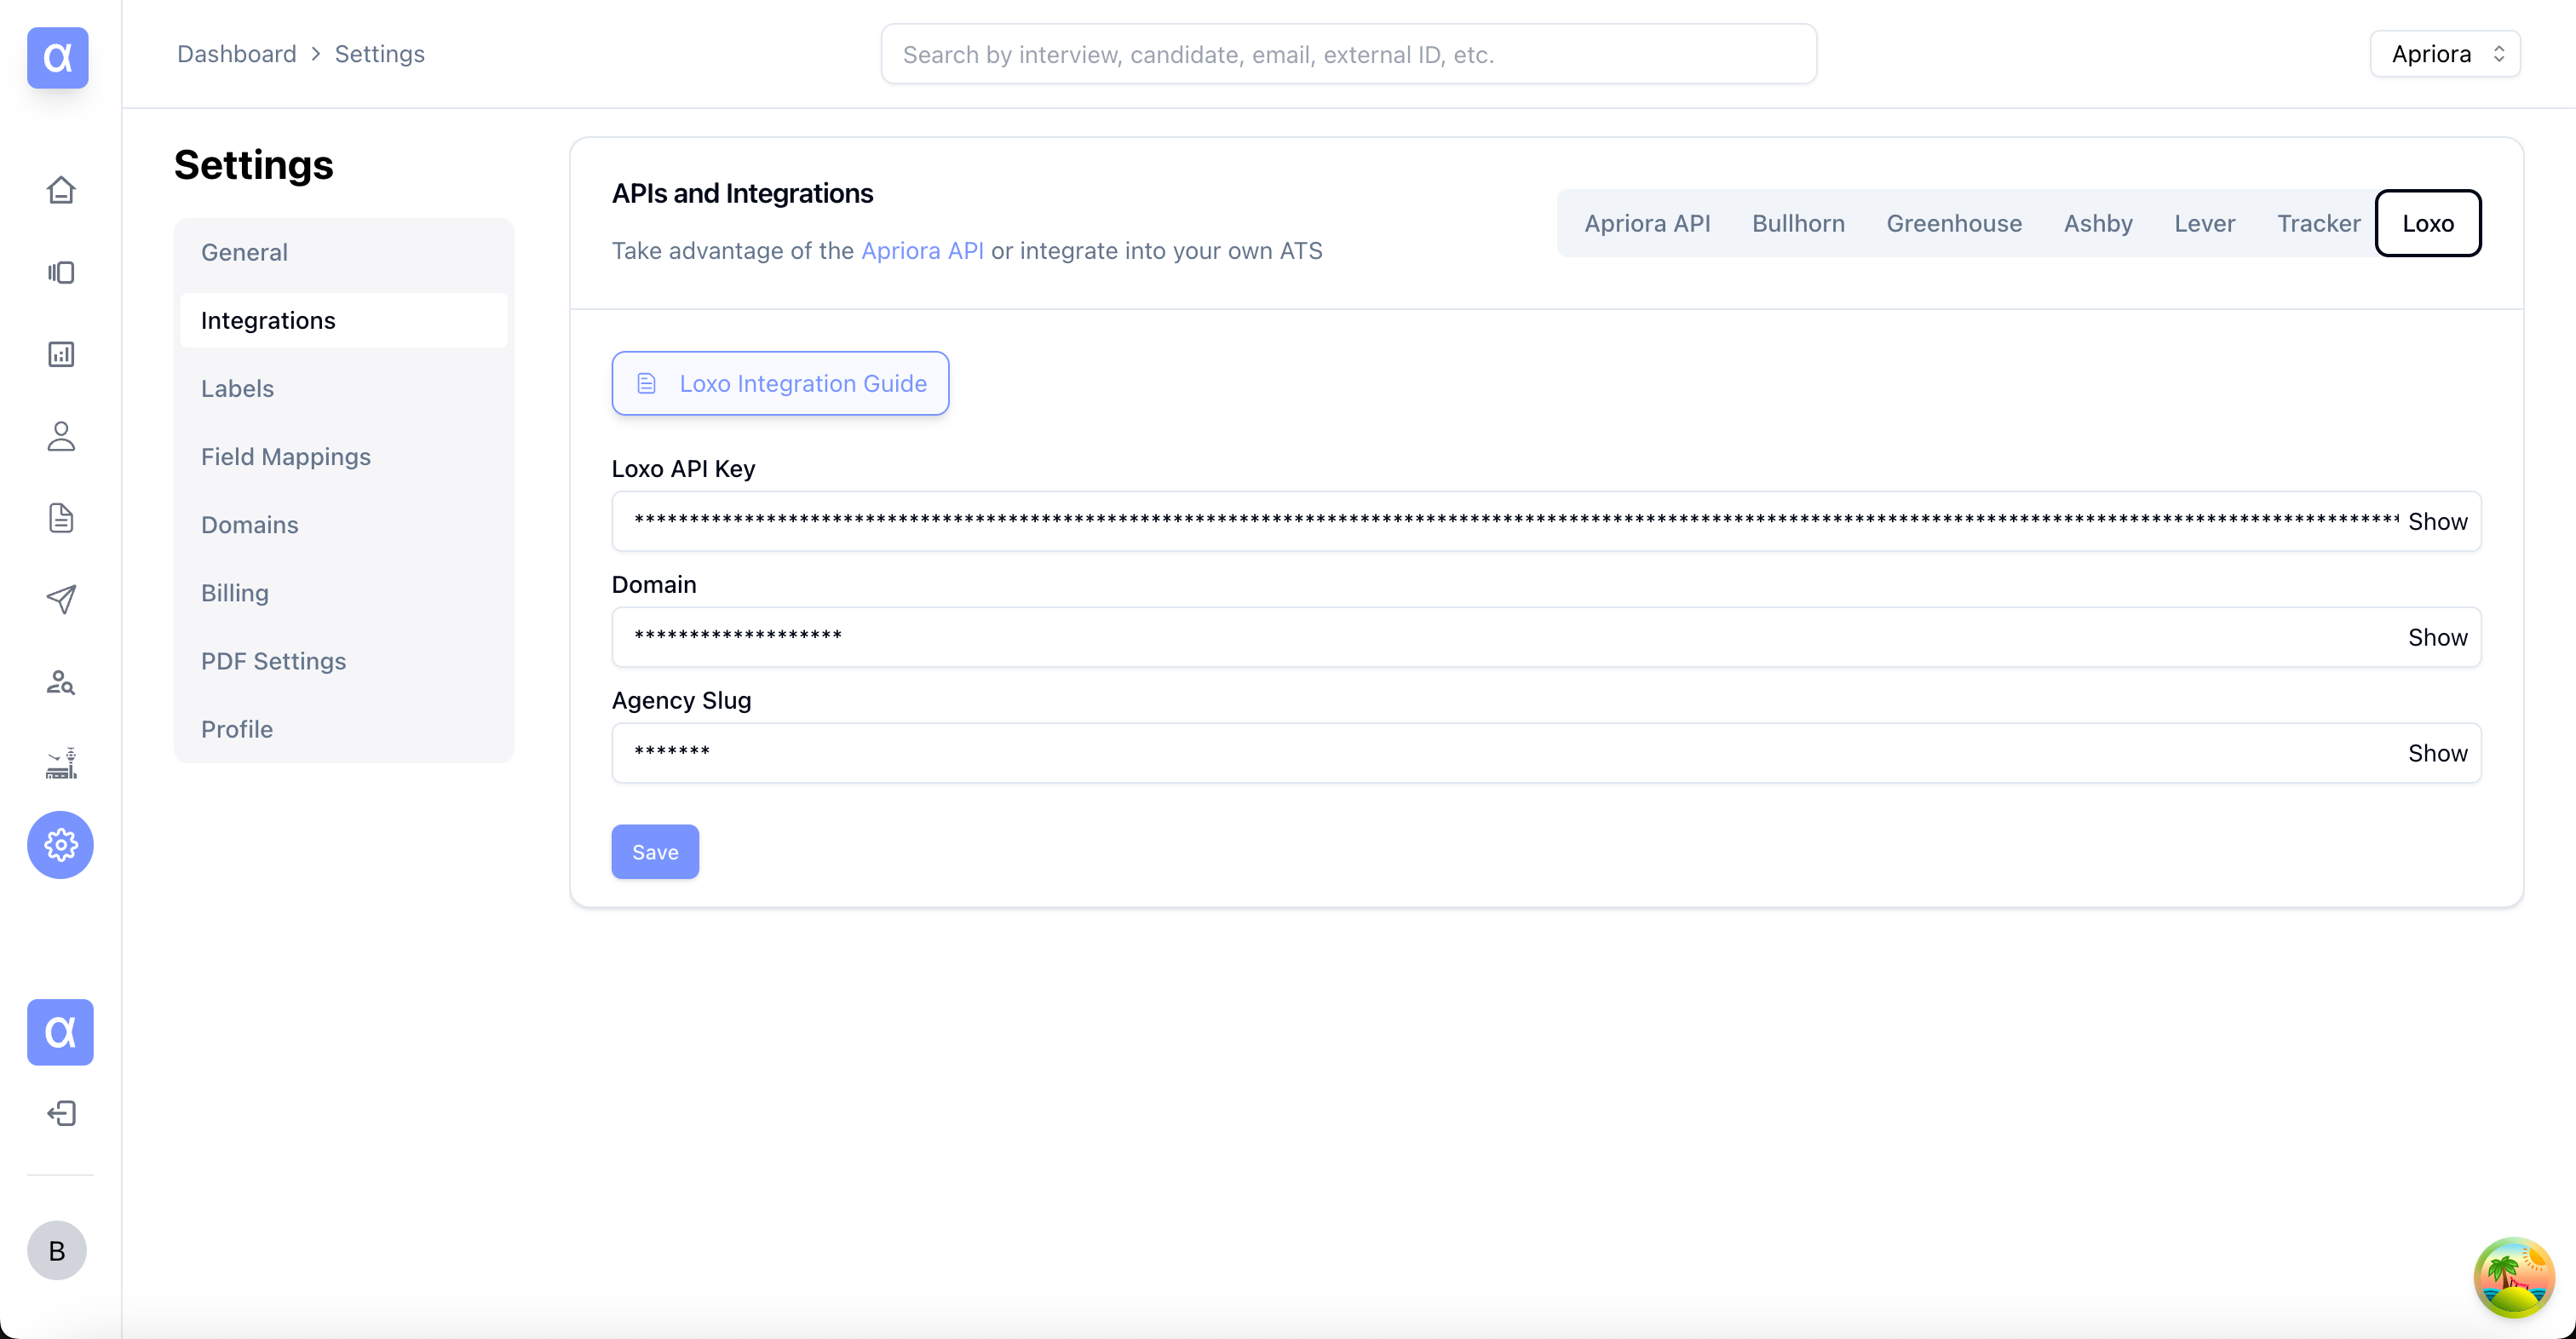
After you have your credentials, you can enter them into the Alex dashboard.- Navigate to Settings > Integrations.
- Select Loxo.
- Enter your Loxo API Key, Loxo Domain, and Loxo Agency Slug into the corresponding fields.
- Click Save.
app.loxo.co.