Overview
Our Salesforce integration provides the option to automatically create jobs and send out invites to candidates as you create records in your own Salesforce instance. In addition, upon interview completion, we provide the option to write the interview results to your Salesforce instance. Key Features of the Integration:- Automated Interview Generation: Alex can automatically generate an interview in Alex for each job that is created in Salesforce. The title of the job as well as the job description will be used to create the AI job interview.
- Automated Interview Invites: Alex can automatically send email or SMS invites and handle scheduling. She will also take into account any filtering you set so that you have the ability to control who gets invited.
- Automated Write Backs: Alex can write write back the interview results back to your Salesforce, totally configurable by you and your organization.
Prerequisites:
Salesforce is highly customizable in that you are able to create objects that can represent anything. In order to take full advantage of all of our automations, we need 3 main objects that have relations to one another. They are:- Job (ex:
Job__c) - Candidate (ex:
Candidate__c) - Job Submission / Candidate Application (ex:
Job_Submission__corJob_Applicant__c)
Steps to Integrate:
1. Create a Connected App
Next, you will need to create a Connected App. This connected app is how third party integrations like Alex, communicate with your application. To do so, go to “Setup” and in the “Quick Find”, search “App Manager”. \ Then, create a Connected App. In the Connected App setup, enable OAuth Settings and in the “Selected OAuth Scopes” section, add “Access the Salesforce API Platform (sfap_api)” scope. For the callback URL, usehttps://app.alex.com/
2. Decide on your Authentication Method
The two methods of authentication we support are the Client Credentials Flow and Username/Password Flow. Client Credentials Flow is better practice as it is exposes less credentials and is tied to the connected app, not a specific user. While this is preferred, we also support Username Password Flow just in case of any special circumstances.2a. Client Credentials Flow
In order to set this up, simply navigate to your Connected App and under “API (Enable OAuth Settings), check the box the says “Enable Client Credentials Flow”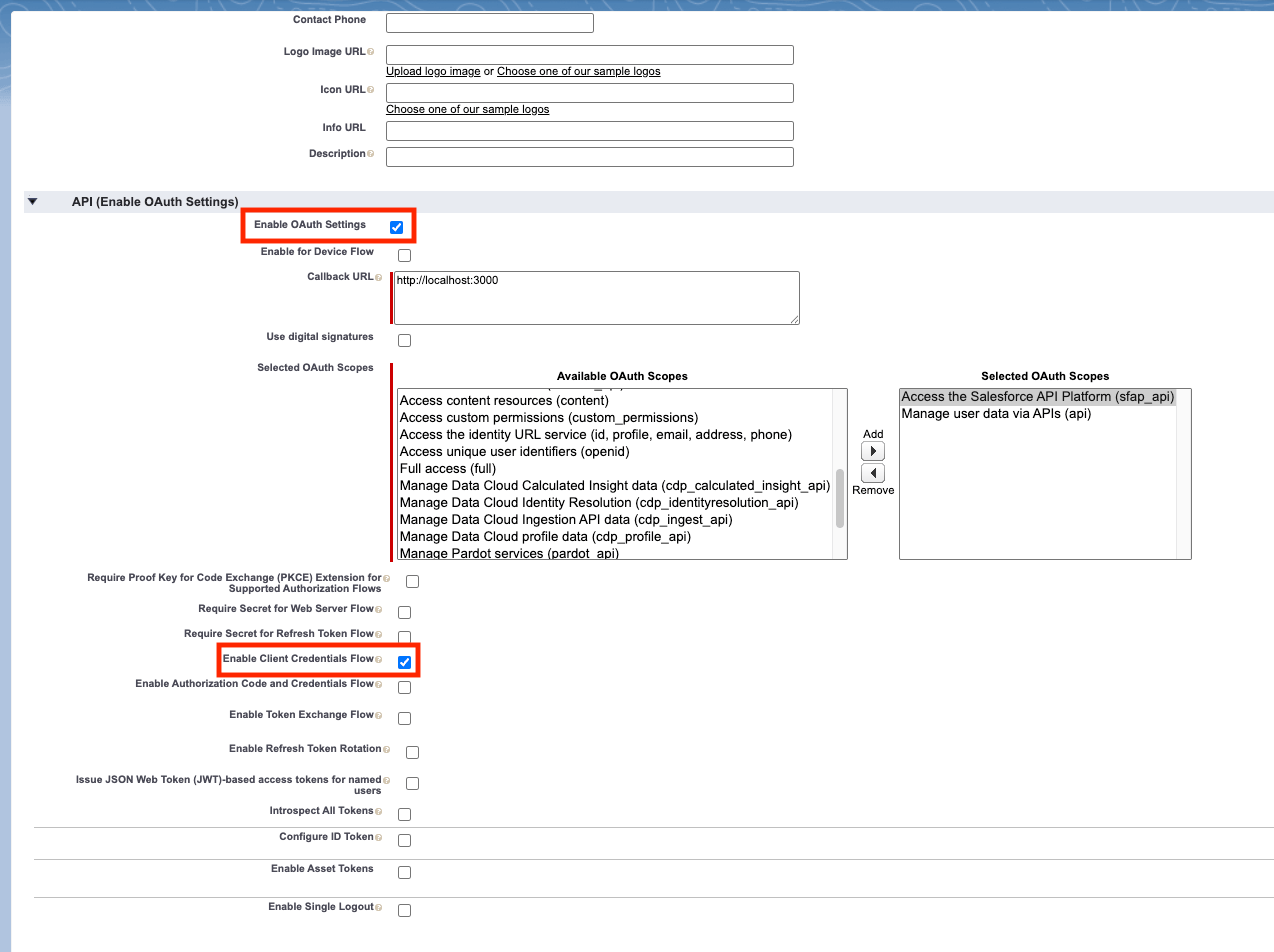
2b. Username Password Flow
This API user is what we will use to read/write data to your Salesforce instance. You can do this by first navigating to the “Object Manager” in “Setup” and then searching “User” in the “Quick Find” search bar on the left hand side. When you create a new user, you will see this menu, where you should ensure that the User License and Profile are “Salesforce Integration” and “Salesforce API Only System Integrations”, at the minimum.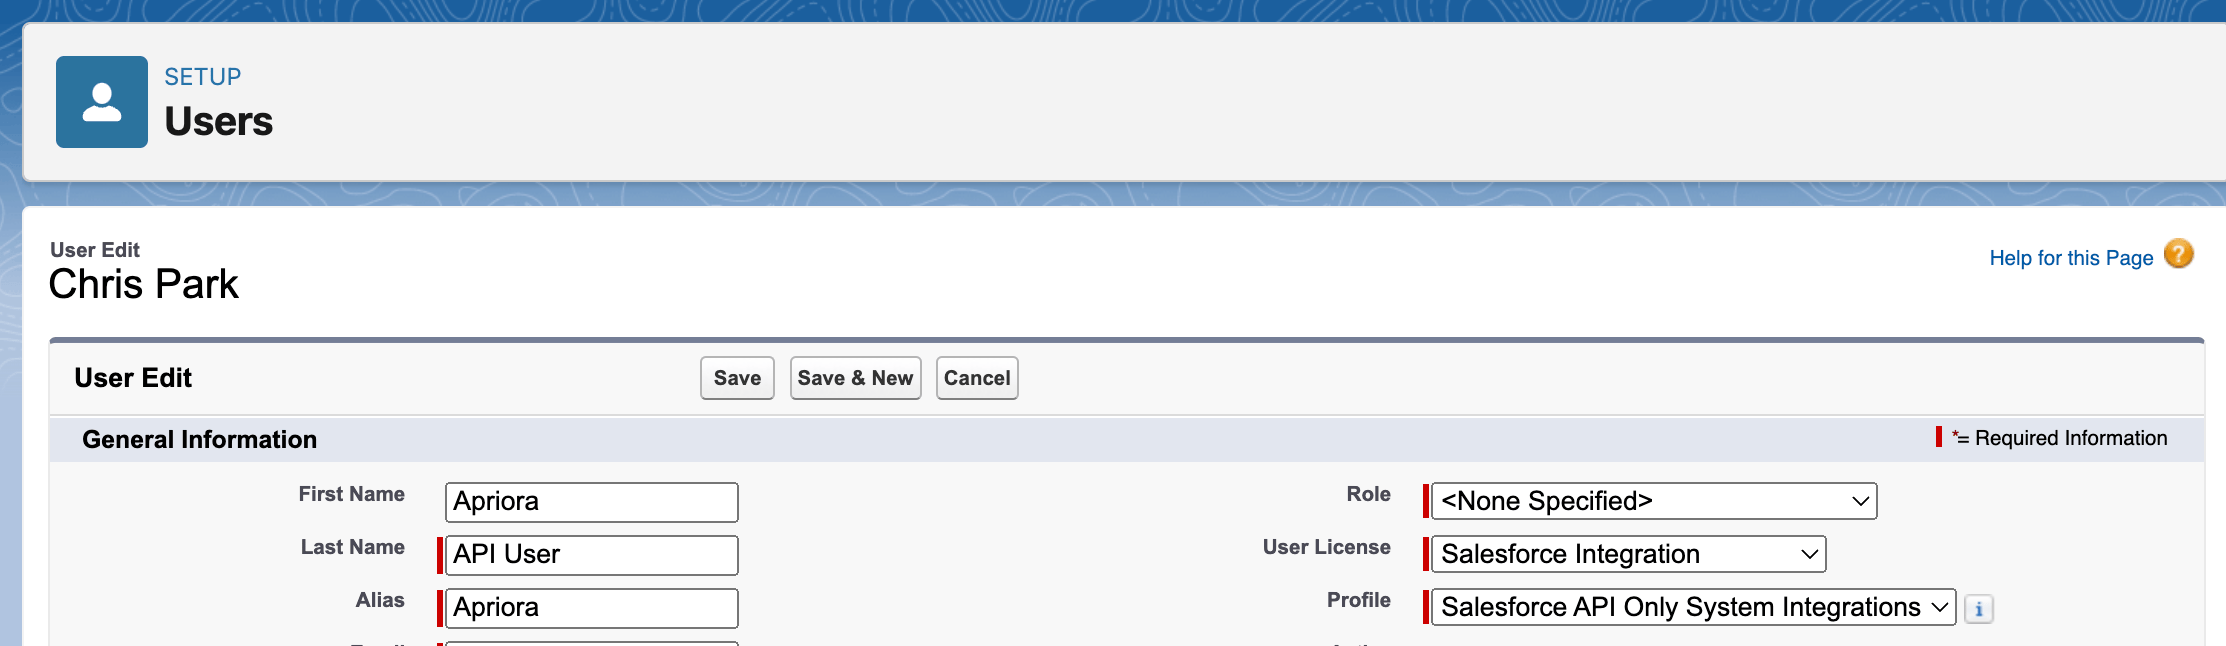

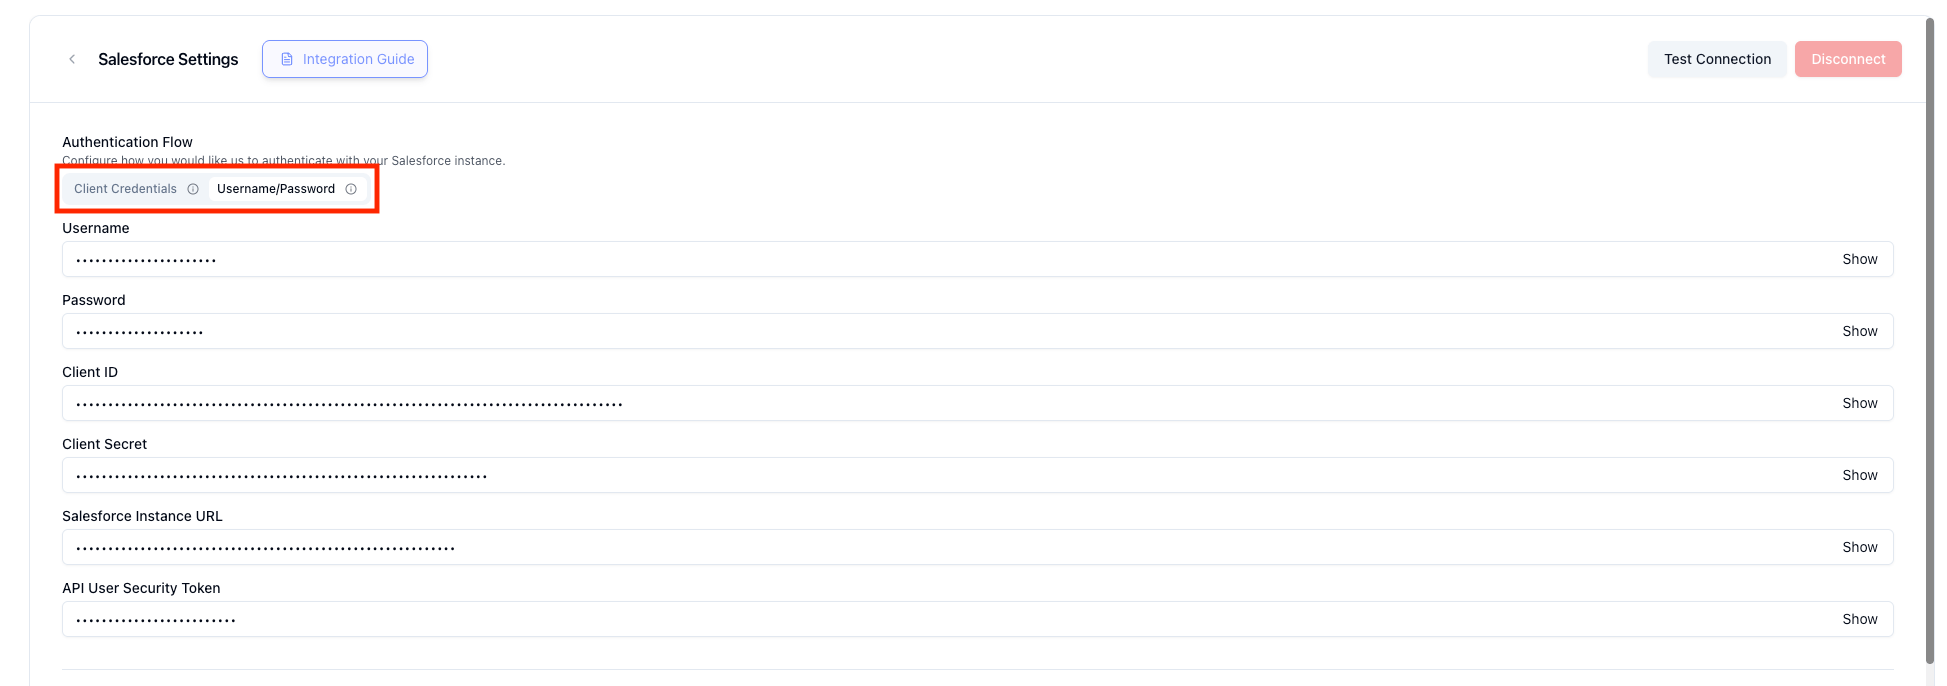
3. Add Your Credentials to the Alex Settings
Here, you will see the option to configure a Client Credentials Auth Flow or a Username/Password Auth Flow. This specific example is using Username/Password, thus why all the fields are filled out. For Client Credentials Flow, all you will need to provide are the consumer key, consumer secret, and Salesforce instance url.