

Overview
Alex connects to your Workday instance through Kombo, our unified integration provider. You create a dedicated Integration System User (ISU) and API client in Workday, configure the assessment statuses Alex uses, then authorize the connection through Kombo from Alex’s Settings page. The ISU credentials are supplied to Kombo during the connection — they are no longer entered directly into Alex. OAuth 2.0 is required. There are three main steps to configuring the Workday Integration:Workday Security Configuration
Create the Integration System User (ISU)
First, you’ll need to create a dedicated Integration System User in your Workday tenant. Log in to your Workday tenant with administrator credentials and search for Create Integration in the Workday search box. Select the Create Integration System User task.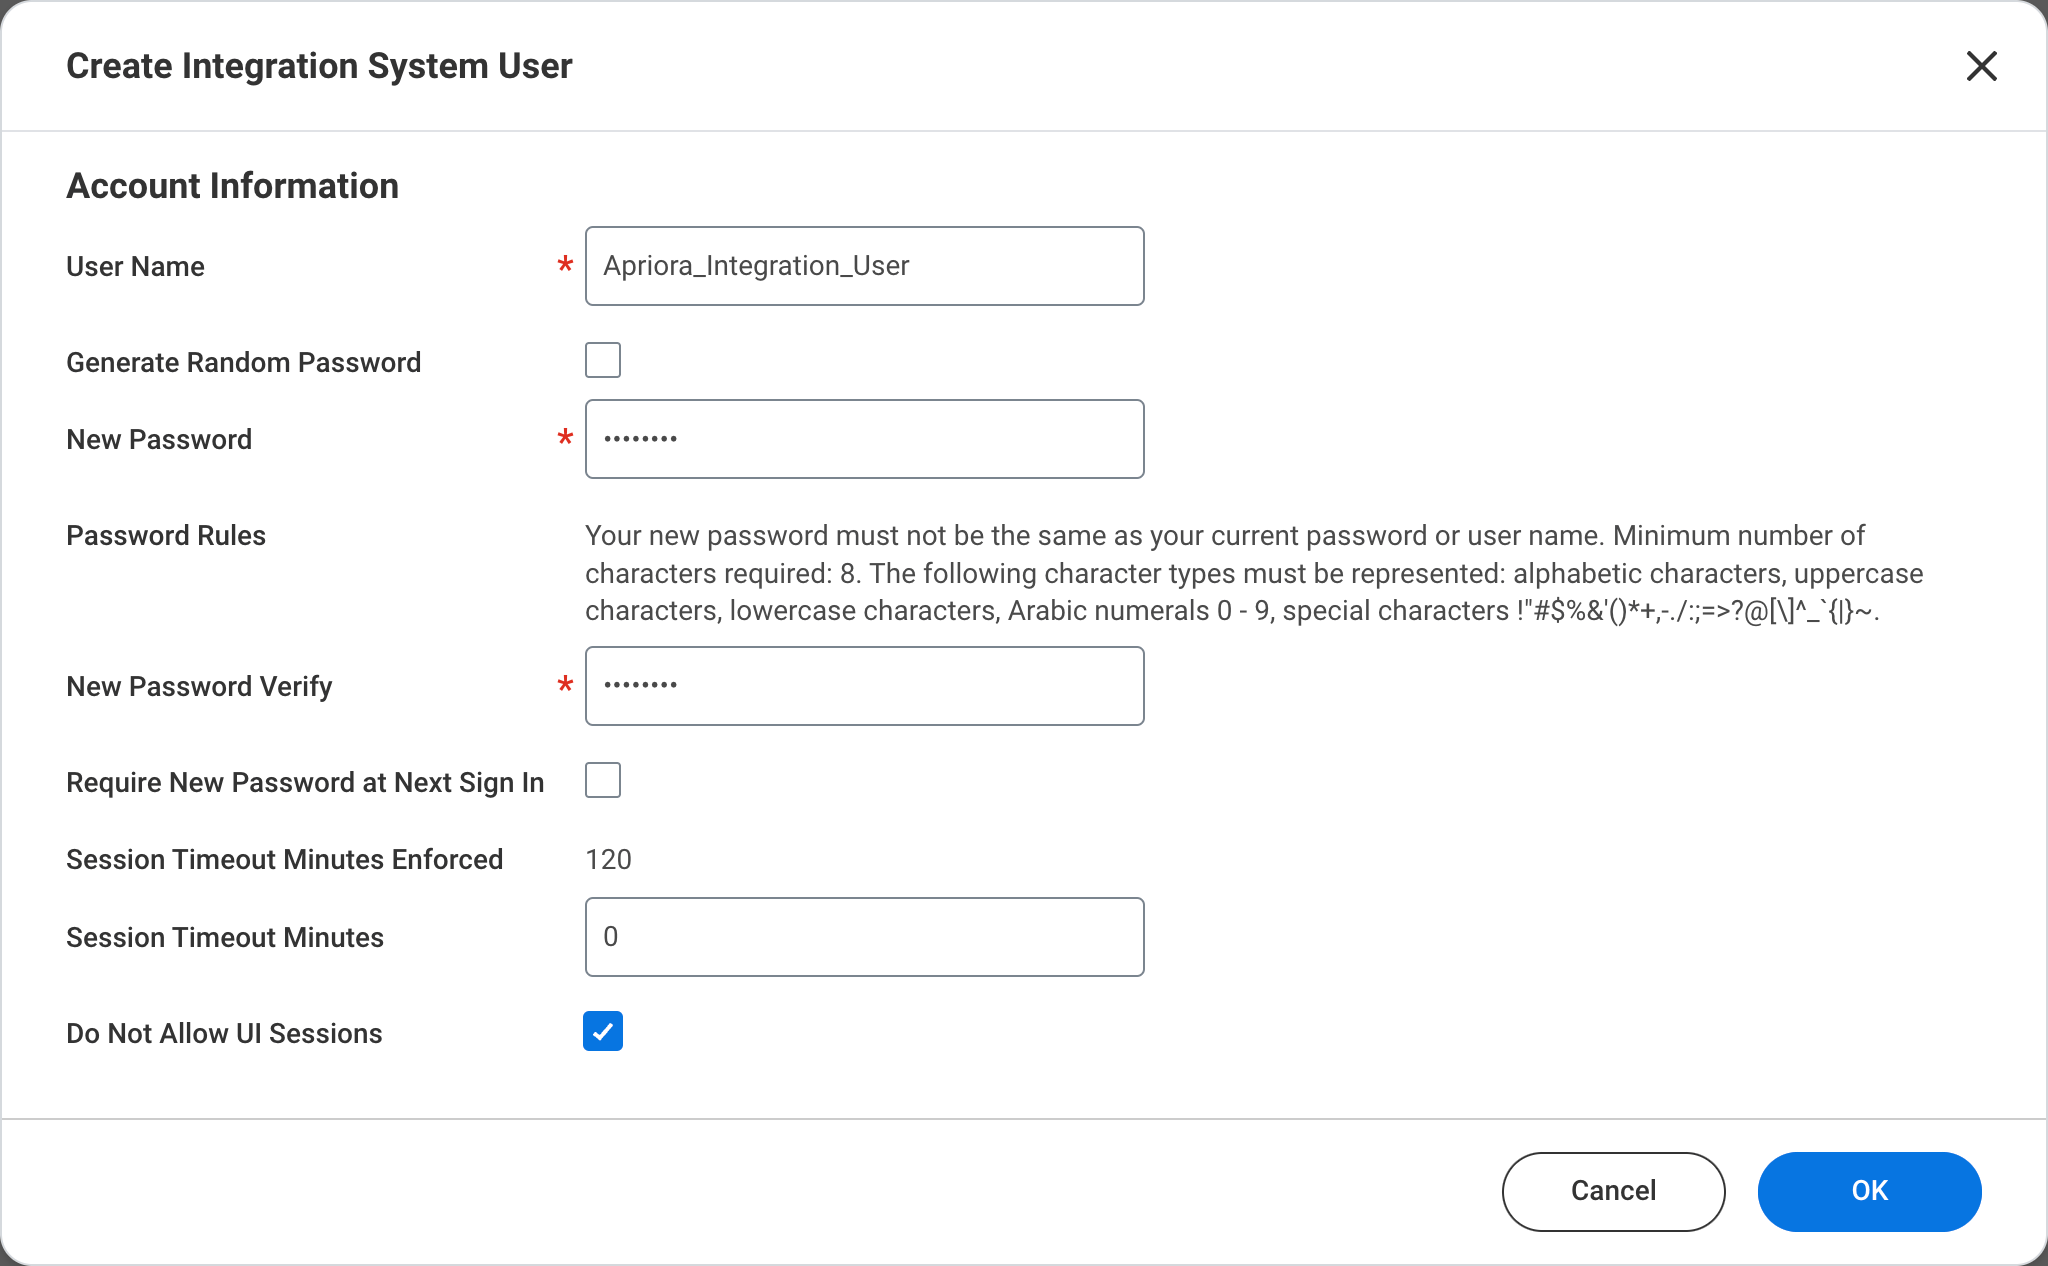
- Name the user
Alex_Integration_User. - When creating the password, avoid using special characters like
&,=,?,%,/, and\. - Make sure that the Require New Password at Next Sign In box is not checked.
- Make sure the Session Timeout Minutes is set to
0. - Check the box, Do Not Allow UI Sessions to prevent the integration user from logging in to Workday using a web browser.
- Click OK and then Done to create the user.
To avoid integration errors caused by expired passwords, Workday recommends
that you prevent Workday passwords from expiring. Access the Maintain
Password Rules task and add the Alex ISU to the System Users exempt from the
password expiration field.
Create a Security Group
Next, create a security group and assign your Integration System User to it. Search for Create Security Group in the Workday search box and select the task.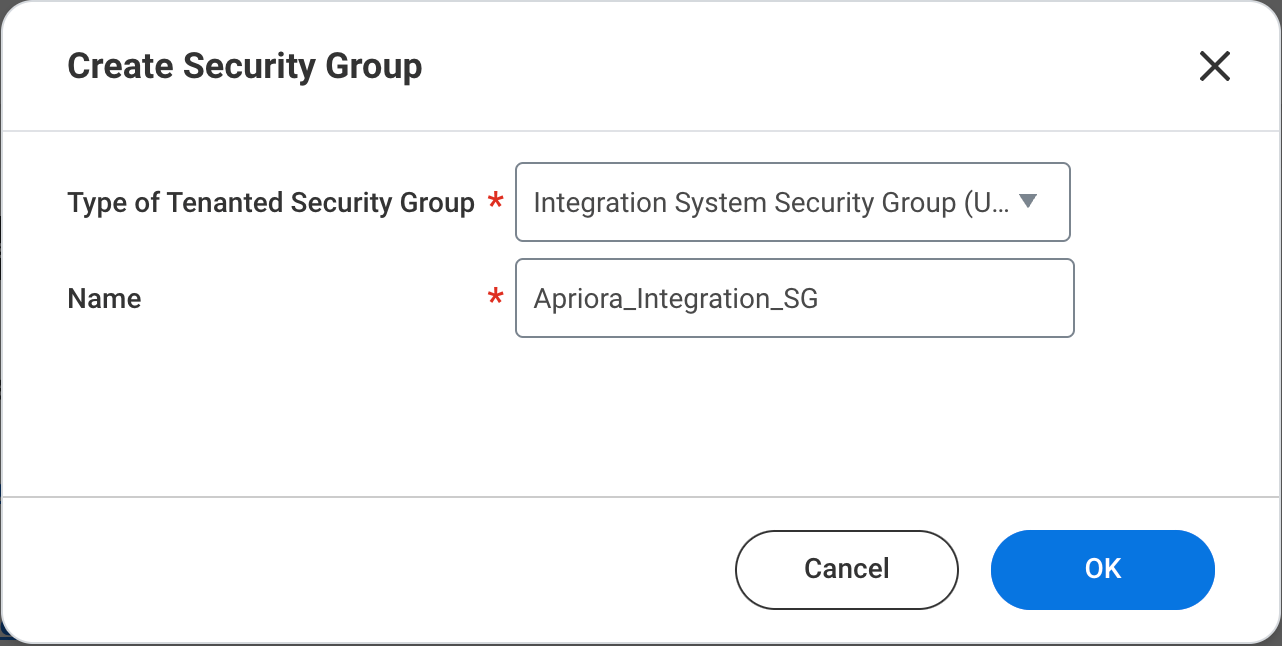
-
Select the type as
Integration System Security Group (Unconstrained). -
Name the group
Alex_Integration_SG. -
Click OK to create the group.
-
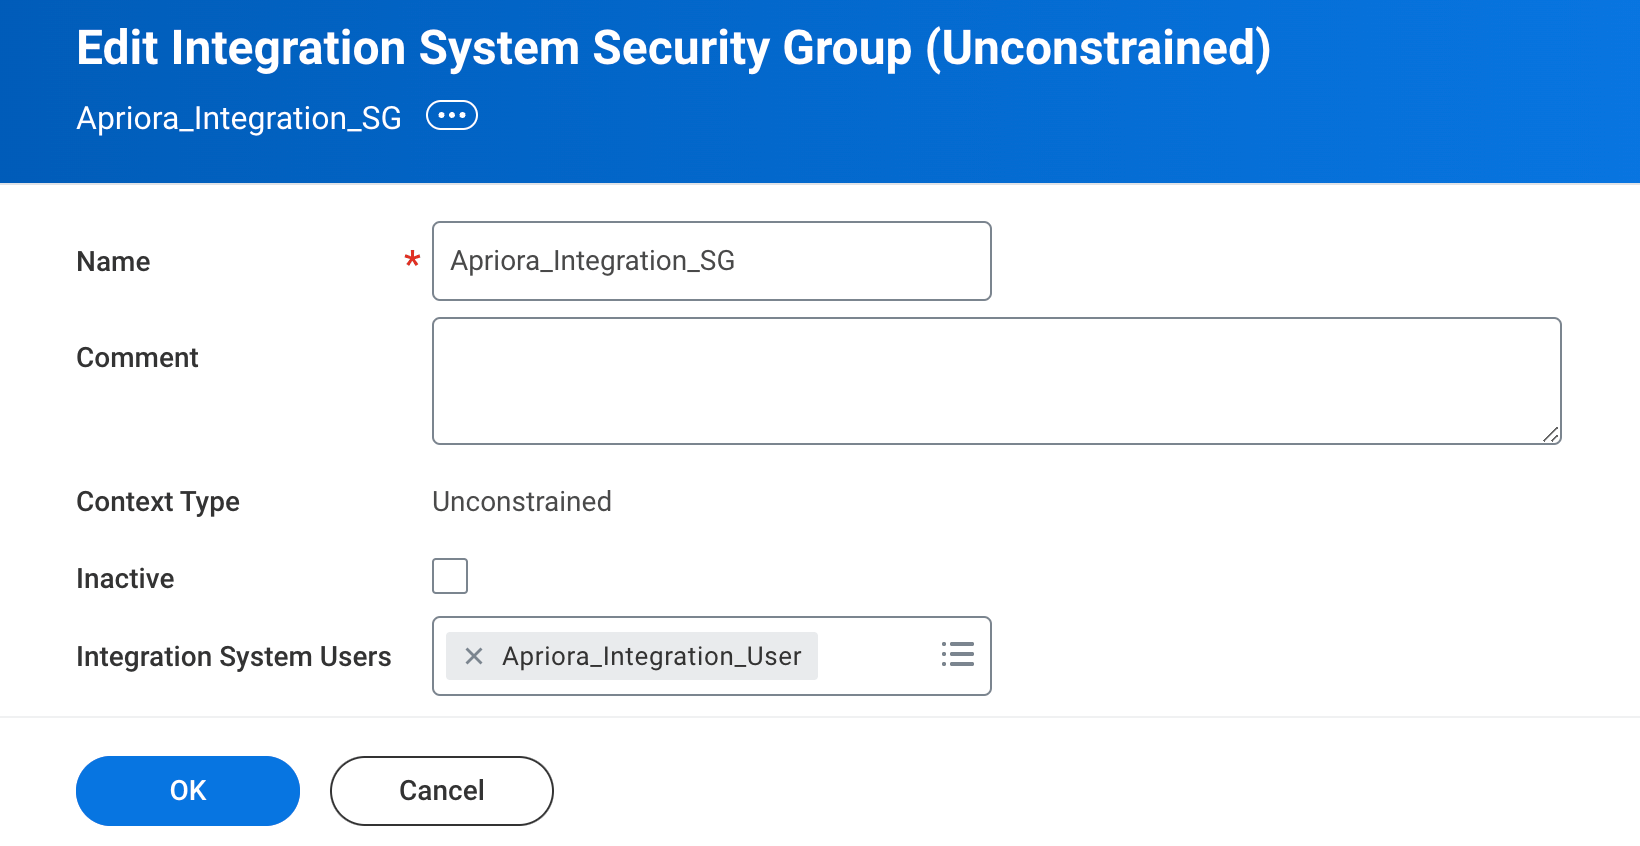
In the Edit Integration System Security Group (Unconstrained) screen, make sure the ISU account
Alex_Integration_Useris included in the security group. - Click OK, then Done.
Assign Domain Security Policies
Then, you need to assign the required permissions to the security group you just created. There are three domains that require permissions. These are the minimum permissions required for the integration to work:
For each domain you must do the following:
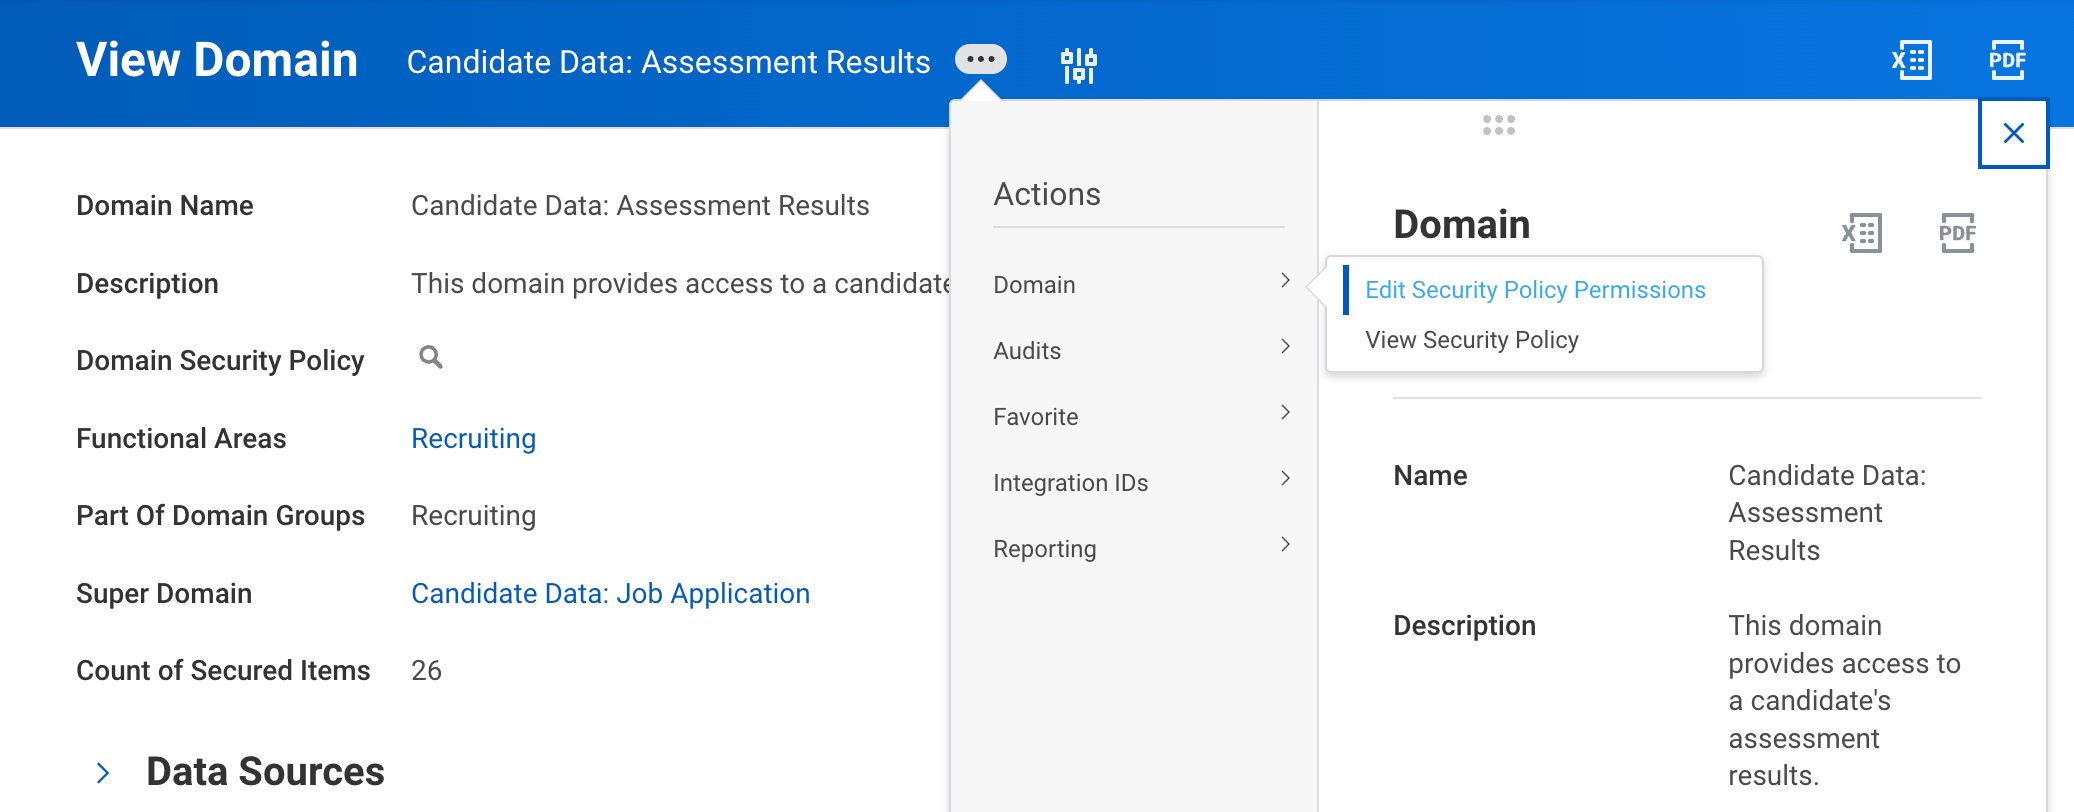
- Find the domain using the View Domain report.
-
Using the related actions, go to Domain > Edit Security Policy Permissions.
-
Using the
+button in the top left of the Integration Permissions table, add the security group you just created as a new row with the appropriate Get and Put permissions. -
Click OK to save the changes.
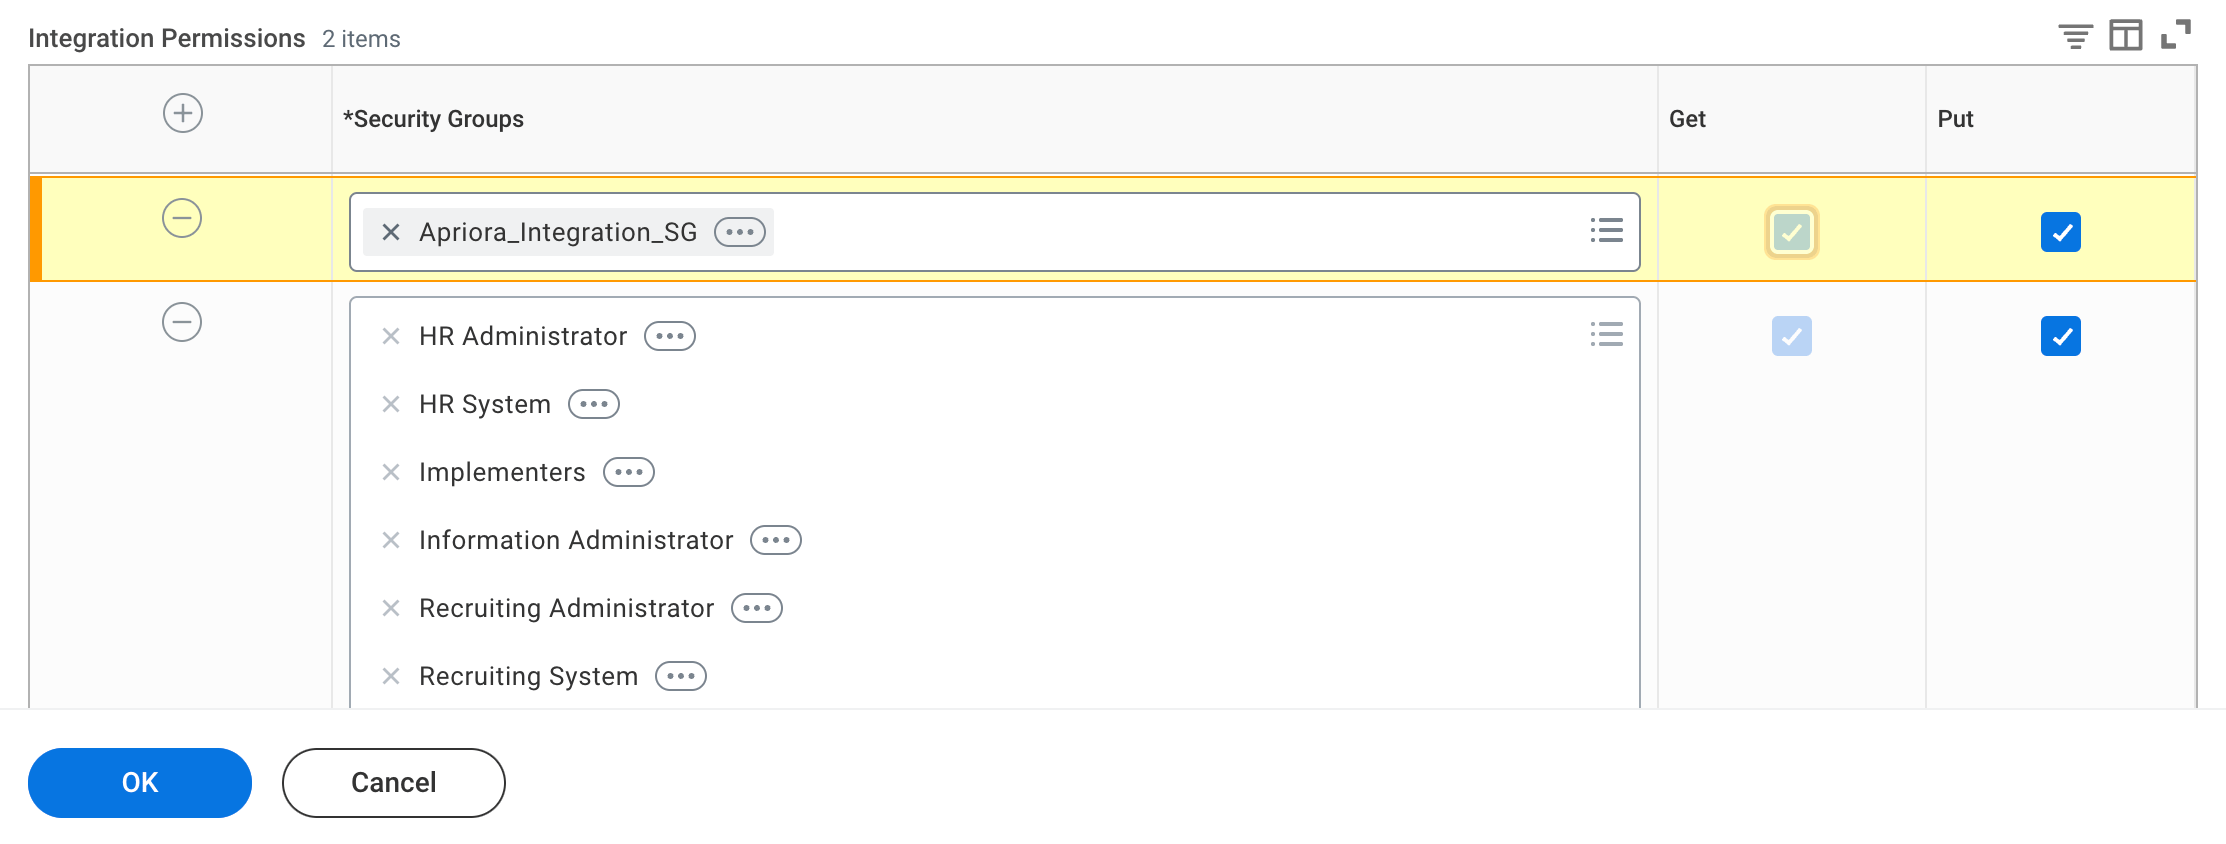
Activate Security Policies
After updating the security policies to all of the domains in the table above, you need to activate your security policy changes.- Go to the Activate Pending Security Policy Changes task.
-
Enter a description of the changes and click OK to review the policies.
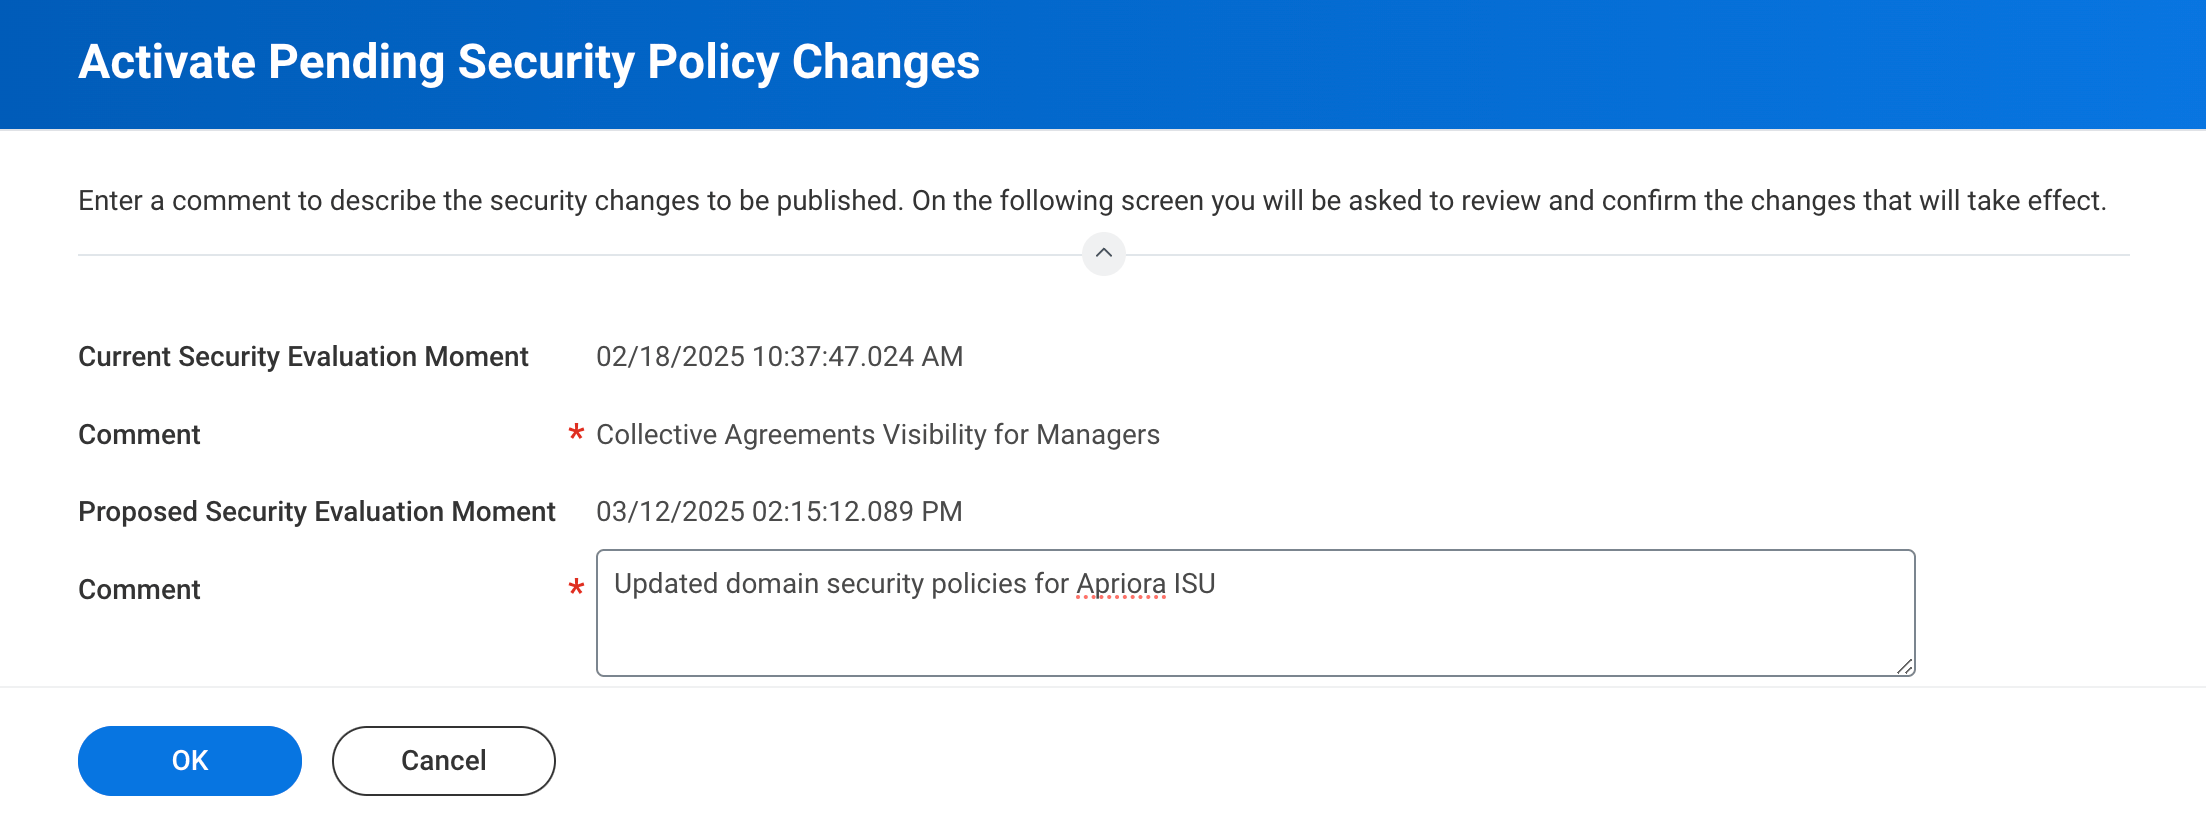
-
Check the Confirm box and click OK to activate the policies.
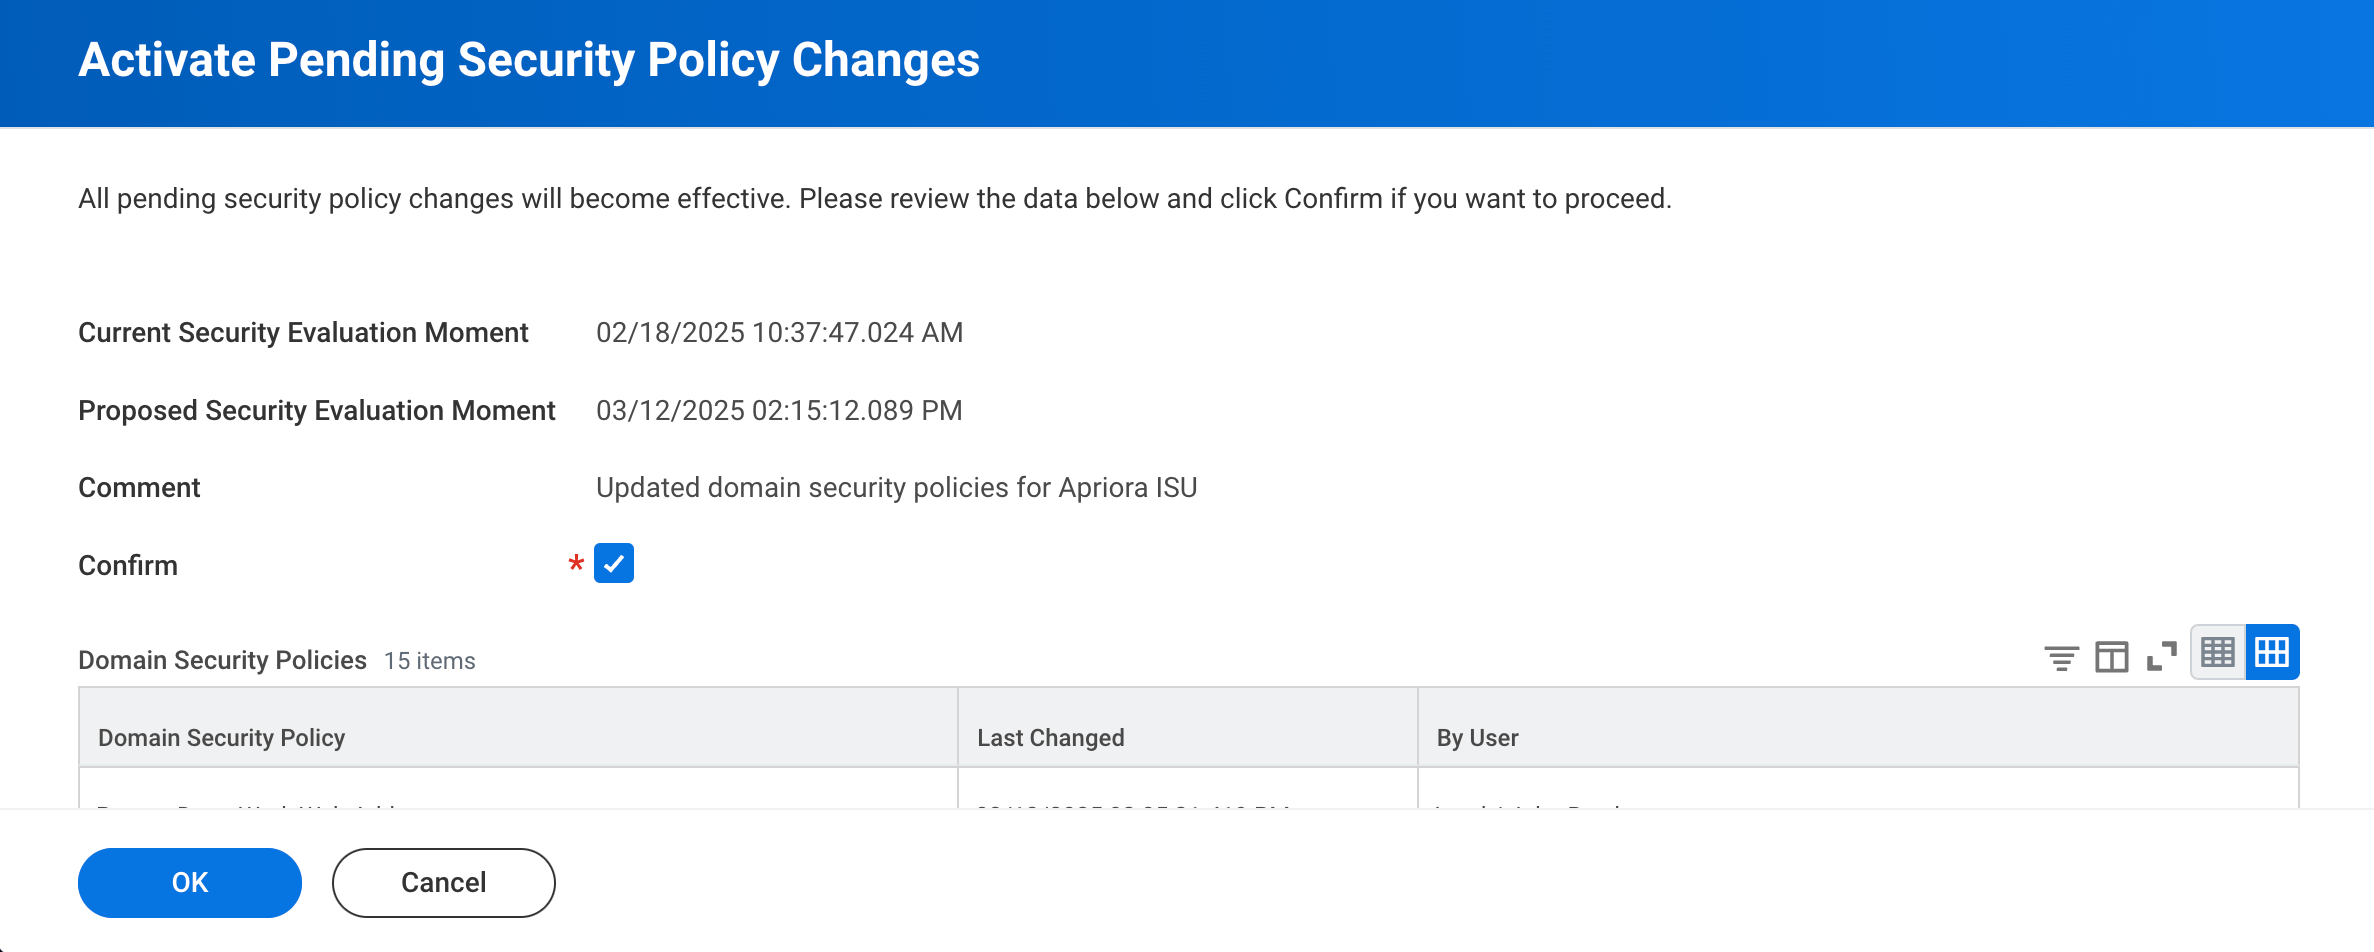
Register the API Client
OAuth 2.0 is required for this integration. If you don’t have it enabled for
your tenant, an admin can enable it via the Edit Tenant Setup - Security
task, and checking the OAuth 2.0 Clients Enabled checkbox under the
OAuth 2.0 Settings.
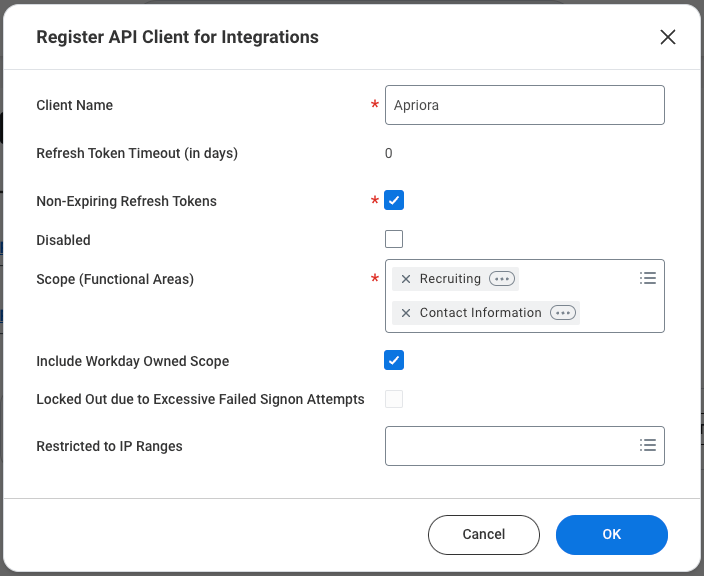
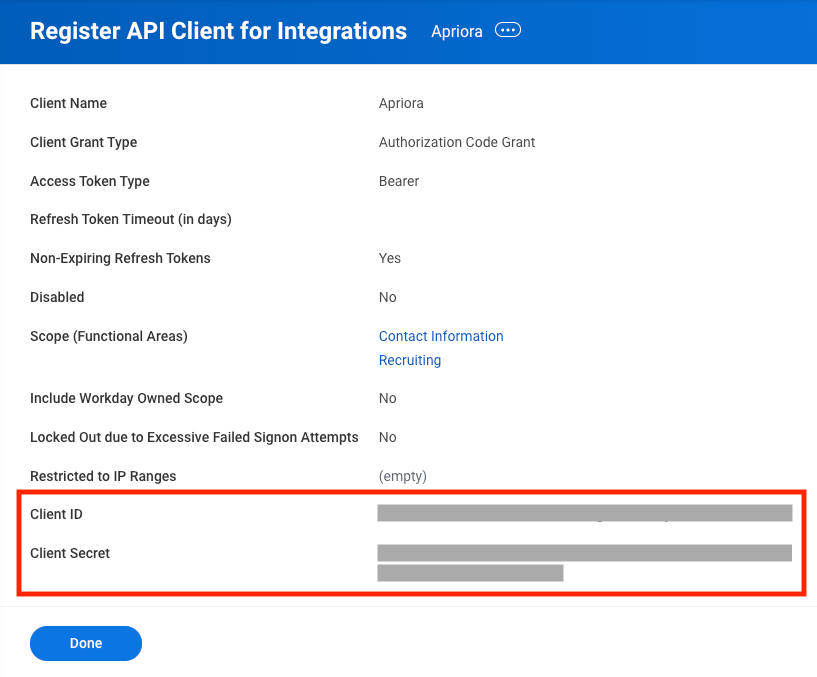
- Set the Client Name as
Alex. - Make sure that the Non-Expiring Refresh Tokens box is checked and the Refresh Token Timeout is set to
0. - Set the Scope (Functional Areas) to contain
Contact InformationandRecruiting. - Make sure that the Include Workday Owned Scope box is checked.
- Click OK to register the API Client.
- Before clicking Done, copy and store the Client ID and Client Secret somewhere (You can only view the Client Secret once, at the time of creation).
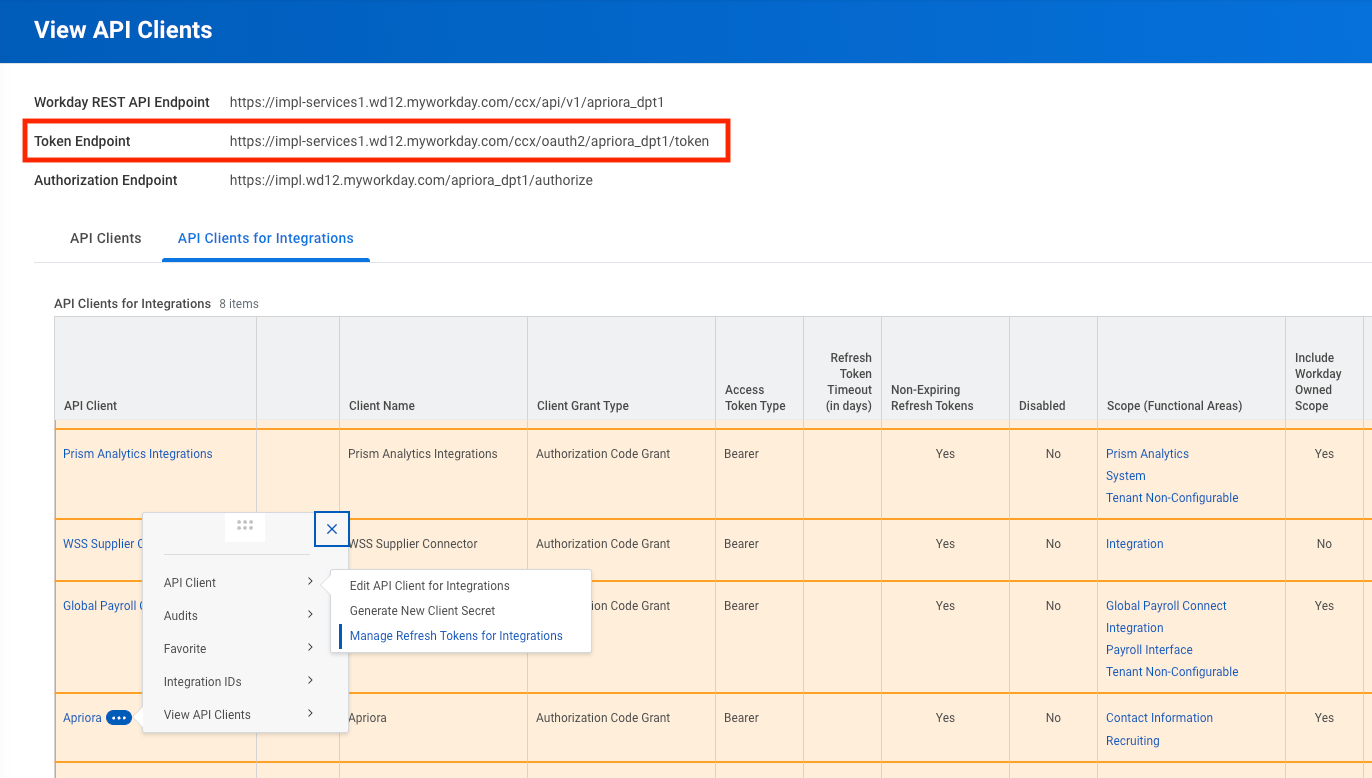
- After clicking Done you should be taken to the View API Clients screen.
- Copy and store the Token Endpoint thats visible at the top of the screen.
- Make sure you are in the API Clients for Integrations tab, and locate the
Alexrow. - Using the related actions, go to API Client > Manage Refresh Tokens for Integrations.
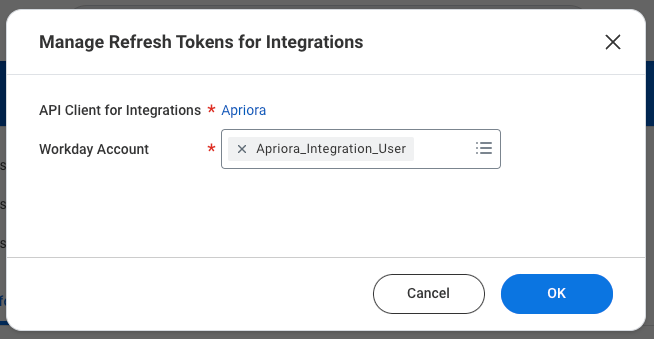
- For the Workday Account, select the
Alex_Integration_Useryou just created. - Click OK.
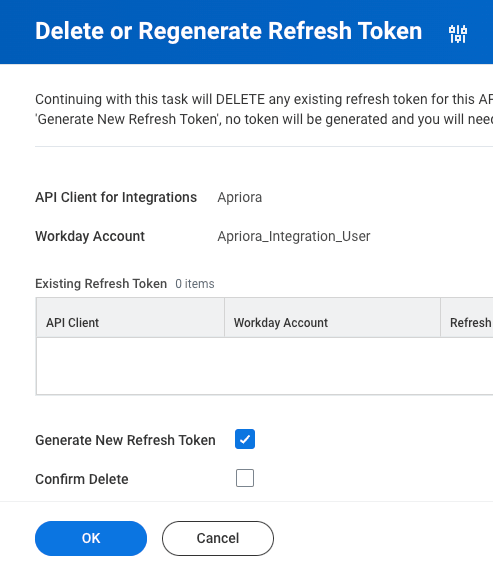
- Check the Generate New Refresh Token box.
- Click OK.
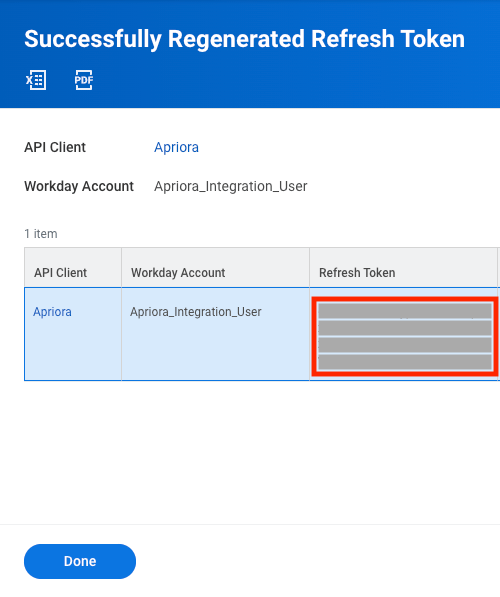
- Copy and store the new
Refresh Tokenfrom the table.
Workday Assessment Configuration
Setup Statuses
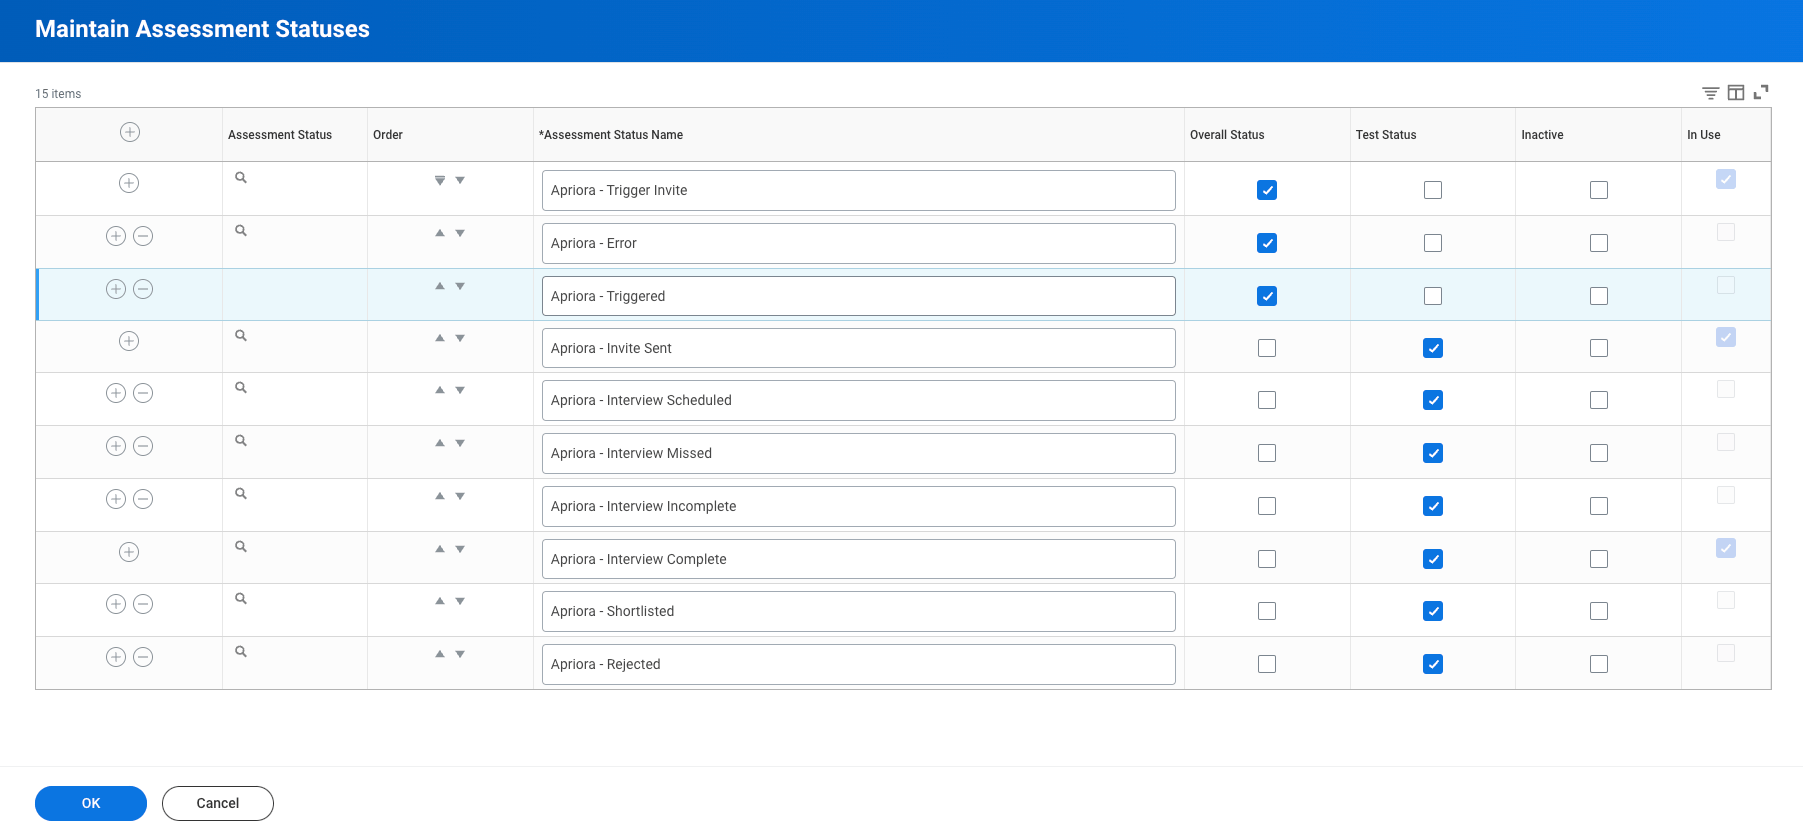
The next step is to setup the assessment statuses in Workday. The Overall Status relates to the current state of the Candidate’s interview, while the Test Status is used once the interview is completed and evaluated. You will need to create the following statuses:- Go to the Maintain Assessment Status task.
-
Click on the
+button at the top to add new statuses. - Add each status from the table above using the given name, and status type.
-
Click OK to save the new statuses.
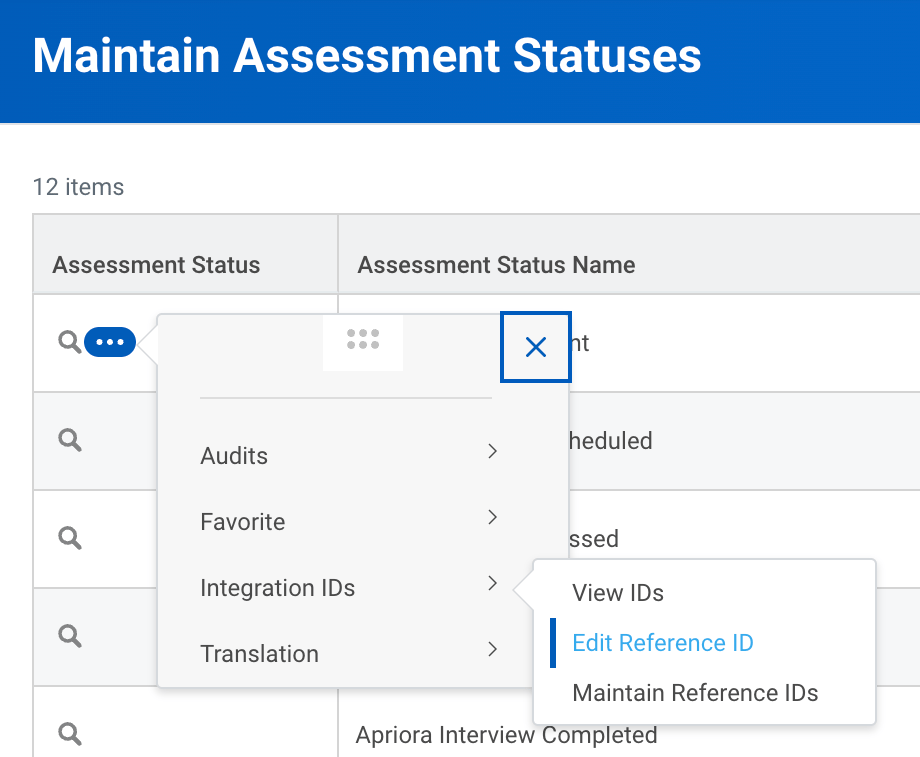
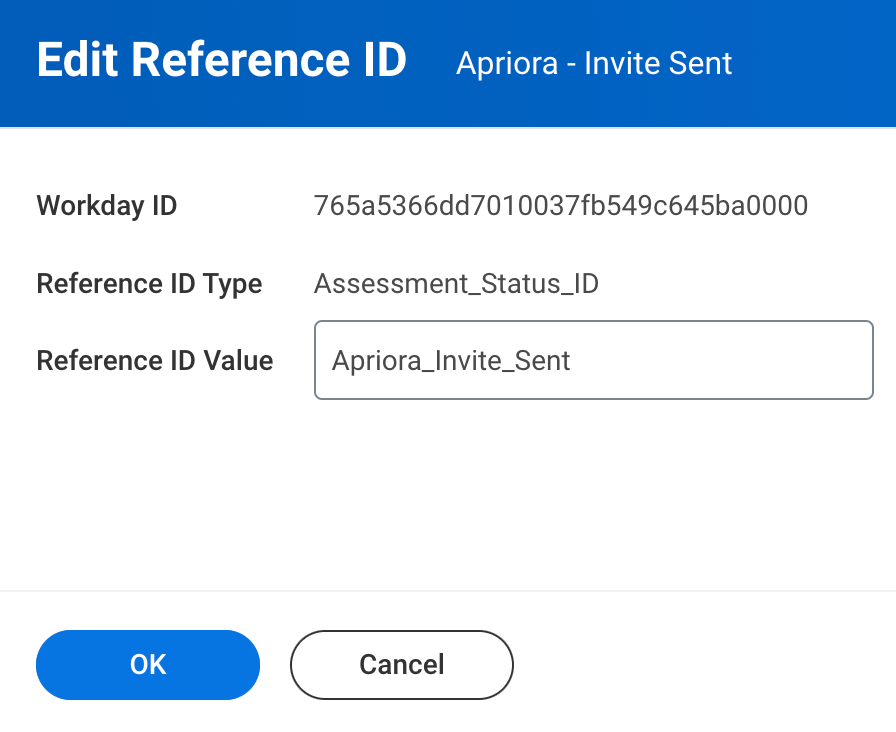
- Using the related action, go to Integration IDs > Edit Reference ID.
- For the given status, copy and paste the reference ID from the table above into the Reference ID Value field.
- Click OK to save the changes.
Setup Assessment
Now you will need to setup the Alex assessment in Workday. You can use this using the Maintain Recruiting Assessment Tests task.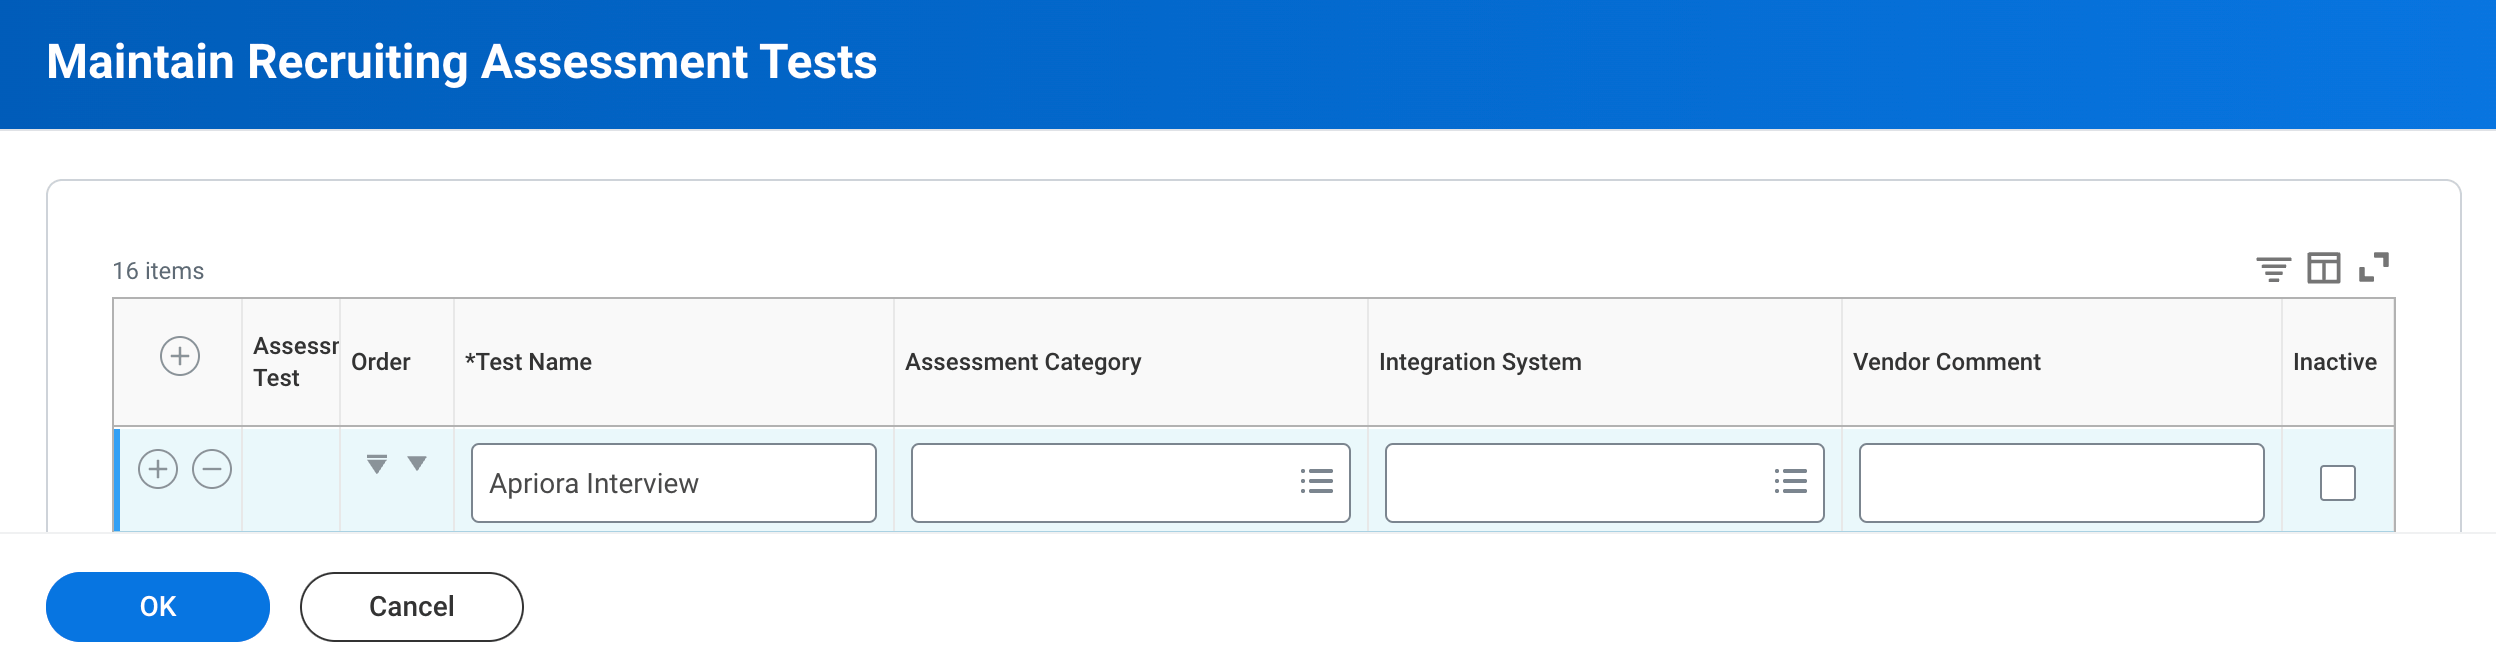
- Use the
+button at the top to add a new Assessment Test. - Name the test
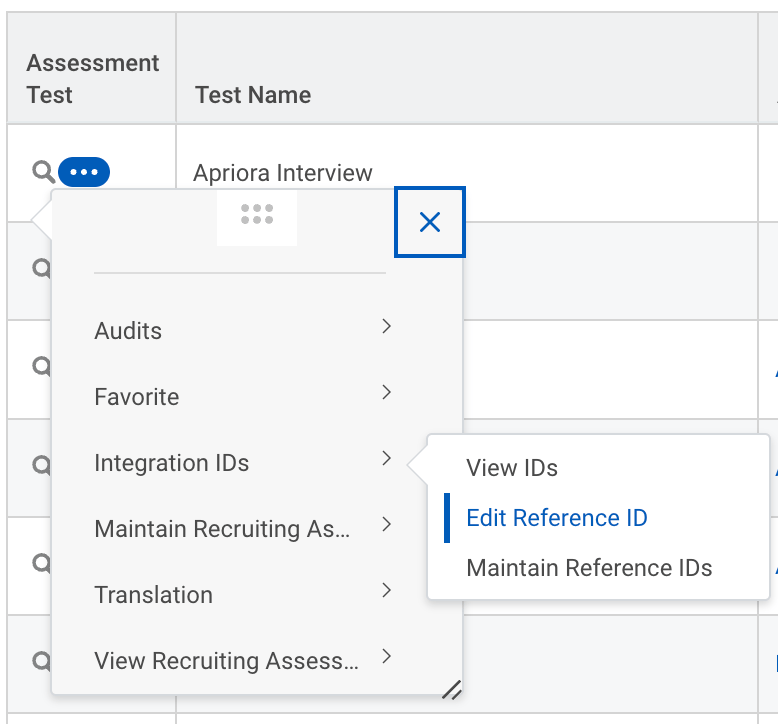
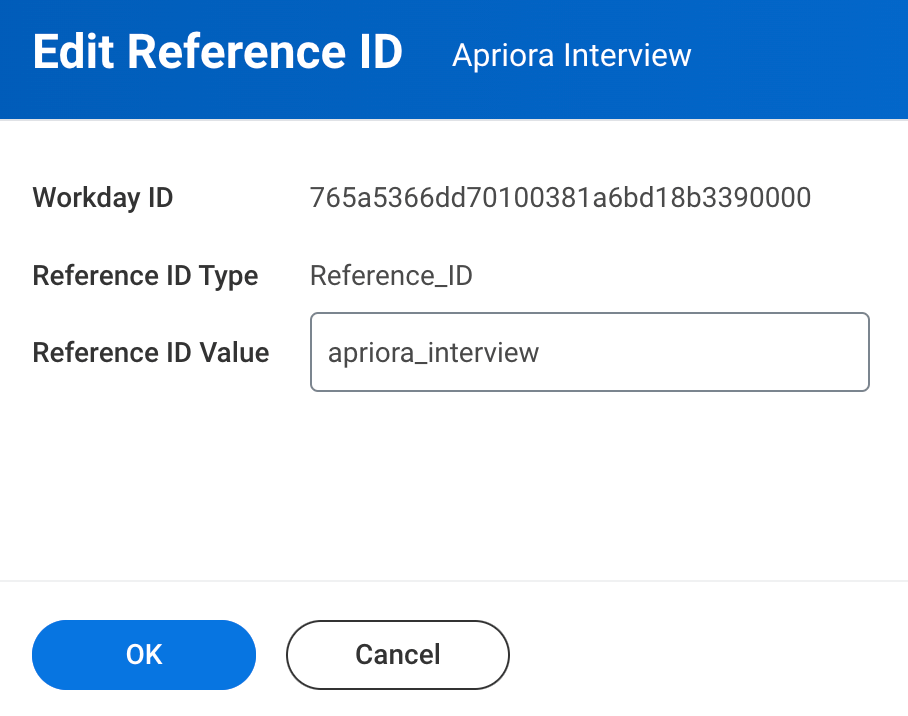
Alex Interviewand click OK to save the new assessment. - You also need to edit the reference ID for the assessment. Using the related action, go to Integration IDs > Edit Reference ID.
- Set the Reference ID Value to be
alex_interview - Click OK to save the changes.
Business Process Configuration
Connect in Alex
The final step is to authorize the connection through Kombo from Alex.- Make sure you are logged in to Alex as an Admin.
- Go to the Settings page, click on the Integrations tab, then click on Workday.
- Click Connect on the Workday ATS card to link your recruiting tenant. If you use Workday’s assessment business process to trigger interviews, also click Connect on the Workday Assessment card.
- A Kombo connection window opens. Authorize access using the Client ID, Client Secret, Token Endpoint, and Refresh Token you created above — Kombo uses these to connect to your Workday tenant on Alex’s behalf.
- Once the connection completes, the card shows a Connected status and the Workday integration is active.