

Set Up the Integration
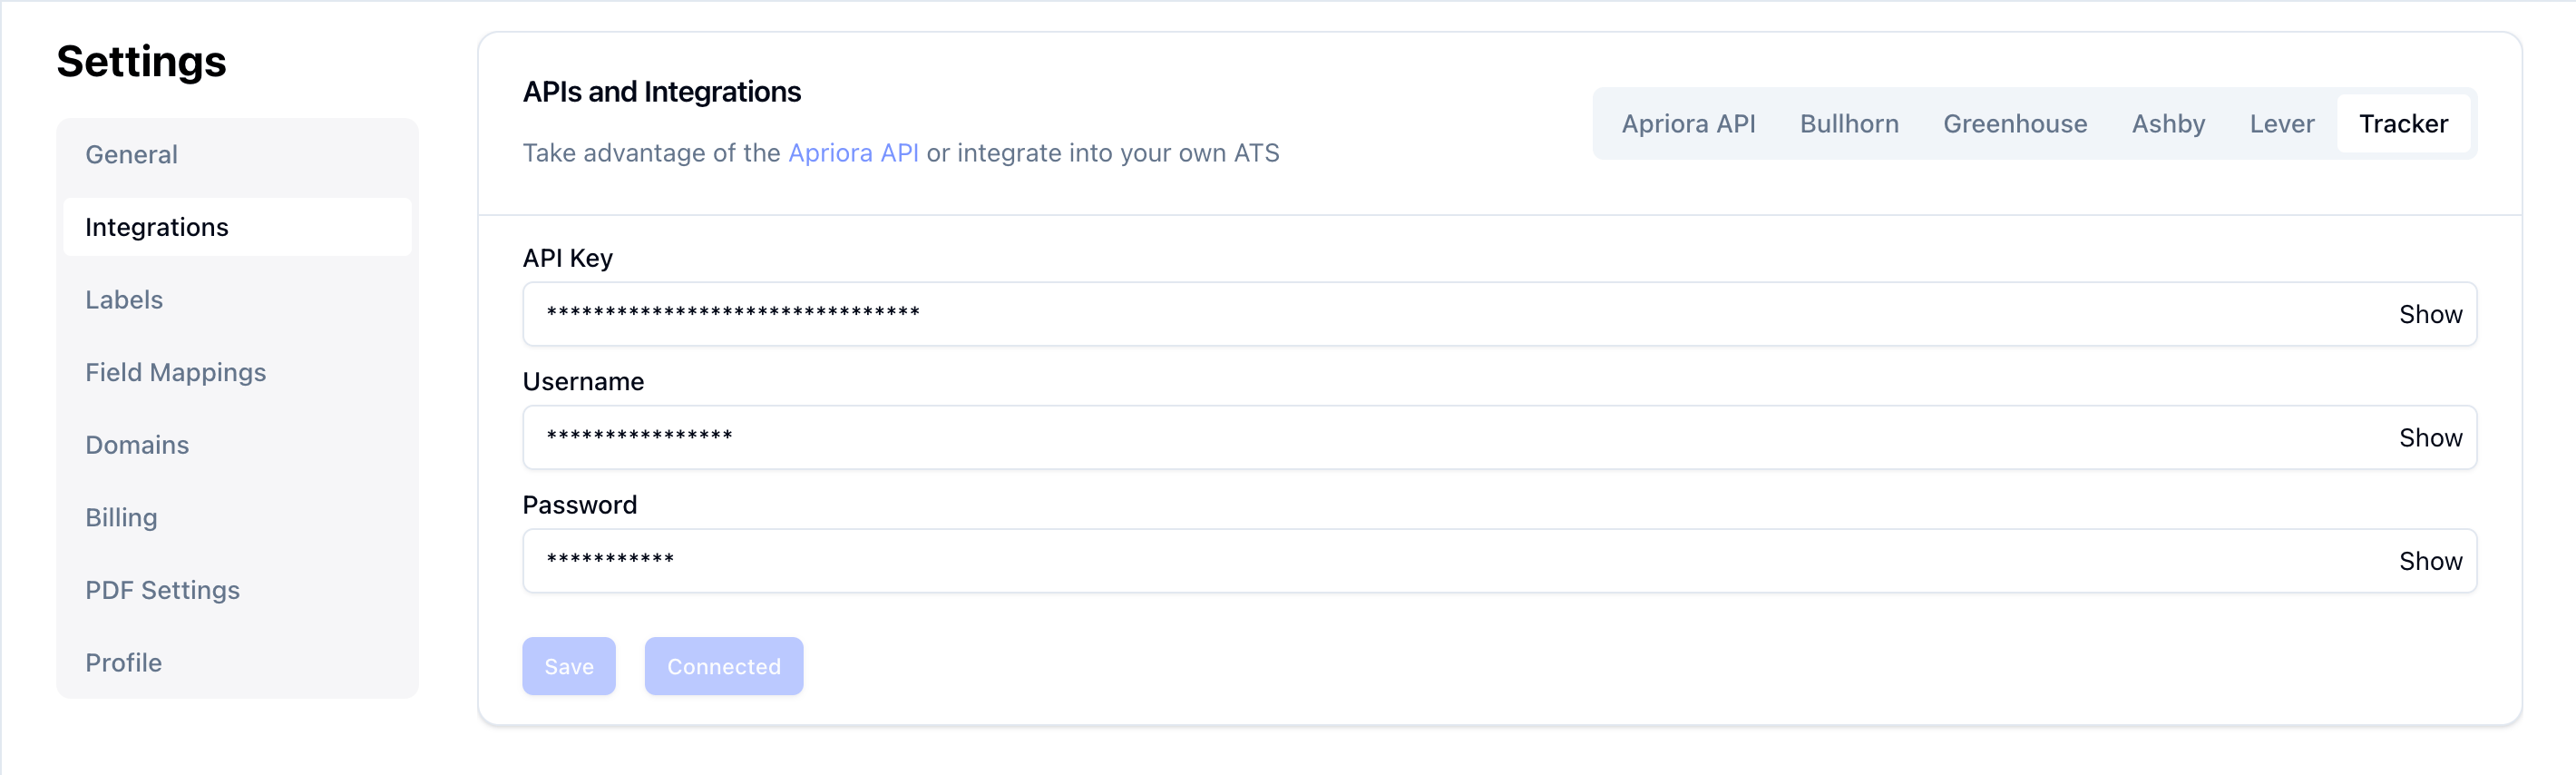
Follow these steps to connect your Alex and Tracker accounts. 1. Get Your Credentials You will need to gather two sets of credentials to enable all integration features.-
API Credentials (V1):
Contact Tracker Support to request an API user account for Alex. You can use the template below:
I’m working with a Developer partner, Alex, and would like to turn their integration on in my Tracker instance. Could you please create and share the following with me?
- API Key
- API Username
- API Password
- API Access Token (V2):
This token enables workflows for new job applicants.
- In your Tracker dashboard, navigate to Tools & Settings > Security > Security Settings > API.
- Obtain an API access token.
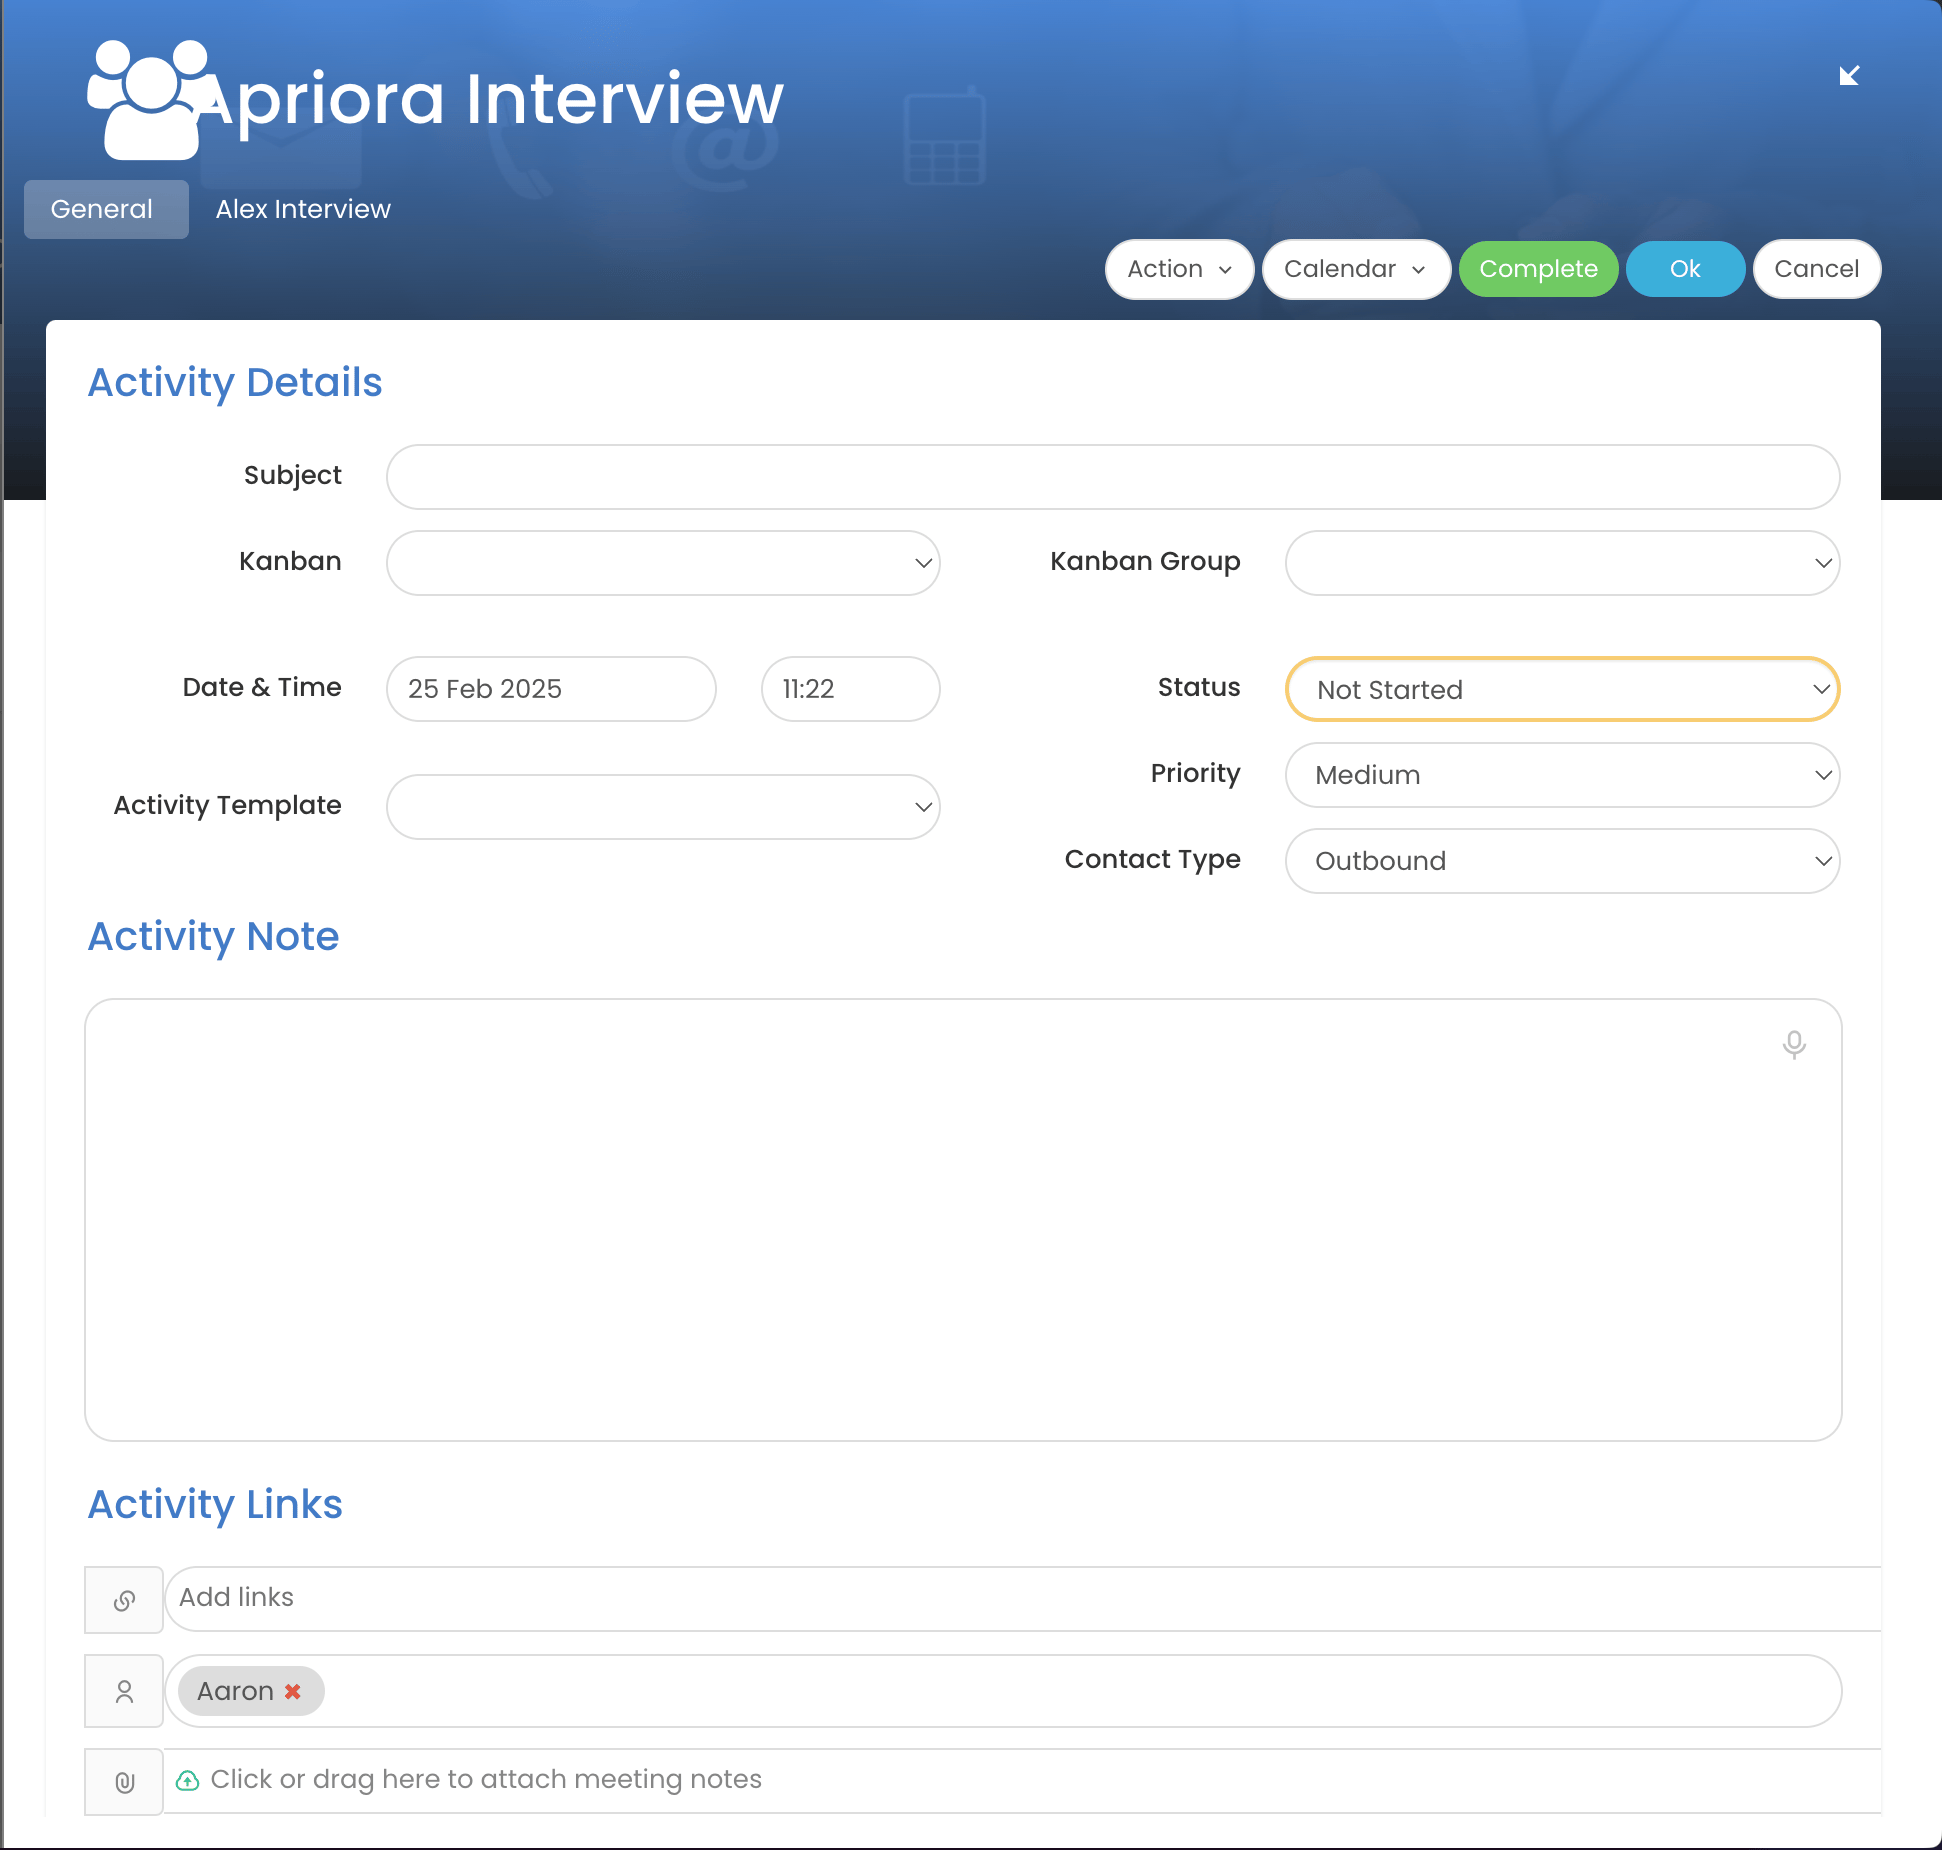
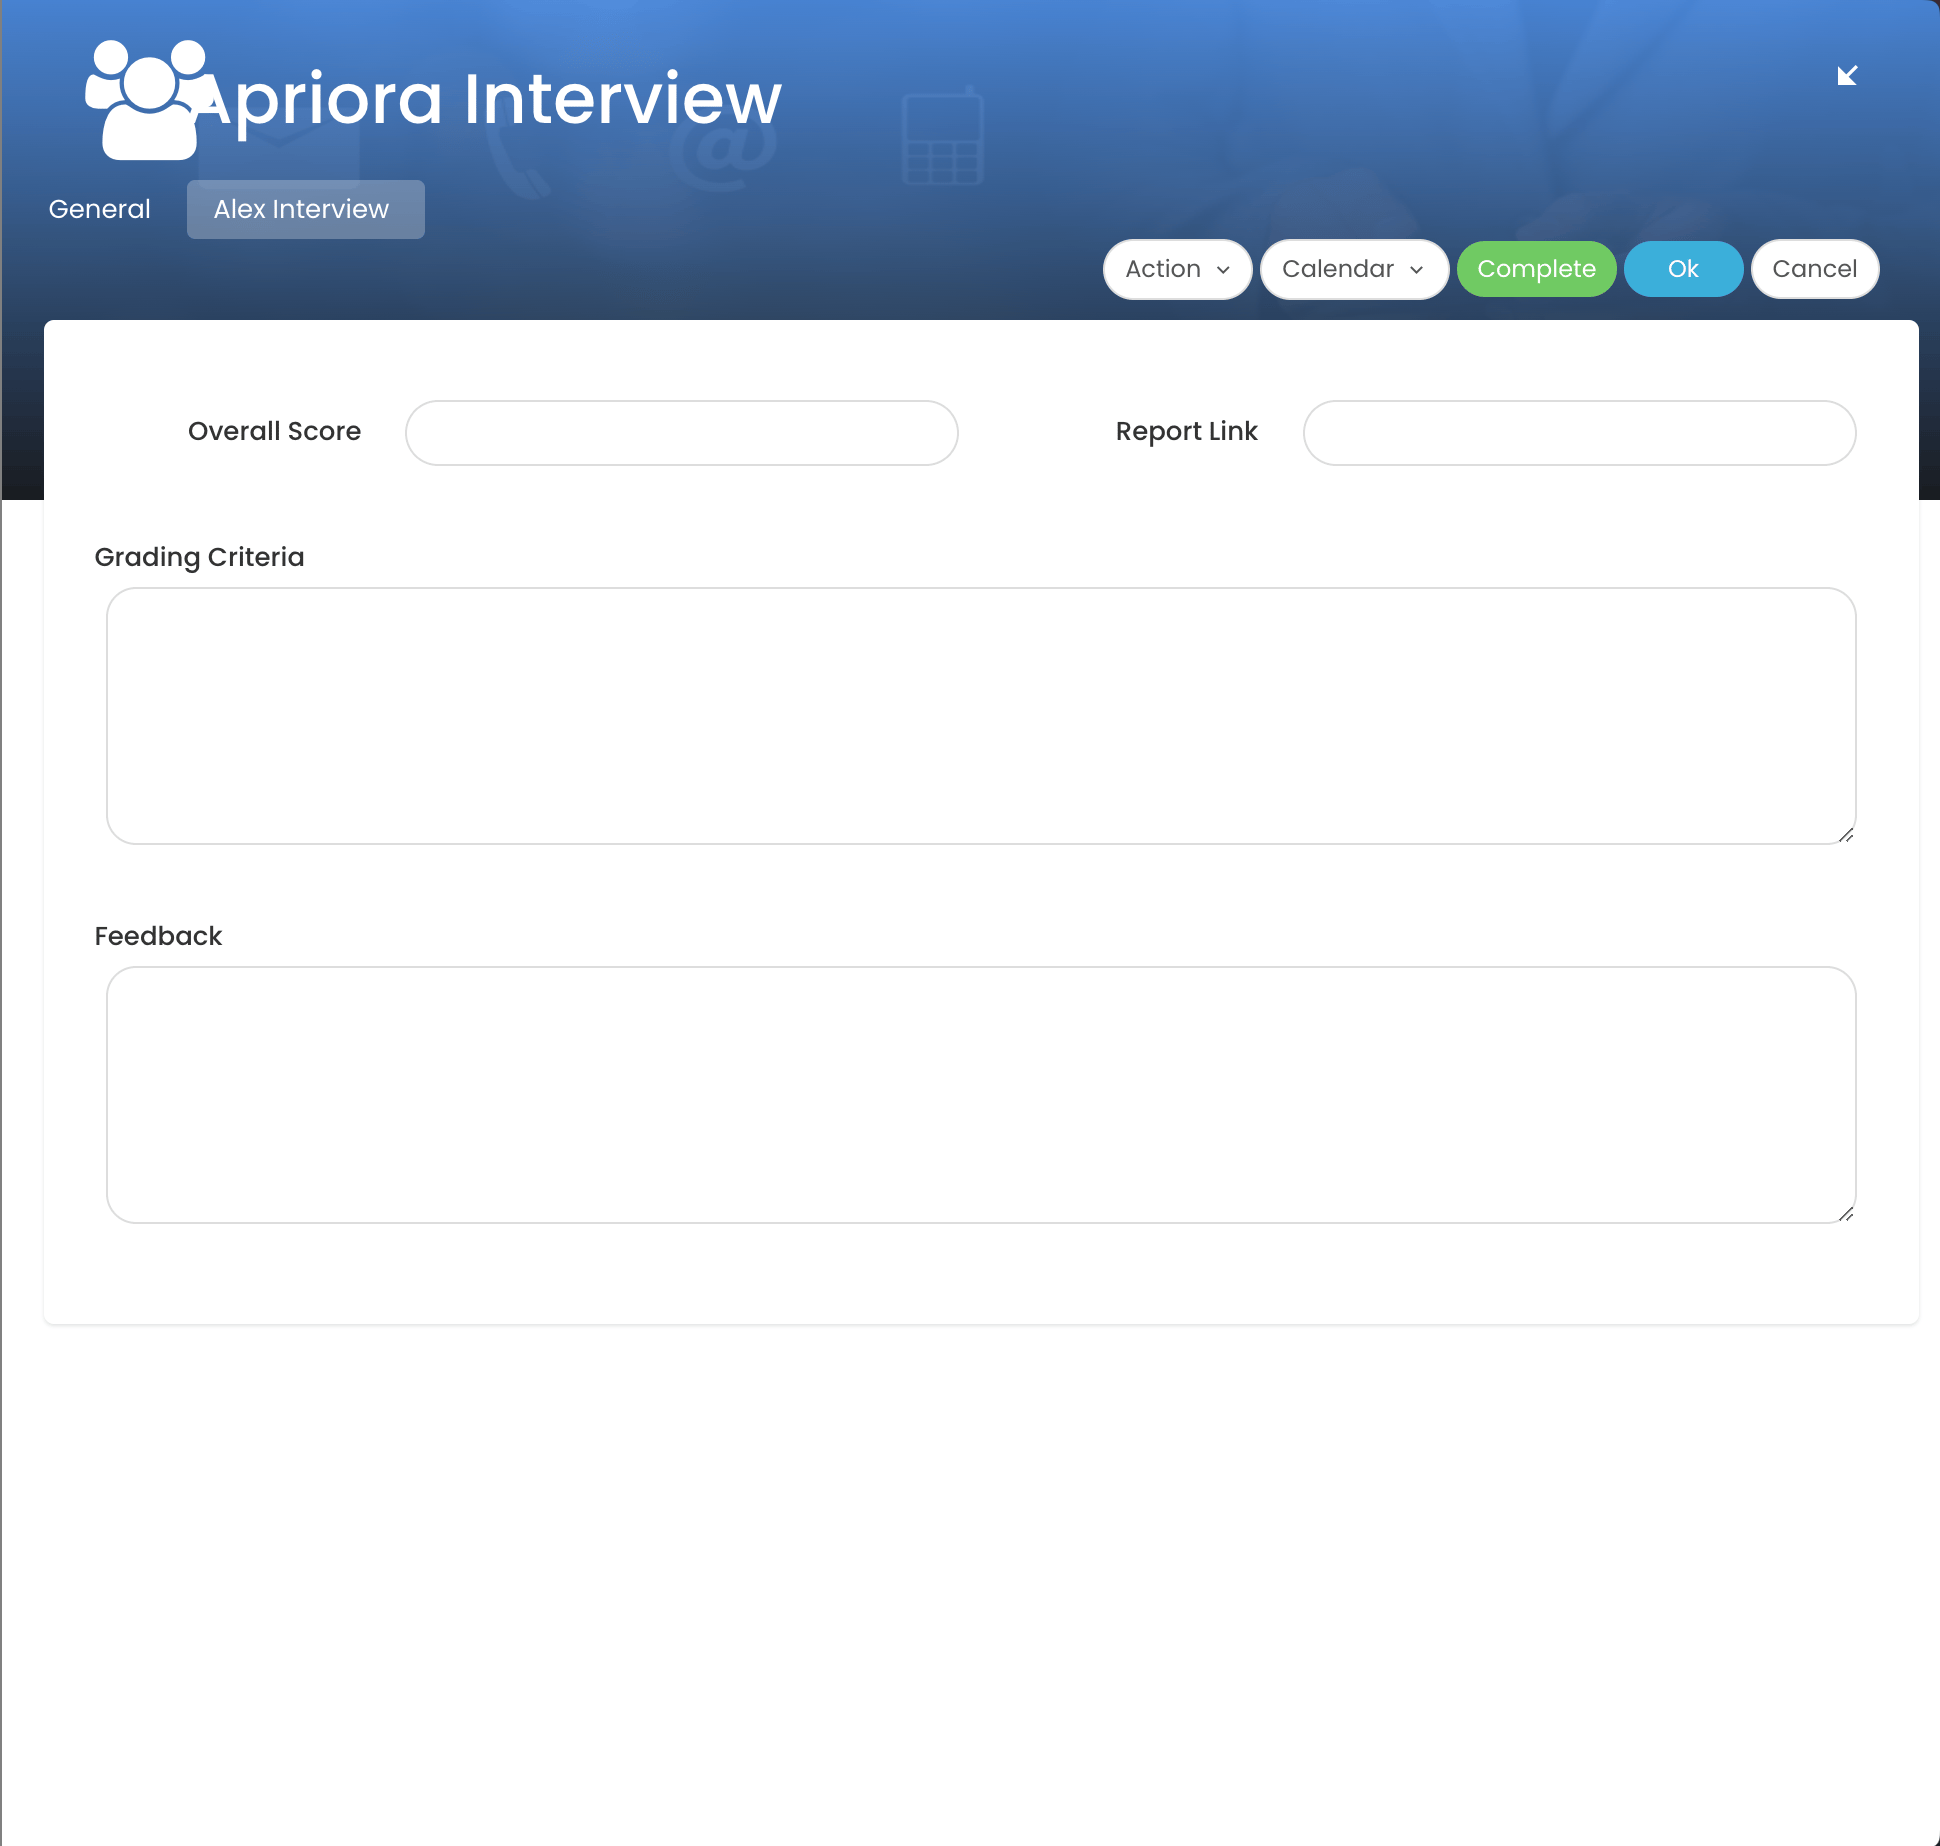
Could you add a custom activity to our Tracker instance of type “Alex Interview”? Please also add the following custom fields and send us the ID for each field:After Tracker provides the Custom Field IDs, enter them on the ATS write-back action in the block that starts with the Interview Completed trigger, in your application workflow. This ensures that when an interview is finished, the results are correctly mapped and displayed in the new “Alex Interview” activity in Tracker. In Tracker, you can view or create Activities in the home page, job, placement, or candidate pages. The Alex activity will be visible, and should look like this:
- Overall Score
- Report link
- Grading Criteria
- Feedback
How the Integration Works
Creating Interviews Manually You can create an Alex interview directly from a job in Tracker.- Navigate to the Interviews tab in Alex and click Create.
- Select the interview type (Phone/Video).
- Choose the ATS option.
- Enter the Tracker Job ID and click Generate. An Alex interview will be created based on the job details from Tracker.
- Automatic Interview Creation: You can configure Alex to automatically create a new interview whenever a job is added in Tracker. This is particularly useful for high-volume roles where speed is critical.
-
Automatic Candidate Invites: Automatically send interview invitations to candidates based on their status in Tracker. There are two primary workflows for this:
- From Placements (Shortlisted Candidates): Invite candidates after they have been shortlisted for a job in Tracker.
- From Applicants (New Applicants): Invite candidates as soon as they apply for a job, allowing you to screen them before the shortlisting stage. This workflow requires the API Access Token to be configured. Alex checks for new applicants from Tracker every two hours.