

{{custom:pay_rate}}) with the right value for each job whenever a template is sent.
Custom variables come in two flavors:
- LLM-generated: Alex reads the job description and extracts the value using a prompt you write.
- ATS field: Alex pulls the value live from a specific field on an object in your ATS (Bullhorn, Salesforce, etc.).
Manage Your Custom Variables
Open Custom Variables in the left sidebar (under Interview Guides) to see every variable defined for your company. The page is visible to settings admins.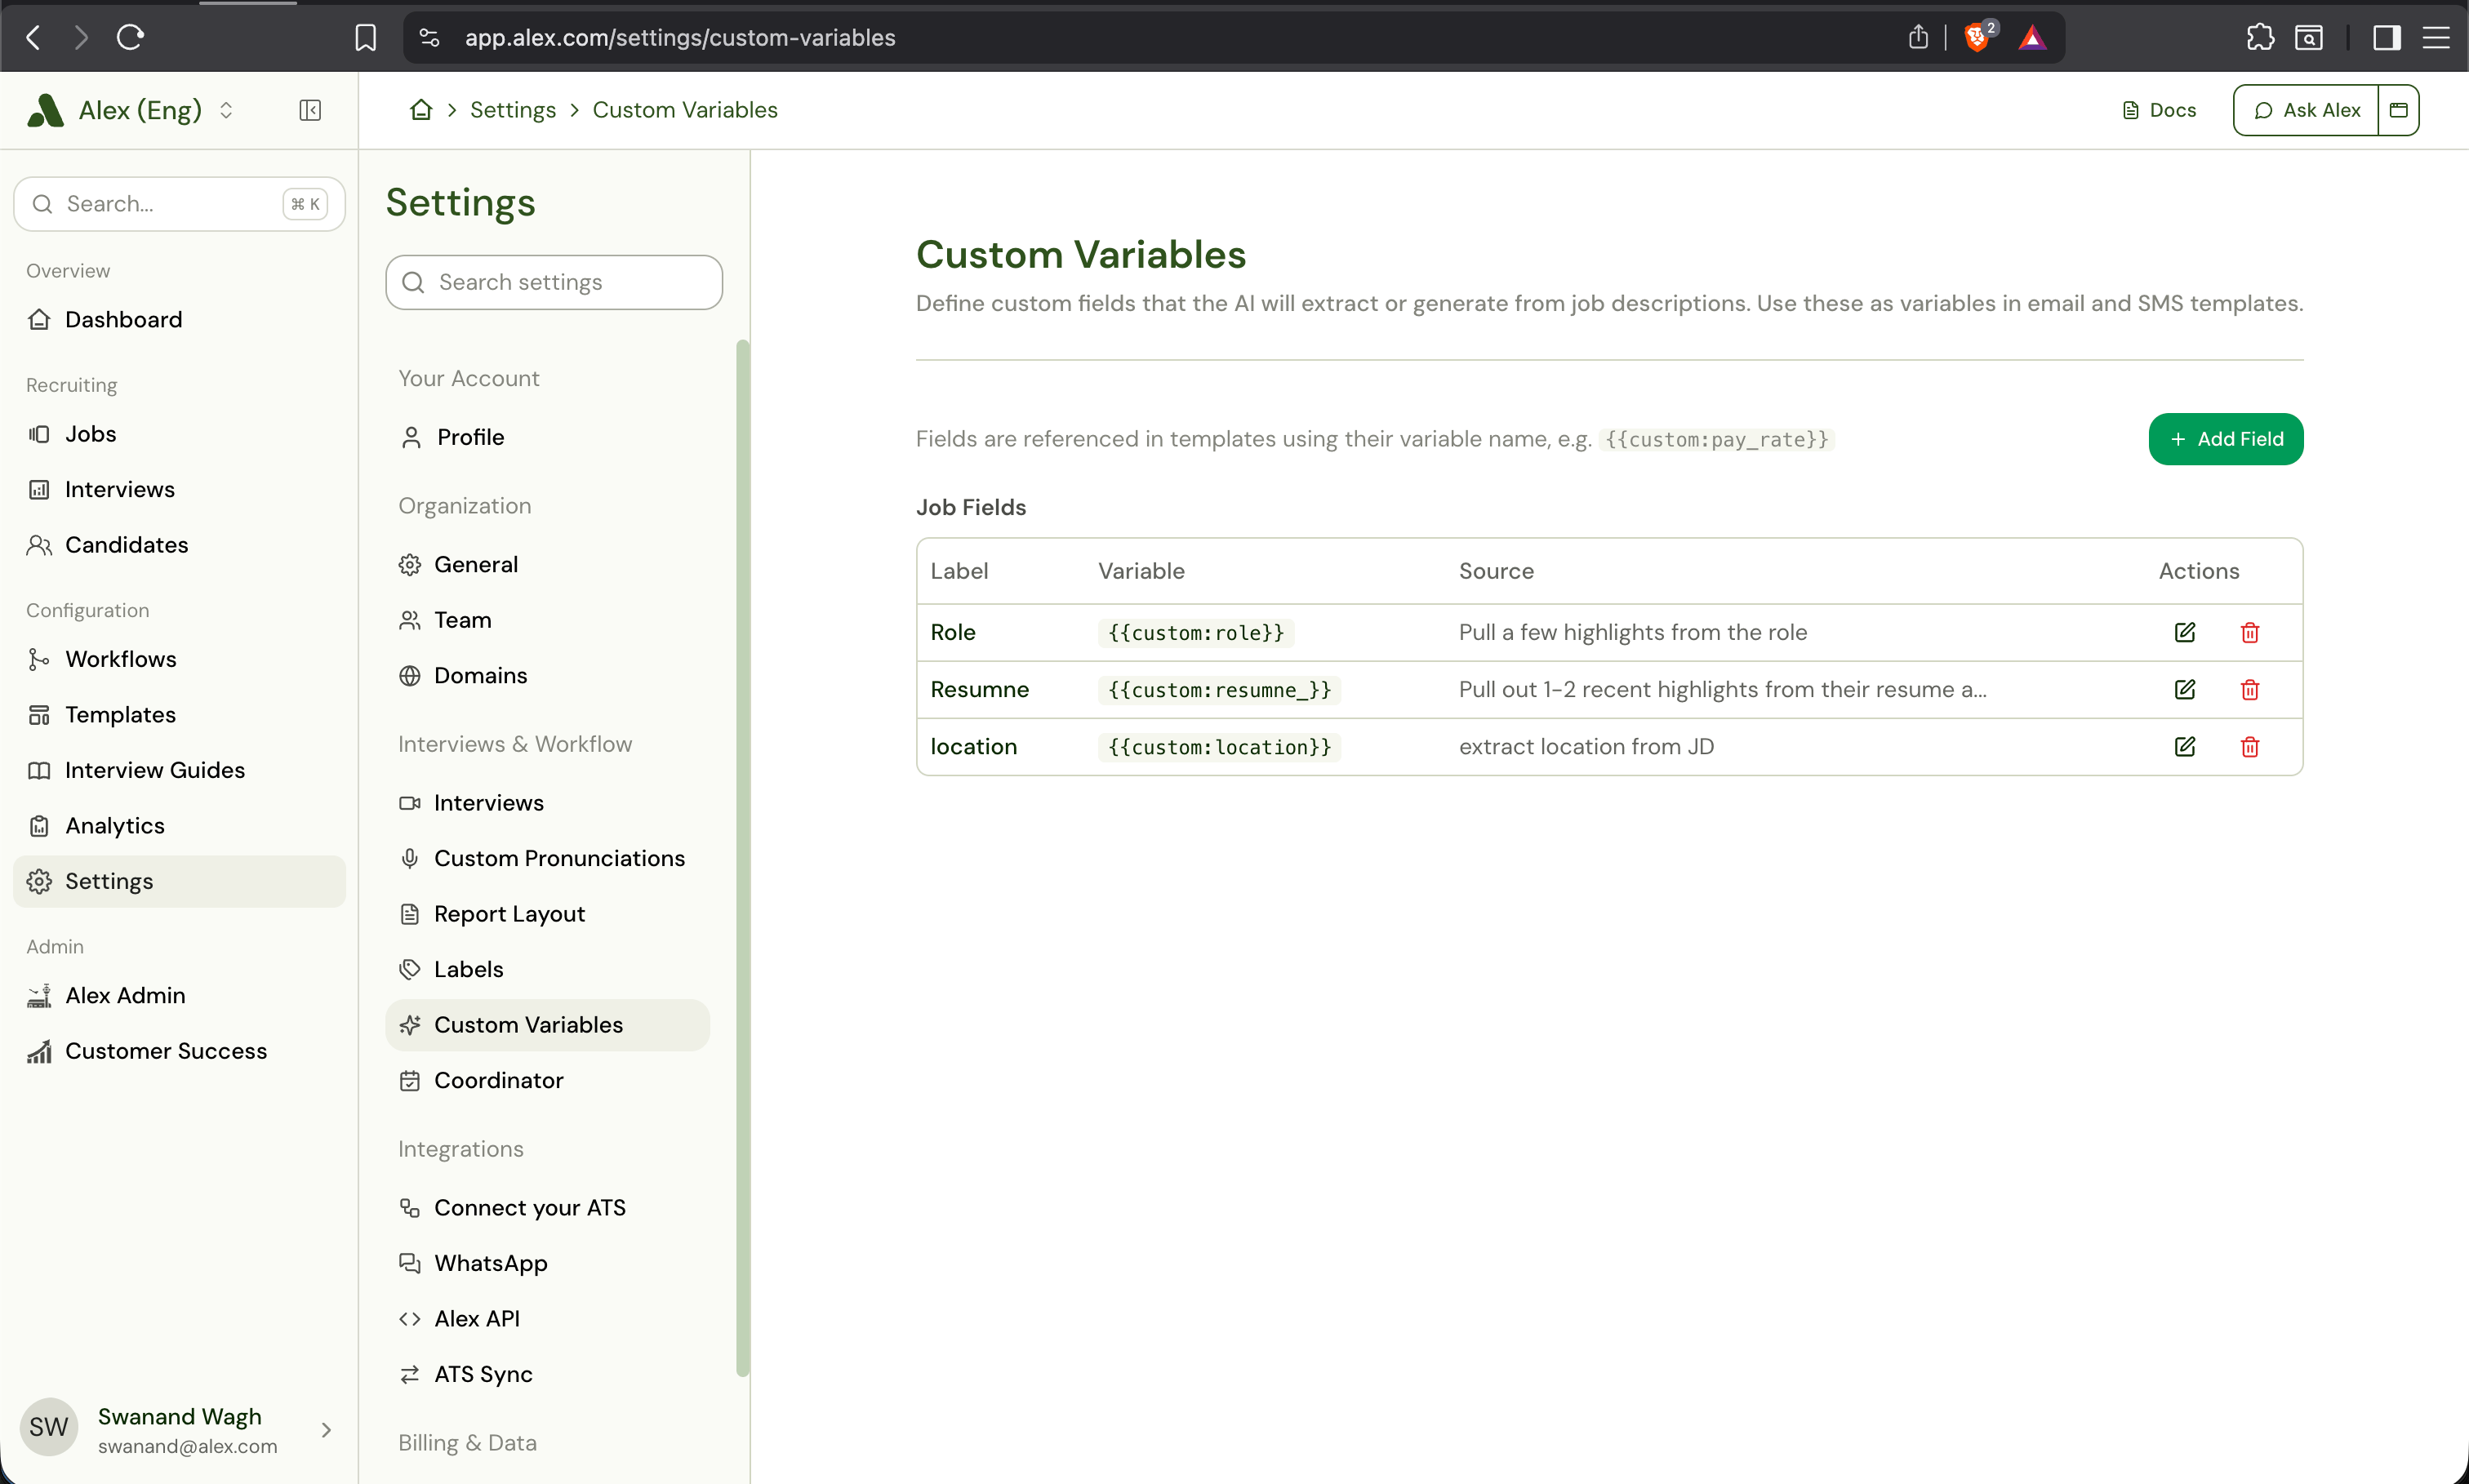
- Label: the display name of the variable.
- Variable: the reference you paste into a template - always of the form
{{custom:<name>}}. The variable name is derived automatically from the label when you create the variable, soPay Ratebecomes{{custom:pay_rate}}. - Applies To: whether the variable is resolved per job, per candidate, or per application.
- Type: the source type - ATS Field, LLM Generated, Static Text, or one of the Workday sources.
- Source: where the value comes from - the prompt for LLM variables, the field path for ATS variables.
- Created: when the variable was added.
Add a Custom Variable
The Add Custom Field modal asks for a label, a source type, and the details that source type needs.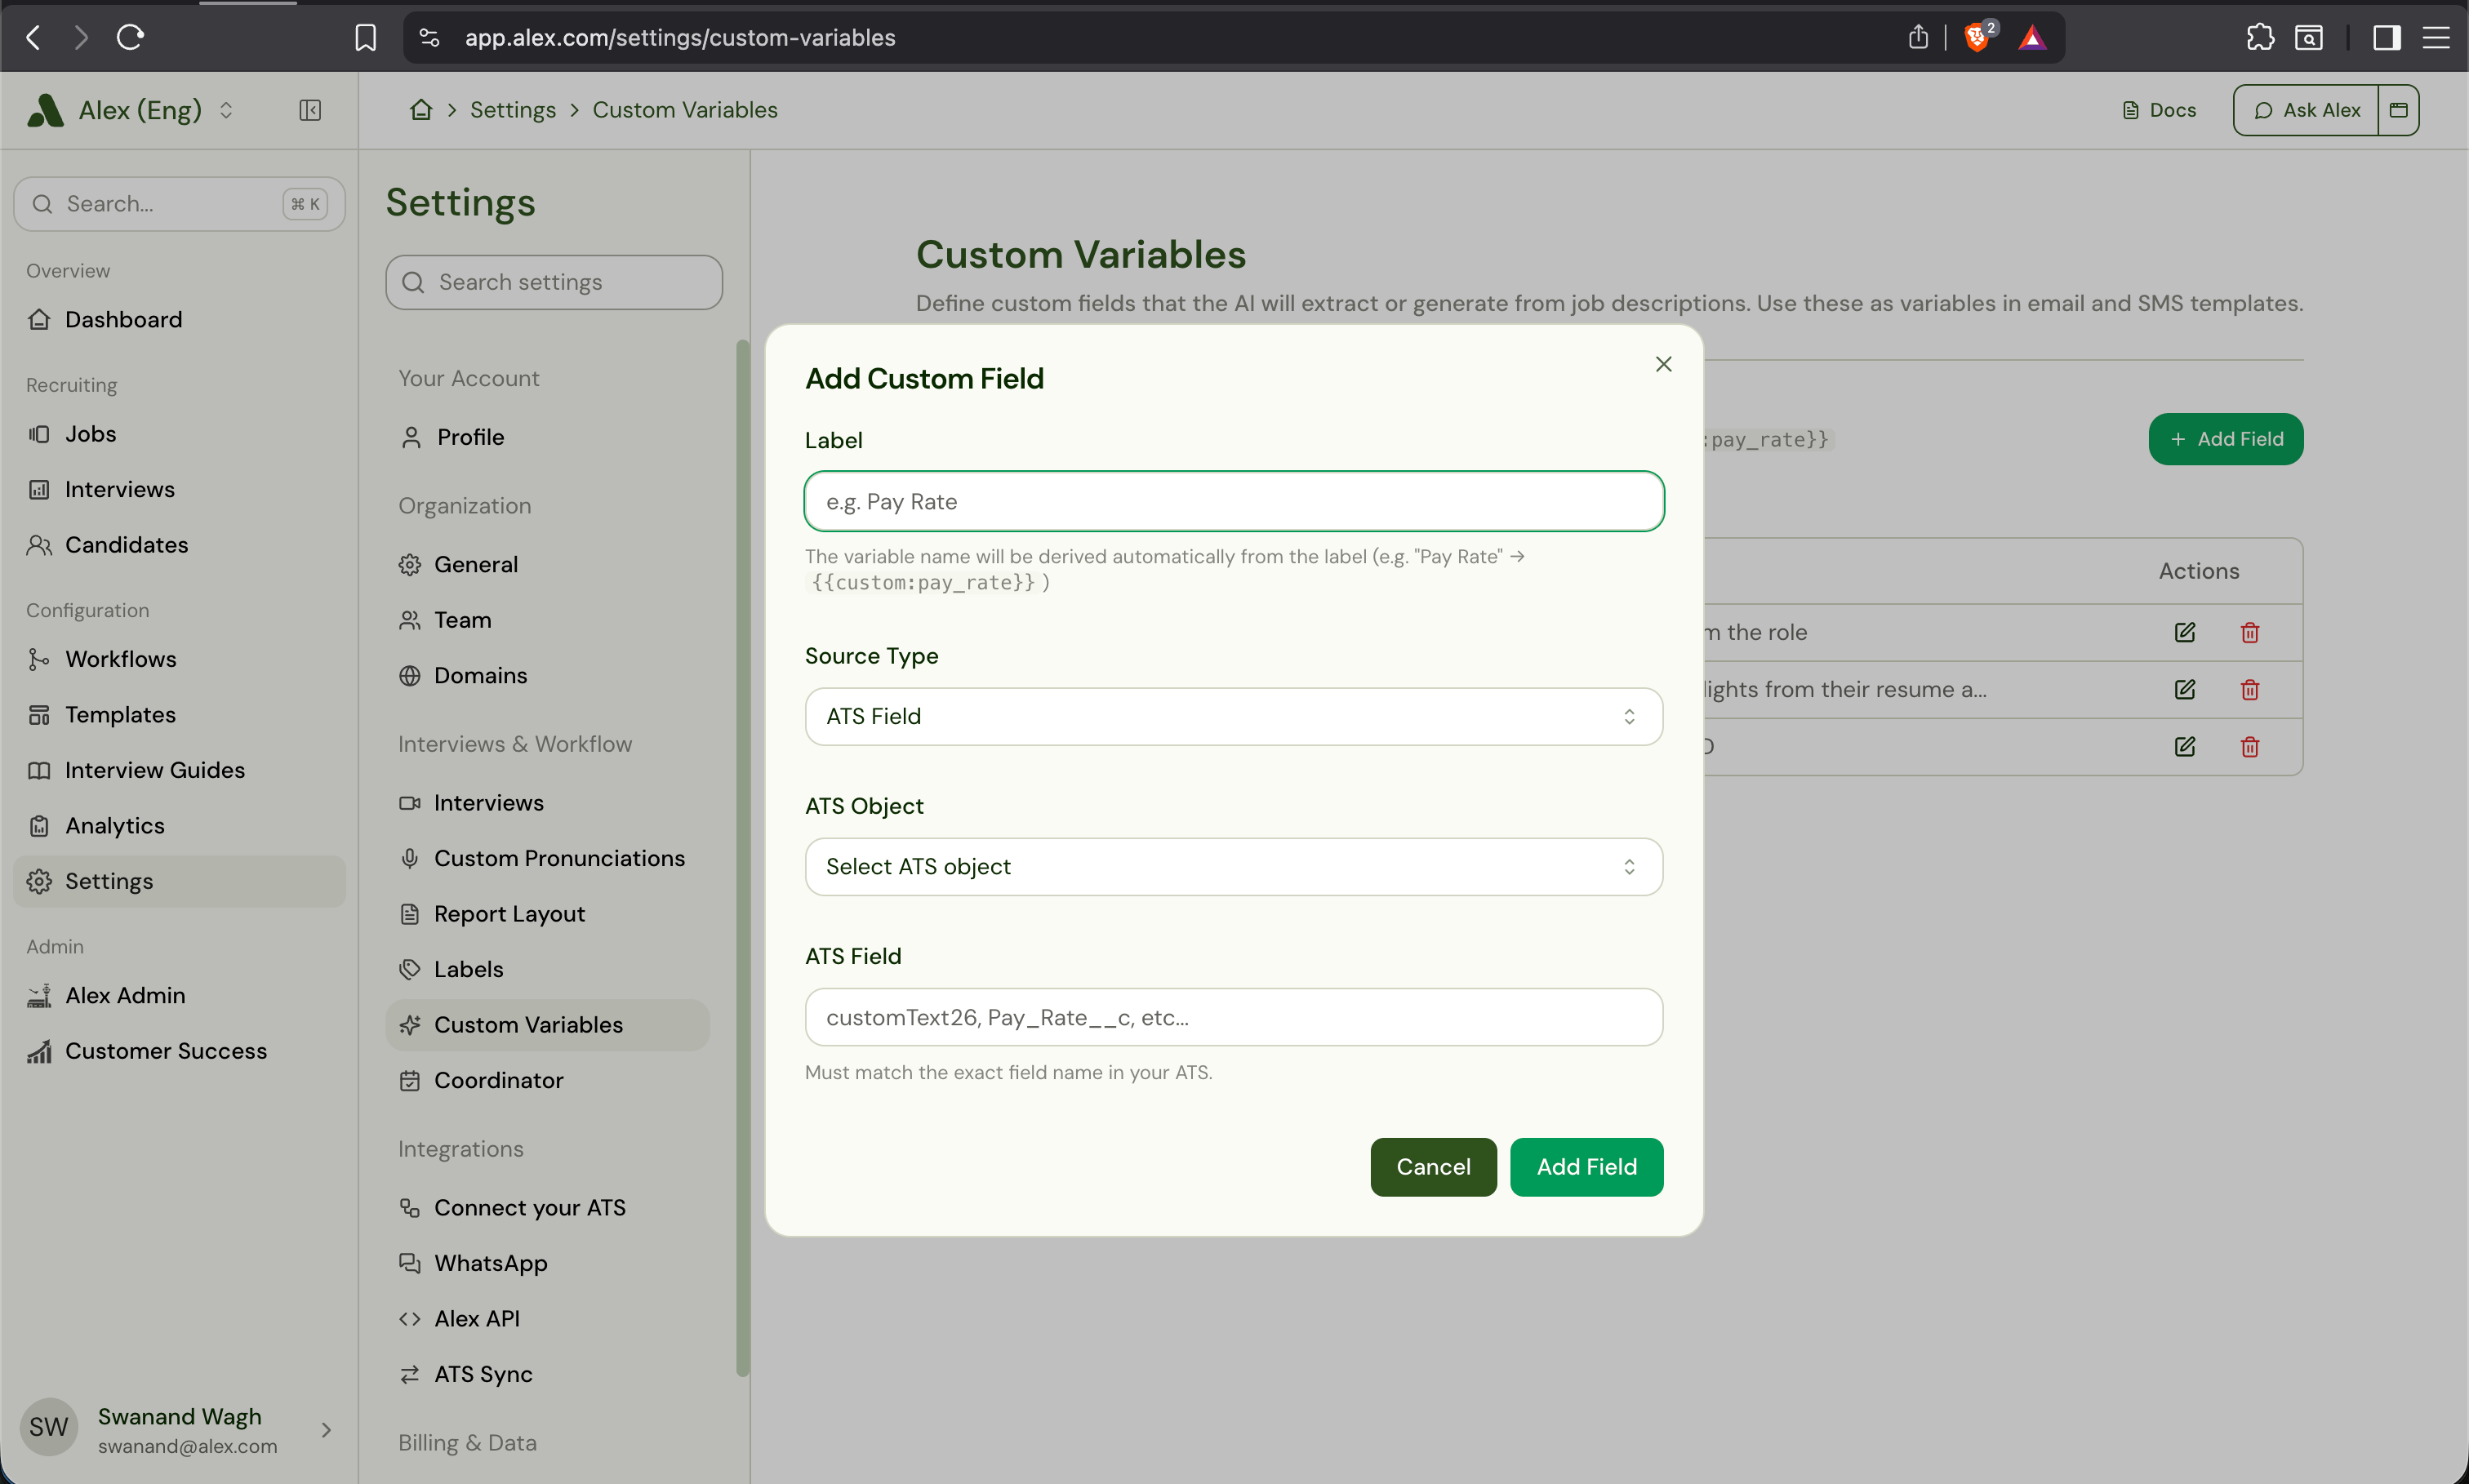
- Label: a short human-readable name (e.g.
Pay Rate). The variable name is derived automatically -Pay Rate→{{custom:pay_rate}}. You cannot change the variable name later, only the label, so pick a name you can live with. - Source Type: choose LLM Generated or ATS Field. The rest of the form changes based on what you pick.
LLM-generated variables
When Source Type is set to LLM Generated, the modal shows a Prompt textarea instead of ATS fields. Write a short instruction describing what Alex should extract from the job description. Good prompt examples:Summarize the most important parts of the job description in 3 sentences or less.Extract the hourly pay rate. Return only the number and currency (e.g. "$45/hr").
ATS field variables
When Source Type is ATS Field, fill in the ATS object and field that hold the value you want. The screenshot above shows this variant.- ATS Object: the parent object type in your ATS - for example
JobOrderin Bullhorn orJob__cin Salesforce. Pick from the dropdown. - ATS Field: the exact field name on that object (e.g.
customText26,Pay_Rate__c). The name must match your ATS exactly; misspellings silently return an empty string at send time.
After you save
Click Add Field to create the variable. For LLM-generated variables, Alex immediately starts filling values for every active job in the background. Depending on your active jobs count, the initial backfill takes anywhere from a few seconds to a couple of minutes. ATS variables don’t need a backfill - they’re always live fetched.Lock an LLM Variable
LLM-generated variables have a Lock toggle on the edit modal. Locking changes what happens to a variable’s value when a job description is edited.- Unlocked (default): When a job description changes, Alex automatically re-extracts the value for that job so it stays in sync with the latest JD.
- Locked: When a job description changes, Alex leaves the existing value alone. Use this when a recruiter has manually cleaned up a value (or typed one in by hand) and you don’t want the next JD edit to overwrite their work.
- Manually editing the value on the job’s settings page and clicking Save.
- Editing the prompt on the Custom Variables page, which re-extracts every job regardless of lock state. Otherwise locked jobs would stay stuck on values generated by the old prompt.
Review and Edit Values Per Job
On any job’s Settings tab, scroll to the Custom Variables section to see the values Alex has extracted and to edit them by hand.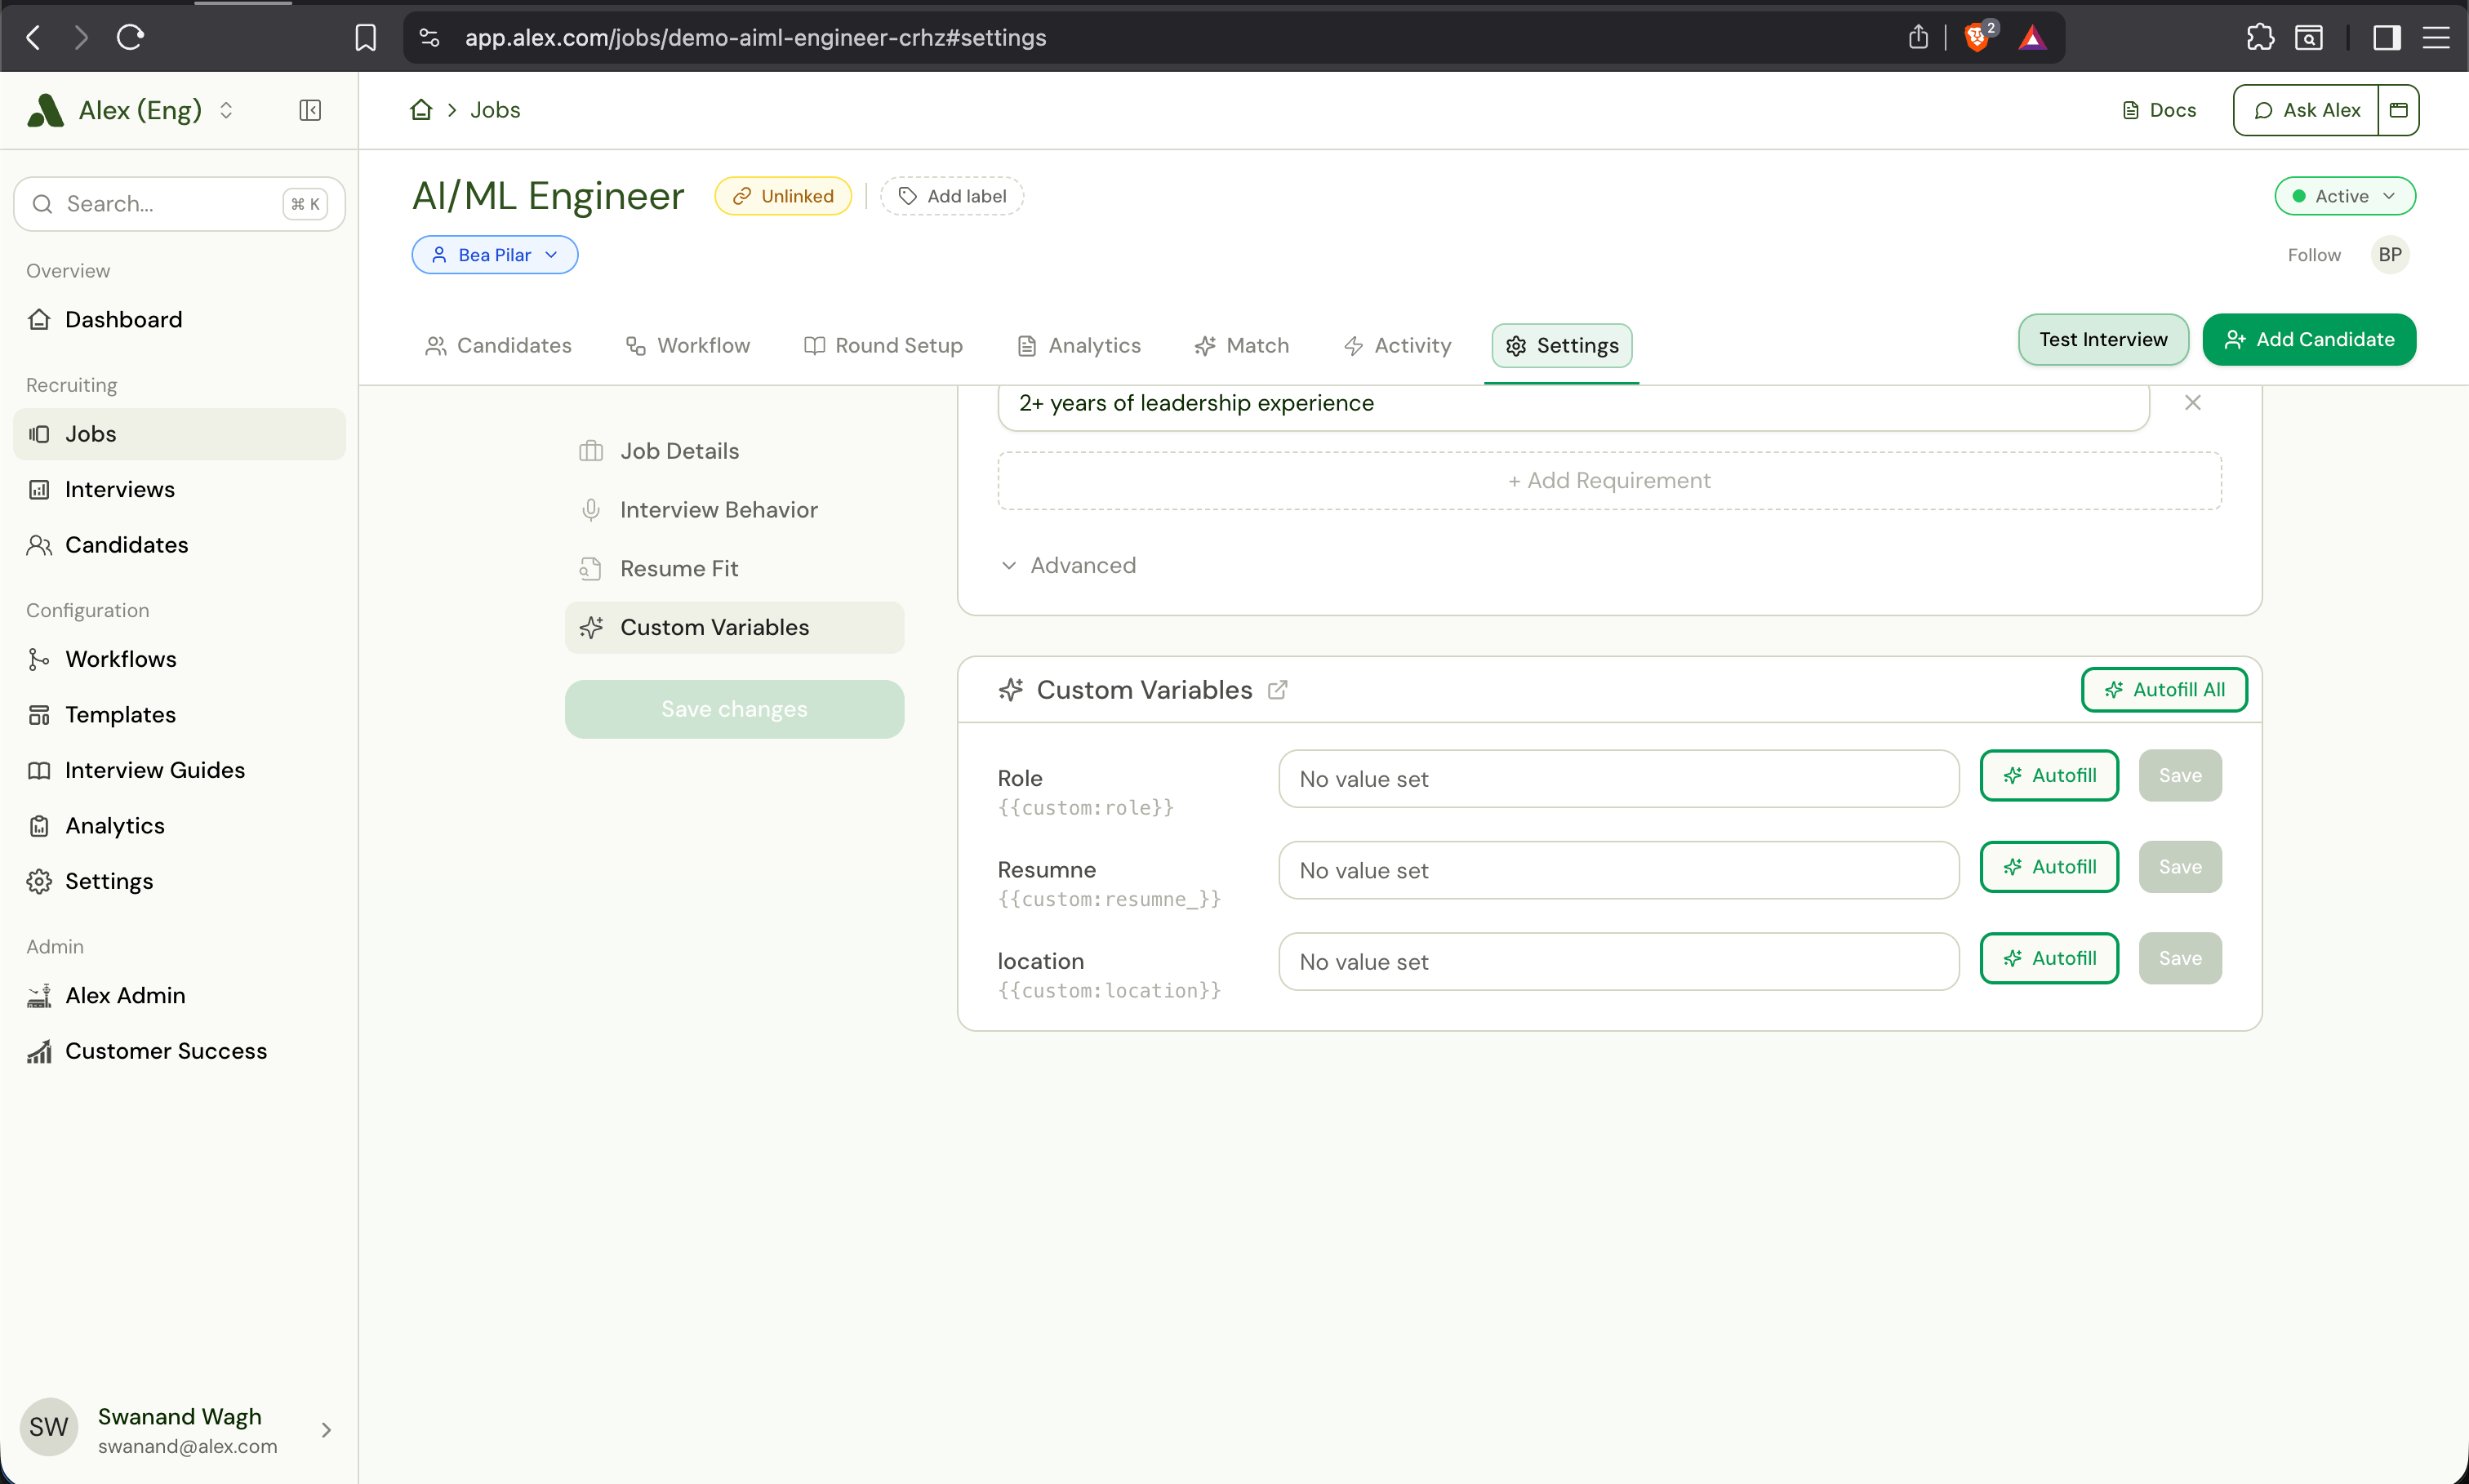
- Type a value manually. Useful when the AI didn’t find what you wanted, or when the info isn’t in the JD. The input is a resizable textarea - drag the bottom-right corner to expand for longer values.
- Click Autofill. Re-runs the AI extraction for that one field against the current job description.
- Click Autofill All (top-right). Re-runs every AI-generated field on the job. You’ll be asked whether to skip already-filled fields or overwrite them.
- Click Save. Persists a manual change. The Save button stays disabled until you actually modify the value.
Use Variables in Workflows and Templates
Anywhere you write a message in Alex - workflow outreach emails, SMS, follow-up messages, interview settings - you’ll find a variable picker next to the formatting toolbar. Click it to browse and insert variables without memorizing the syntax.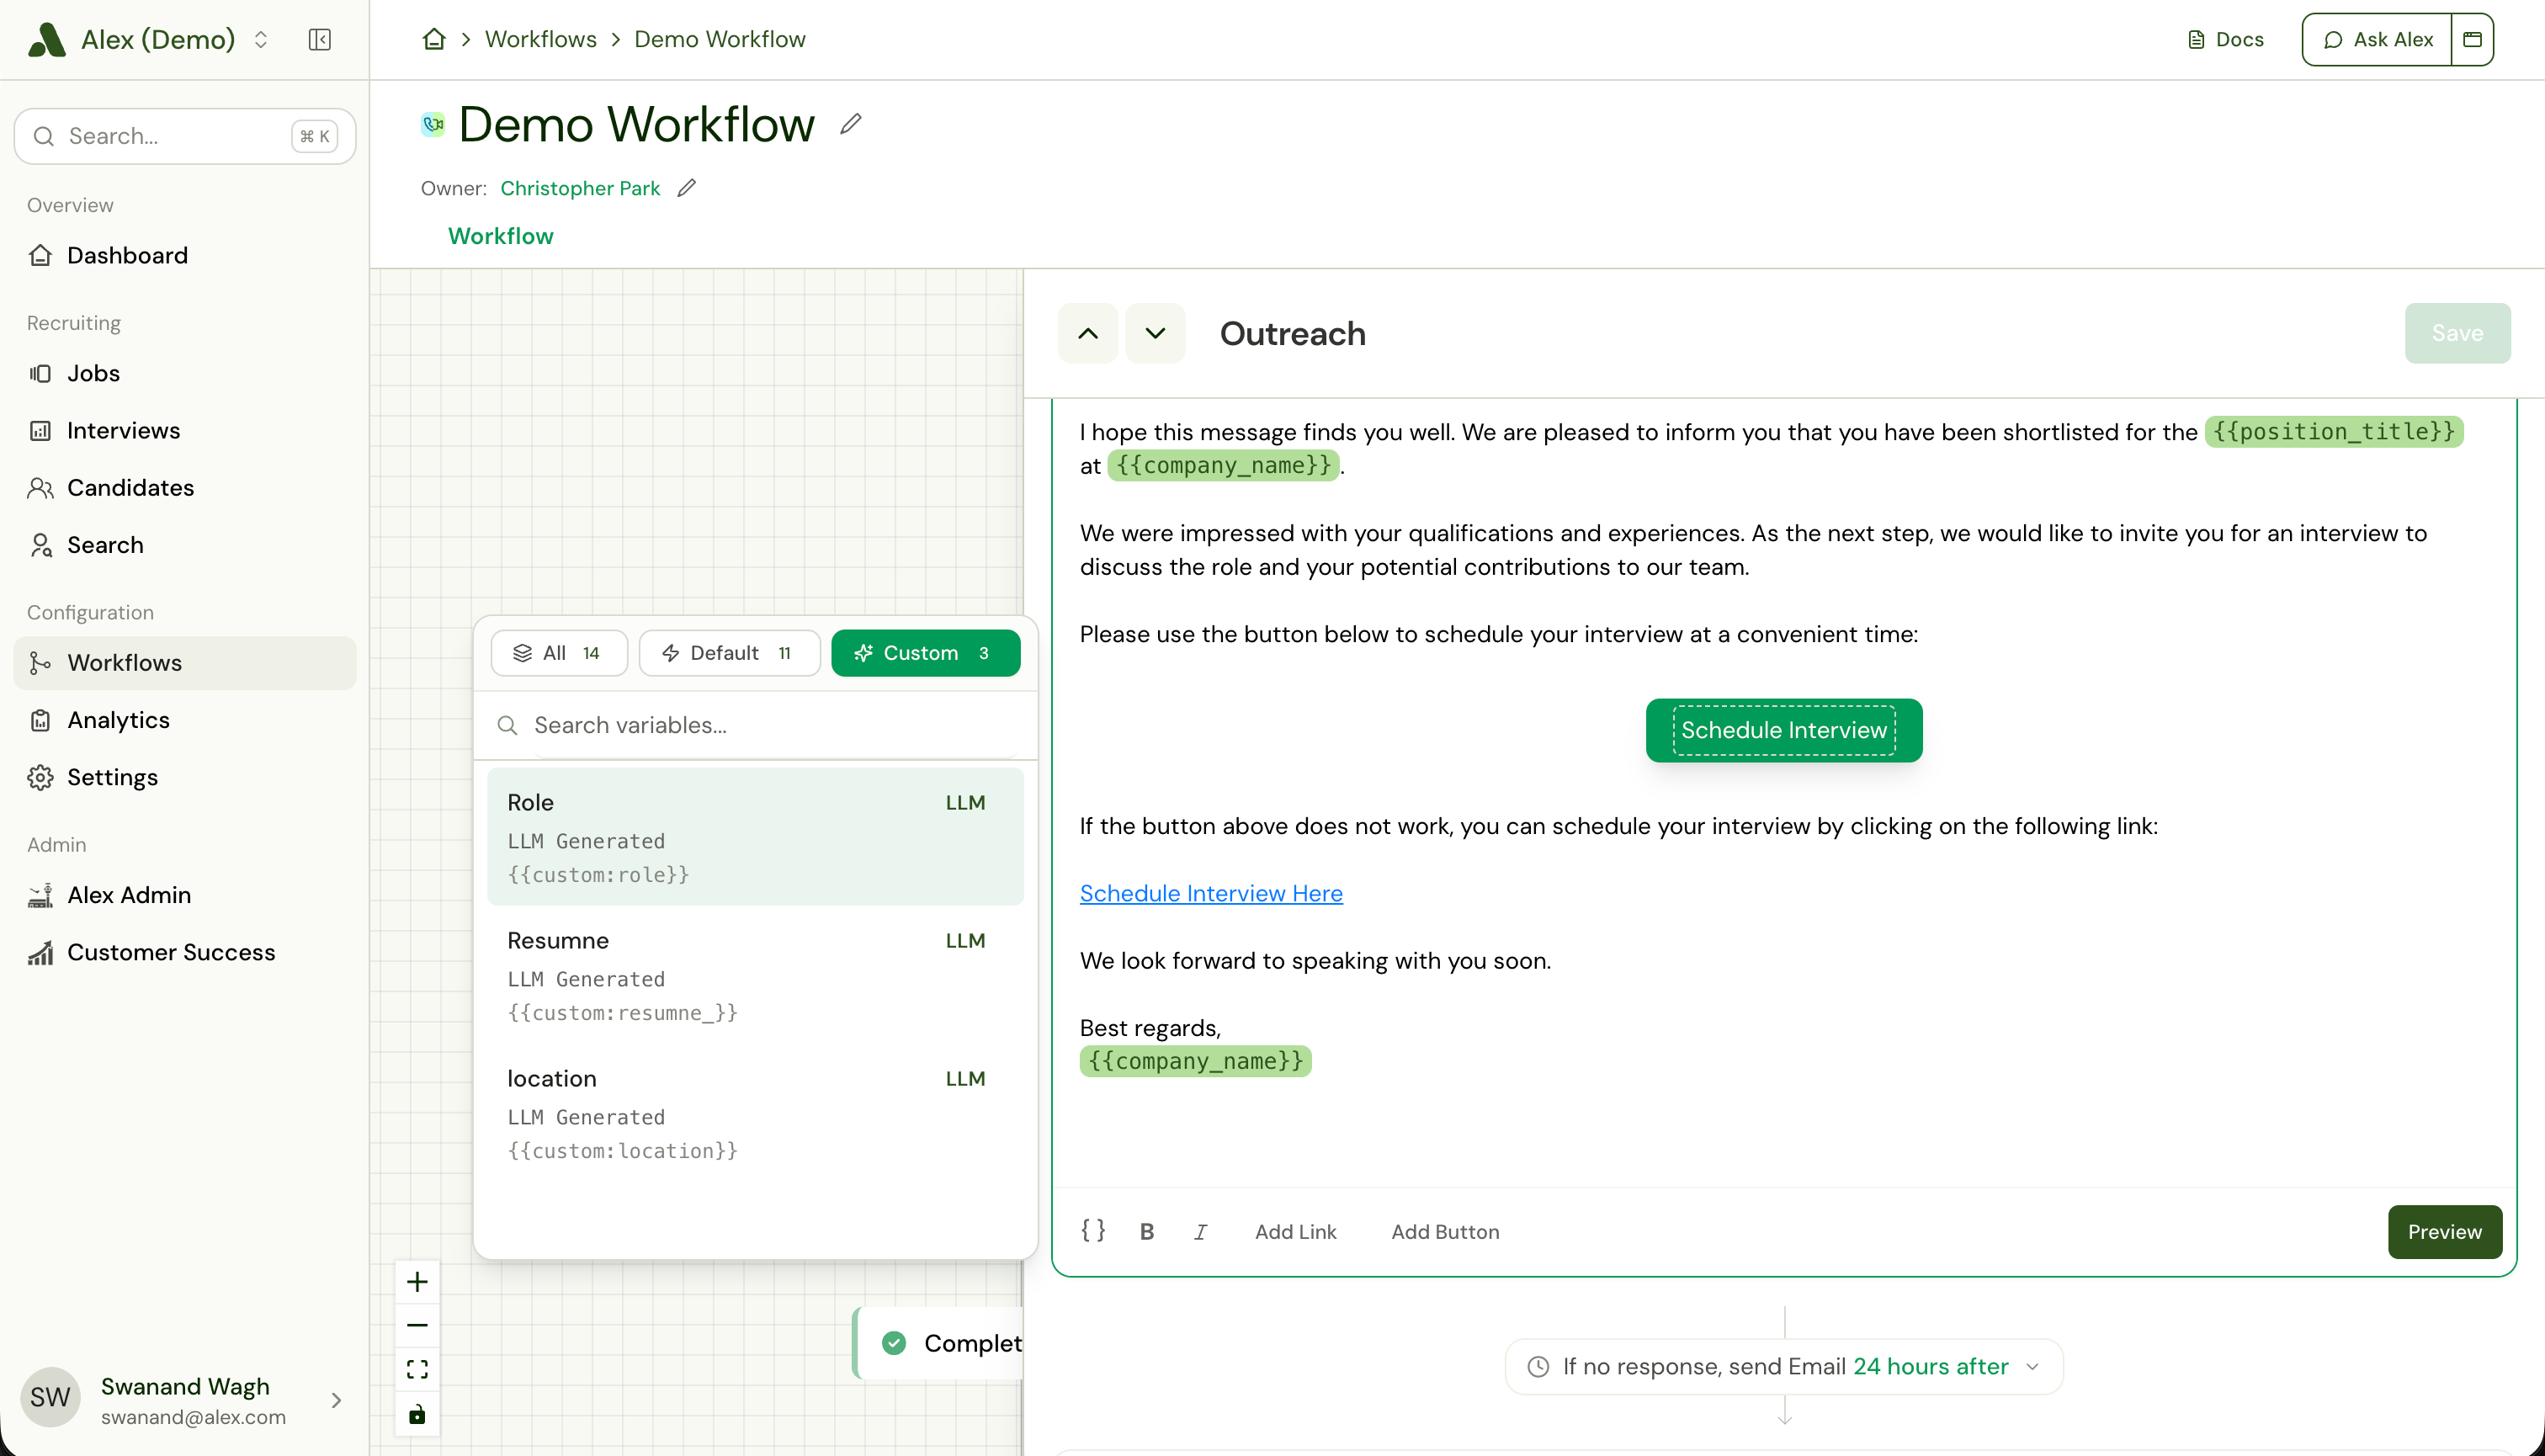
- All: every variable available for this template - defaults and customs together.
- Default: built-in variables like
{{company_name}}and{{position_title}}. - Custom: only the variables you created on the Custom Variables page. Each row shows the label, the variable name, and how the value is produced (LLM generated or the ATS field path).
{{custom:your_variable_name}}. When the message is rendered, Alex replaces the variable with the value for that specific job.
Editing or Deleting a Variable
From Custom Variables, click a row to edit it. Right-click a row (or use the... menu on hover) for copy, edit, test, and delete.
- Editing the label only changes how the variable is displayed; the variable name (
{{custom:...}}) stays the same, so existing templates keep working. - Editing the prompt (for LLM variables) kicks off a background re-extraction across all jobs so stored values match the new prompt.
- Deleting a variable opens a confirmation modal from where you can decide to delete the variable or cancel.